ELMS - Learning Management System
You can find the detailed information about the ELMS learning management system
in this document. If there is
anything you cannot find
in this document, you can send an e-mail from codecanyon
profile.
What is ELMS?
ELMS is a web based responsive application that includes an online learning management system, as well as admin, instructor and student panel. This is complete ready to use learning management system. Instructors create, update paid/free courses, which students can buy and obtain learning content and educational resources, lesson, quiz, assignments, live class, discussion etc. Students can track their progress while participating course assignment, quiz, discussion and also download the certificate after completing the course.
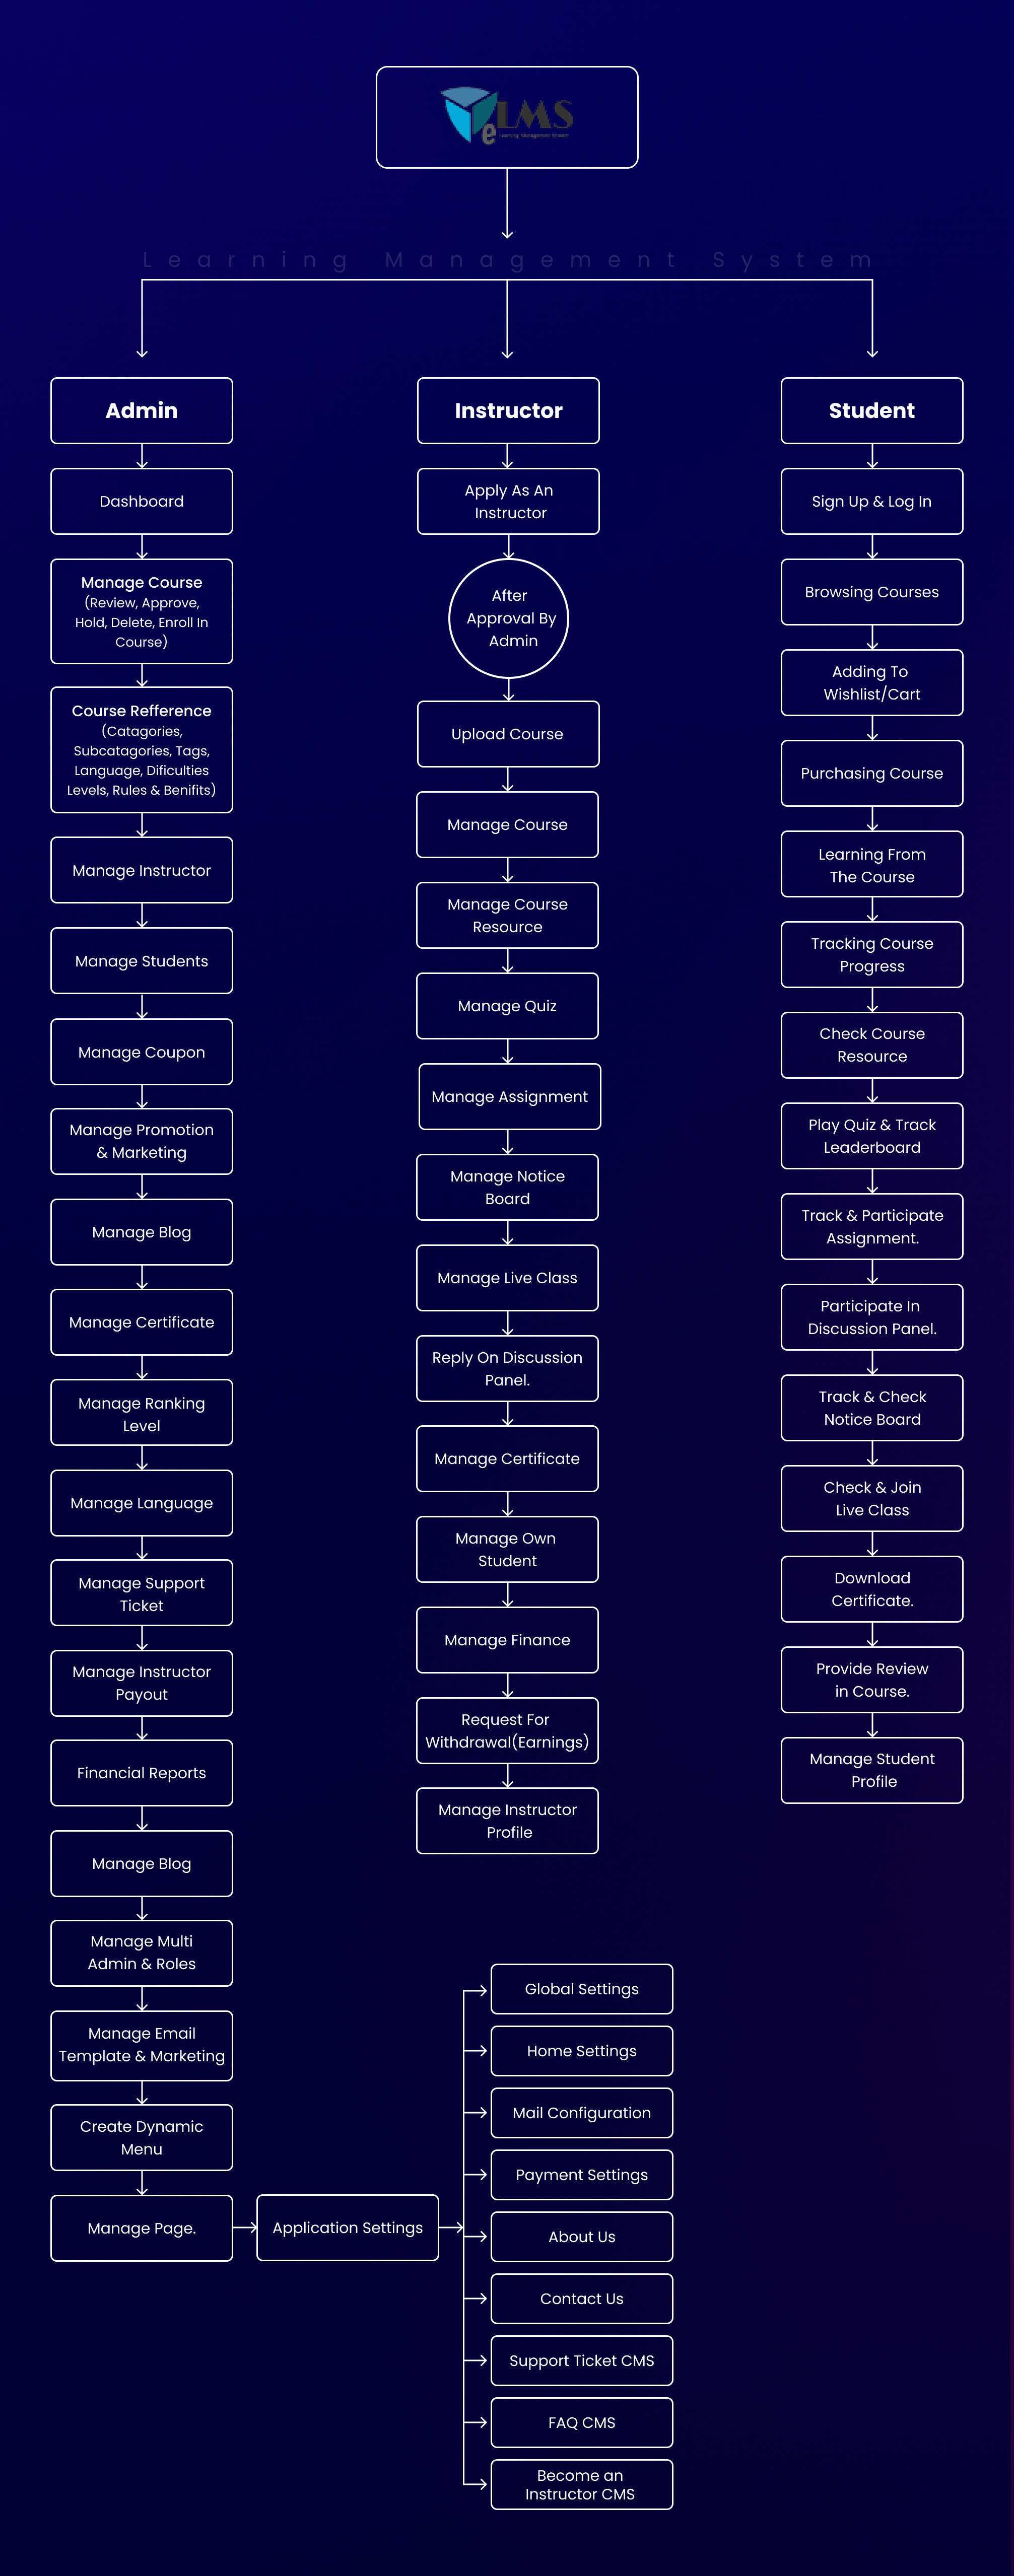
How ELMS Works
This platform has three panel (Admin, Instructor, Student) and description here
An admin what to do:
In ELMS, an admin is a user with the most access, permissions, and responsibilities. To run the program, the admin must handle the entire system.
An instructor what to do:
In ELMS, an instructor can create and sell courses. Instructors can add, update, delete their course materials like lessons, quizzes, resources, assignments. Can take live classes, can discuss with their enrolled students. Instructors can earn income by sharing a percentage of the course price after selling the course on this platform.
A student what to do:
In ELMS student can learn and upgrade their knowledge and skills through this platform. Students can purchase any course for enrollment. After enrolling in a course, they can start to learn. They can give assignments, quizzes and see the results. If there is any problem while doing the course, you can discuss it with the course instructor. Students can browse any courses, make a wish list, see blogs, share courses and blogs. A student can apply to become an instructor.
Basics Terms
Course
ELMS is a course based learning management system. Instructor share their course then student purchase course and obtain knowledge or skills in this platform. Instructor creates the course for the students in their expertise. A course has many resources, assignments, quizzes, several lectures, several sections, live classes, discussion. Instructor can also earn by selling the course. on the other side, student gain knowledge and upgrade their skills by watching the courses and completing the assignments and quizzes.
Section & Lectures
In one single course instructor can create multiple section and multiple section has multiple lessons.
Curriculum
A curriculum consists of the "Roadmap" of any course. In ELMS, the curriculum will help you overview the course details. A course curriculum will help your students get external info and a course summary.
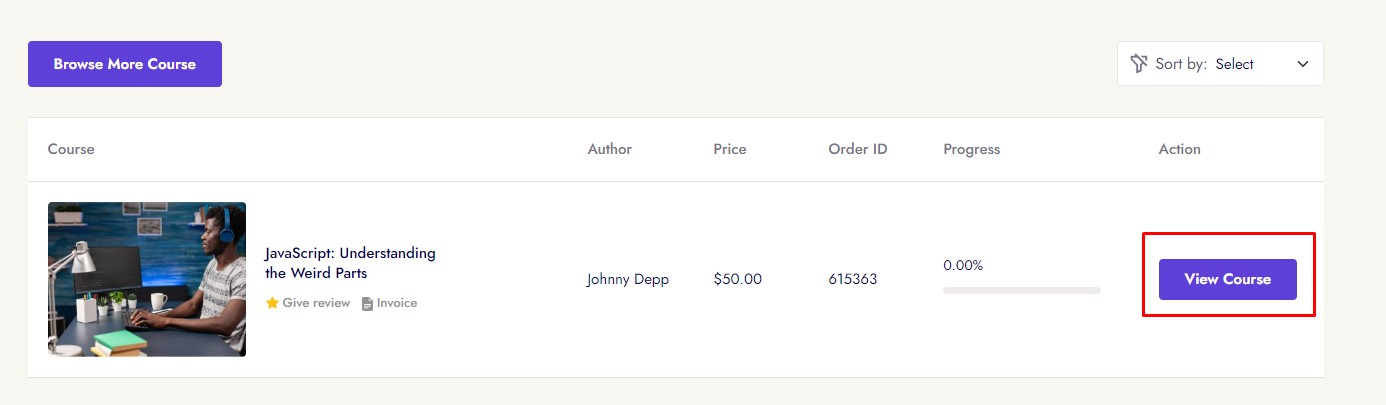
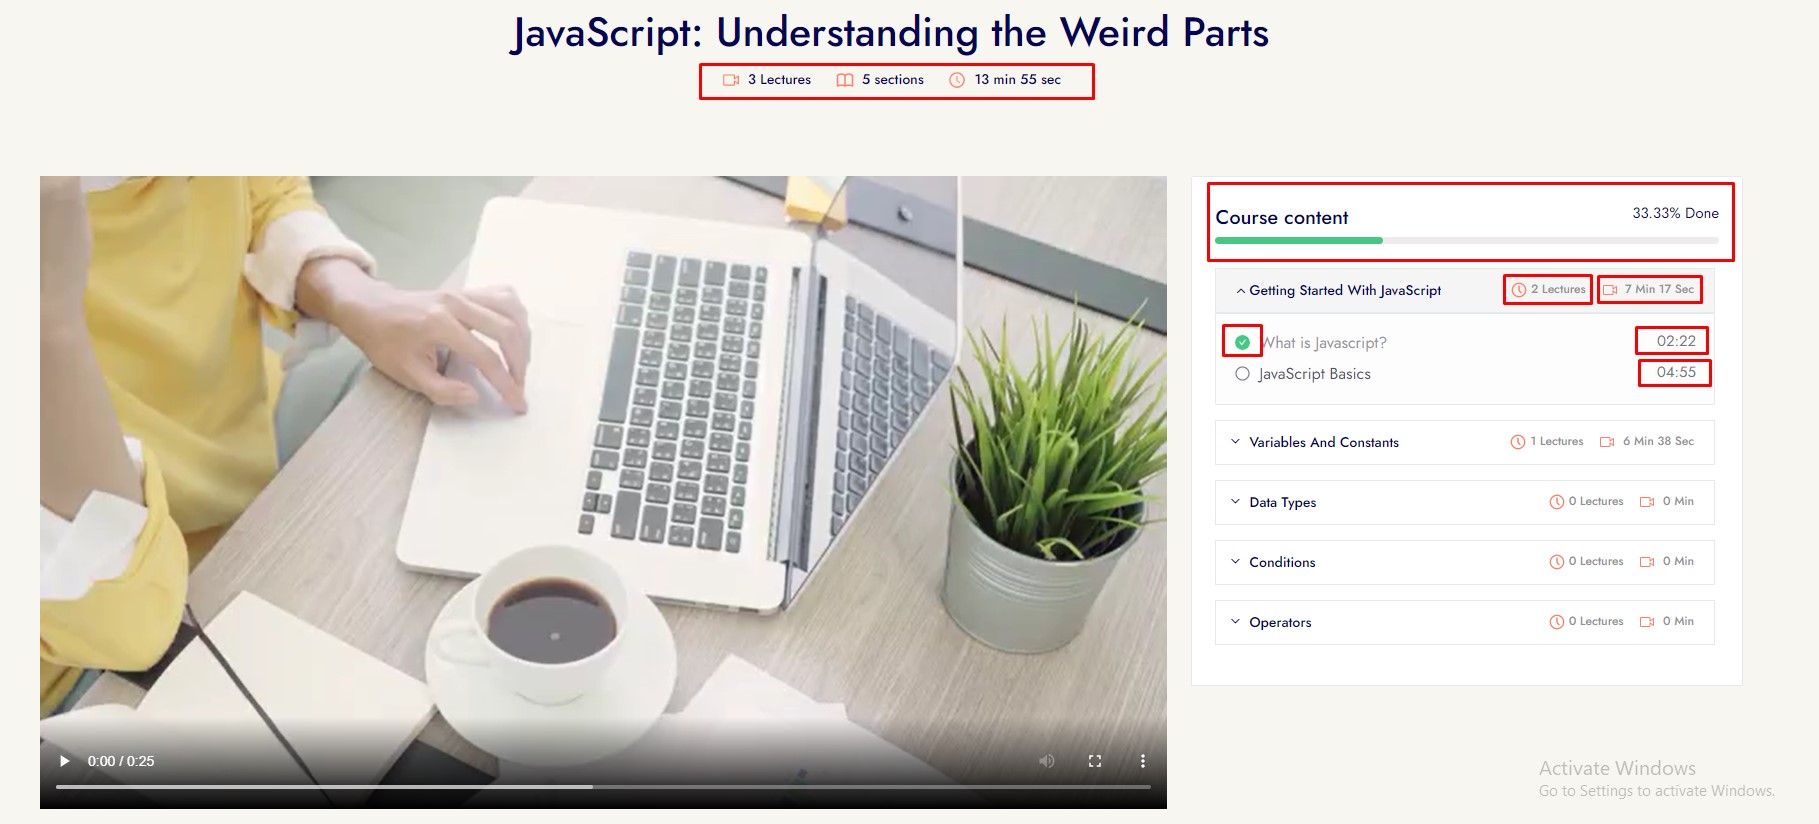
After purchasing course student show many things:
For example:
Tag
In ELMS, you can add multiple keywords for a course. These all keywords are individual tags. Showing related courses based on tags and even course searching can happen with it.
Admin
In ELMS, an admin has to perform a large number of activities. In this platform admin can do anything. An admin is responsible for every curriculum activity.
Student
In ELMS, Student can purchase course and obtained gain knowledge from course and upgrade their skills and after completed the course will get certificates.
How to Begin a Career as an Instructor
To become an instructor, there are some procedures to complete.
Instructions given here:
Instructor
In ELMS, an instructor can create and sell courses. Instructors can add, update, delete their course materials like lessons, quizzes, resources, assignments. Can take live classes, can discuss with their enrolled students. Instructors can earn income by sharing a percentage of the course price after selling the course on this platform. Instructor can withdraw his/her income from instructor panel.
Category
You can classify courses so that your students can find the course more quickly. You can add several categories and sub-categories according to the courses.
Credentials For Demo
Student Account Activities
Browse The course in ELMS
The finest user experience is provided by ELMS. This learning management system allows user to view the course details and curriculum without create an account. You must take the following steps:

A user can browse a course from the welcome page, they can filter the course based one:
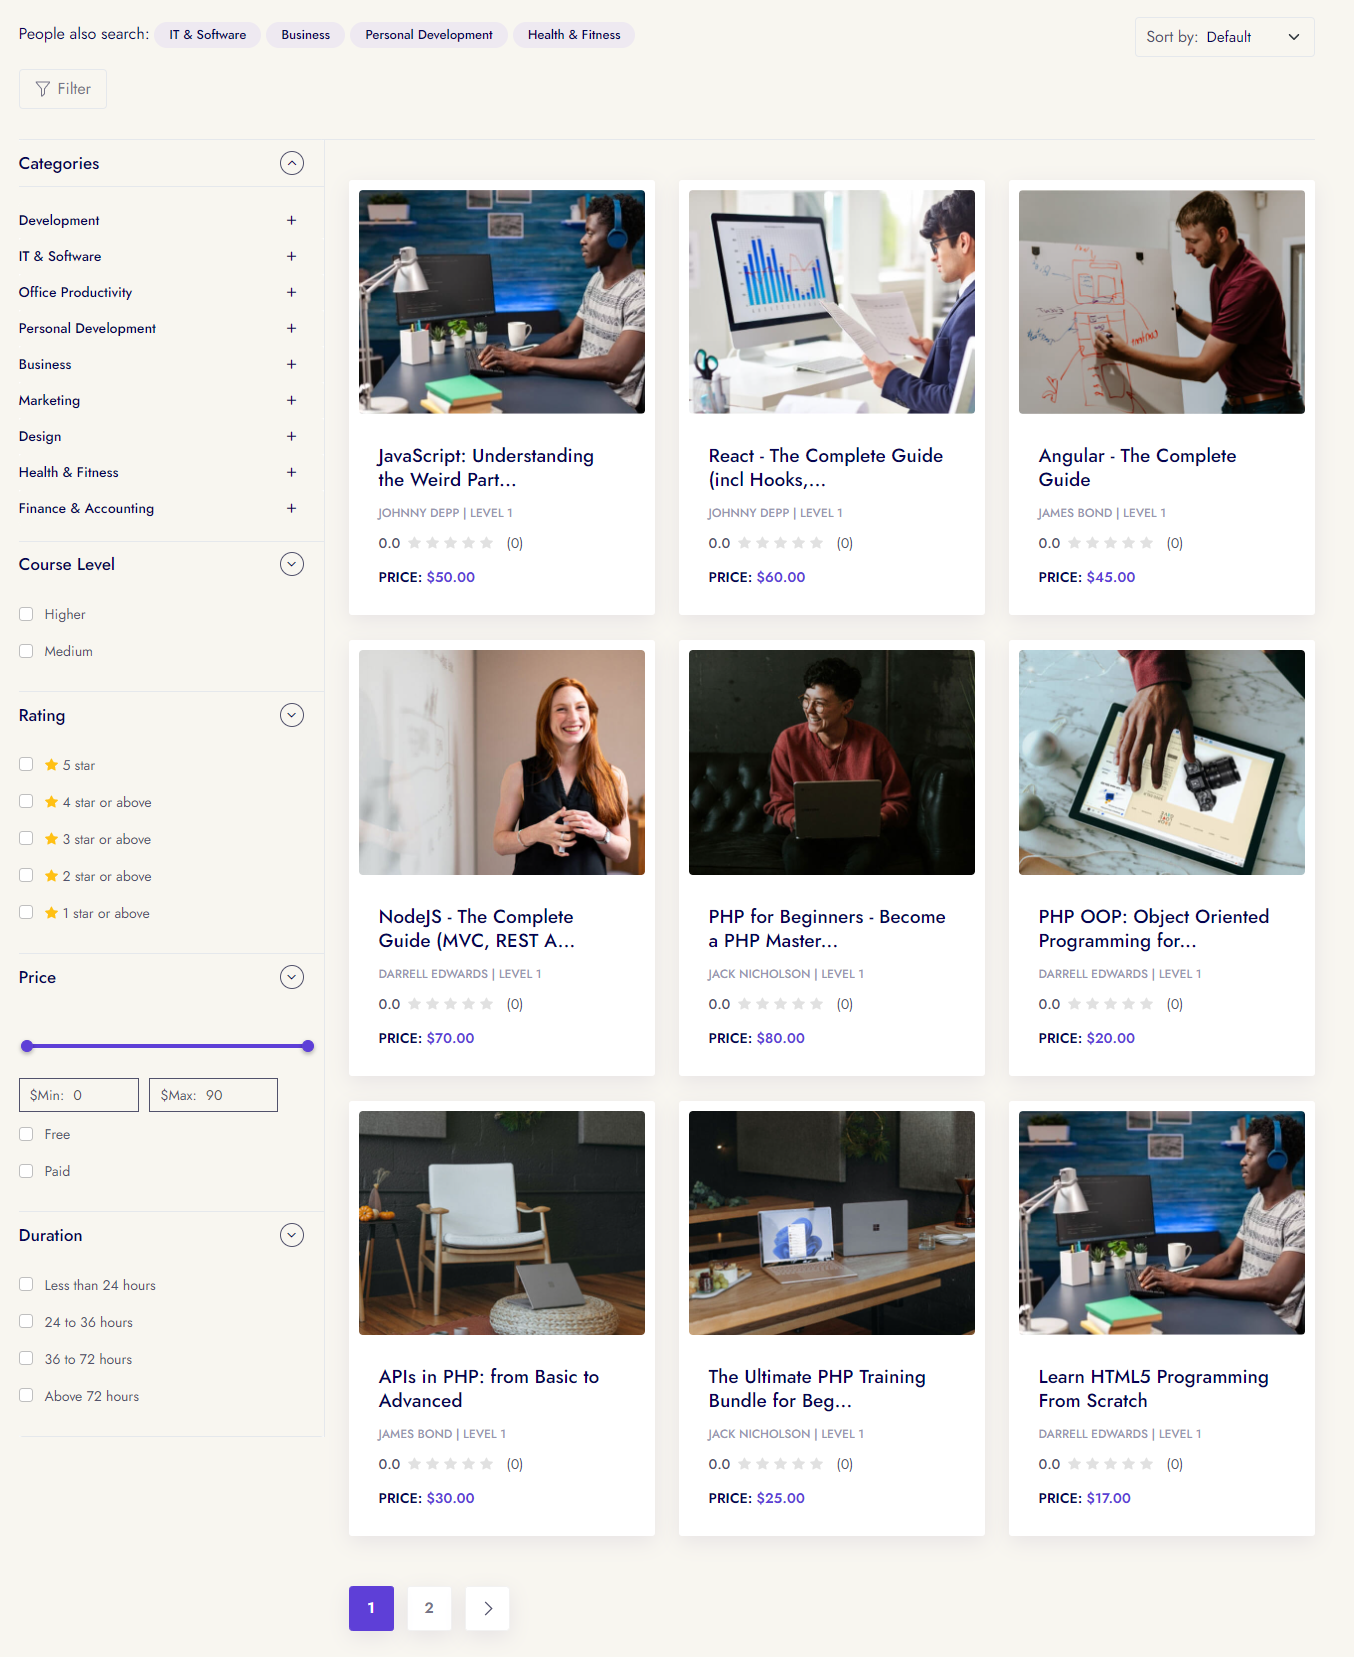
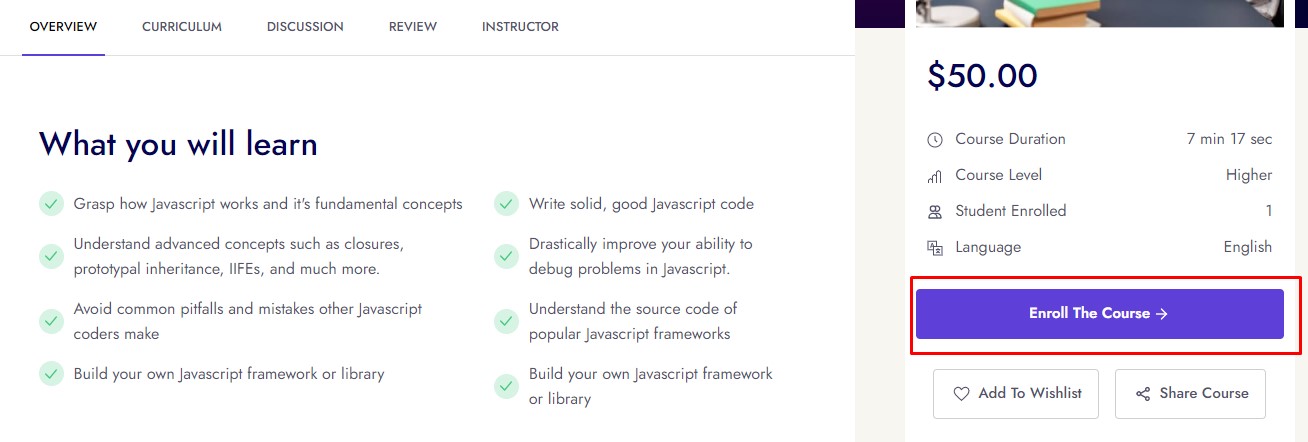
Then a student click any course and see the course details. For example, you can see
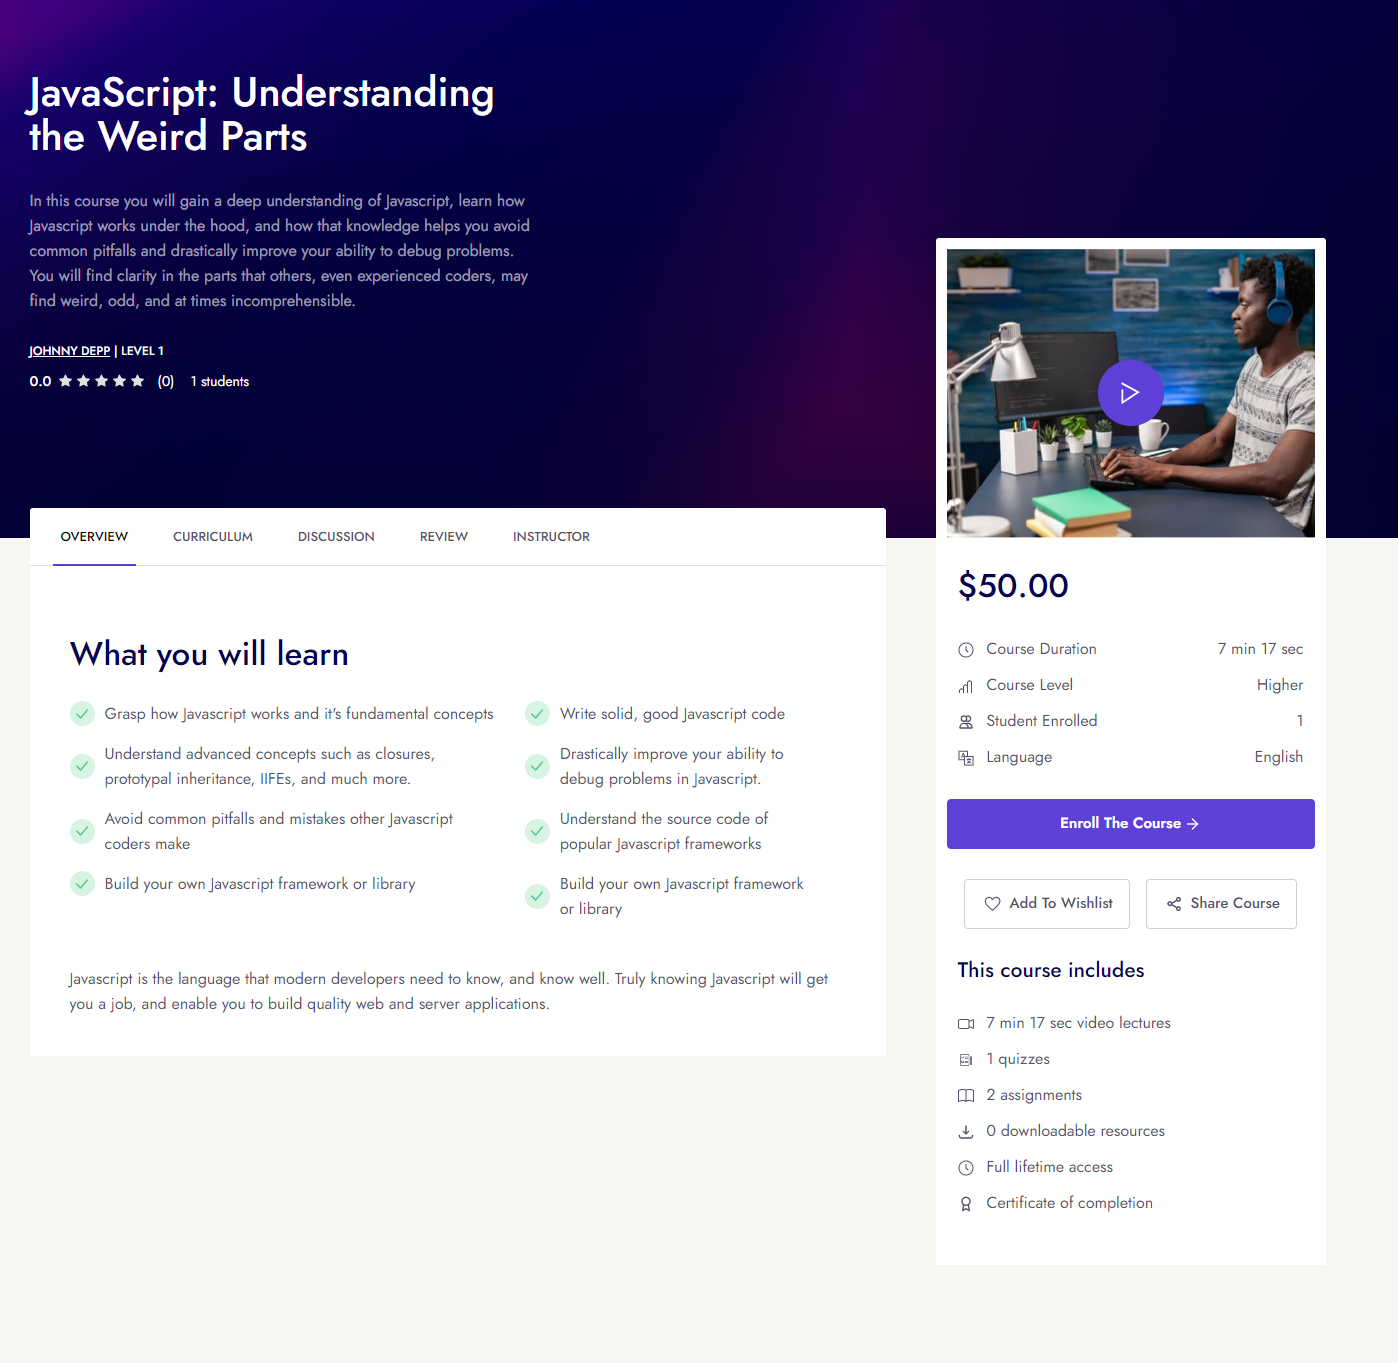
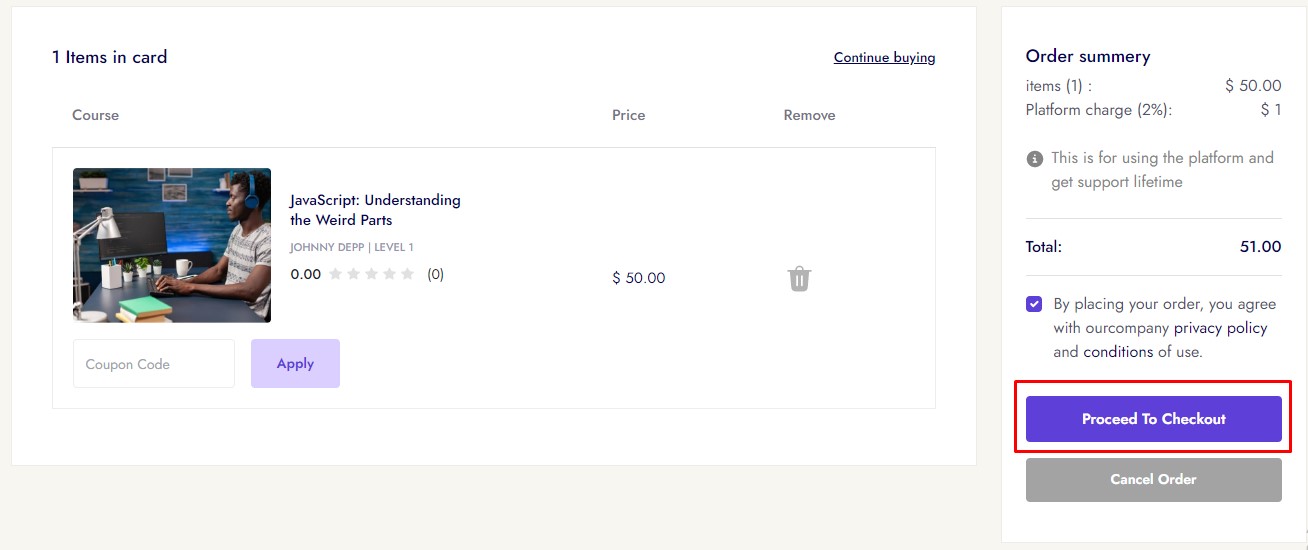
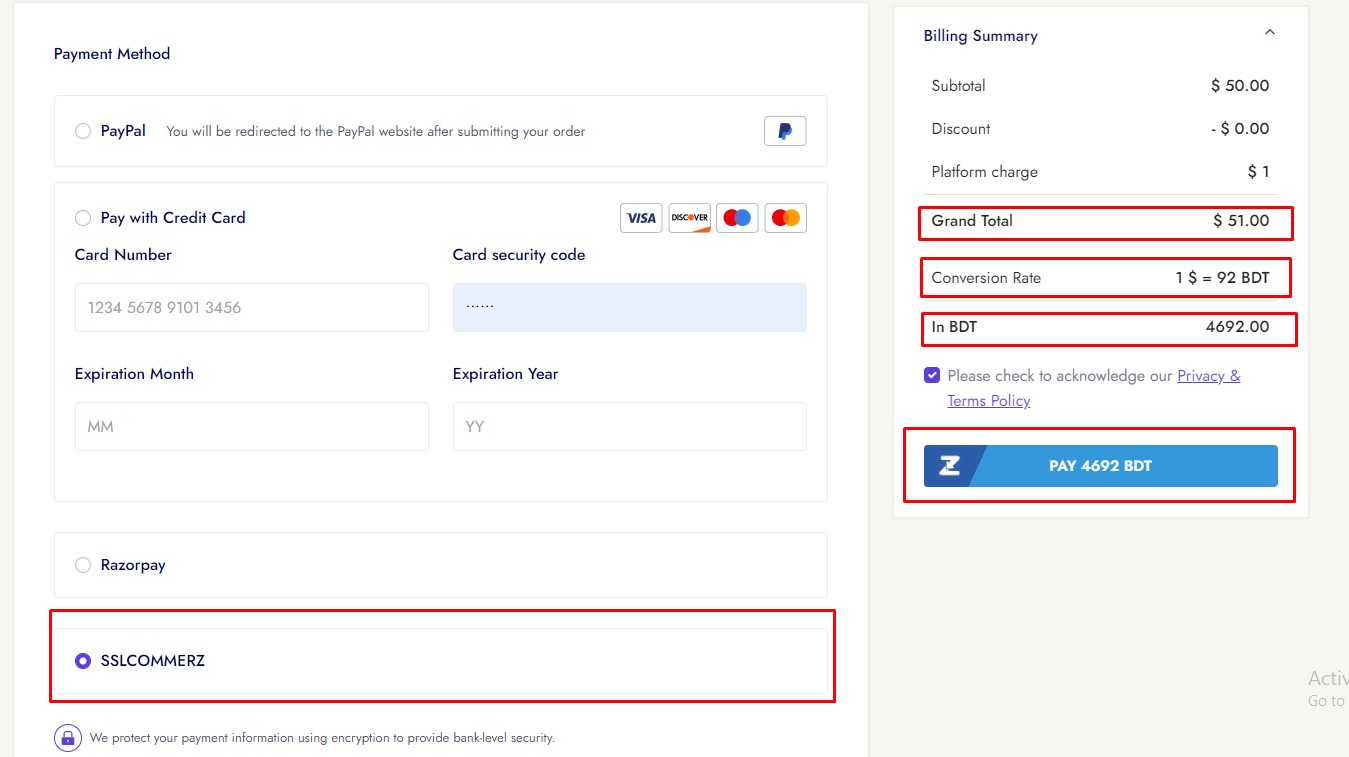
How to purchase a course
To purchase a course a user follow some criteria:


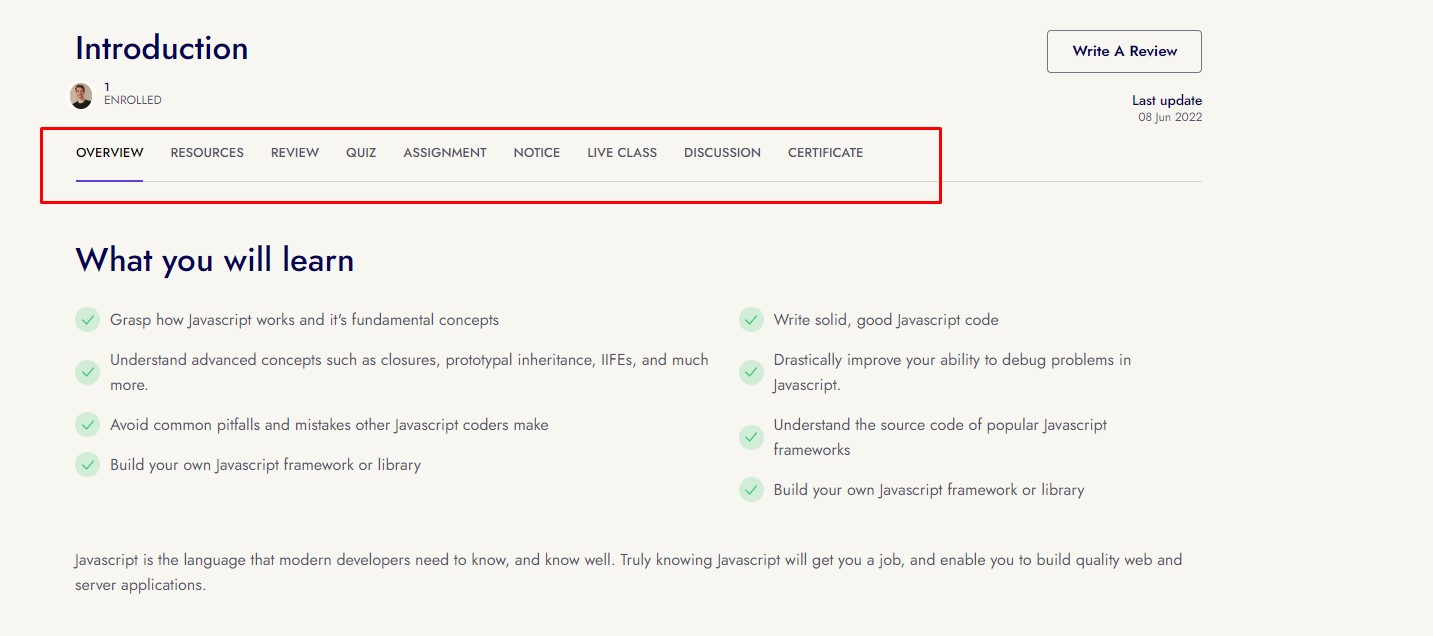
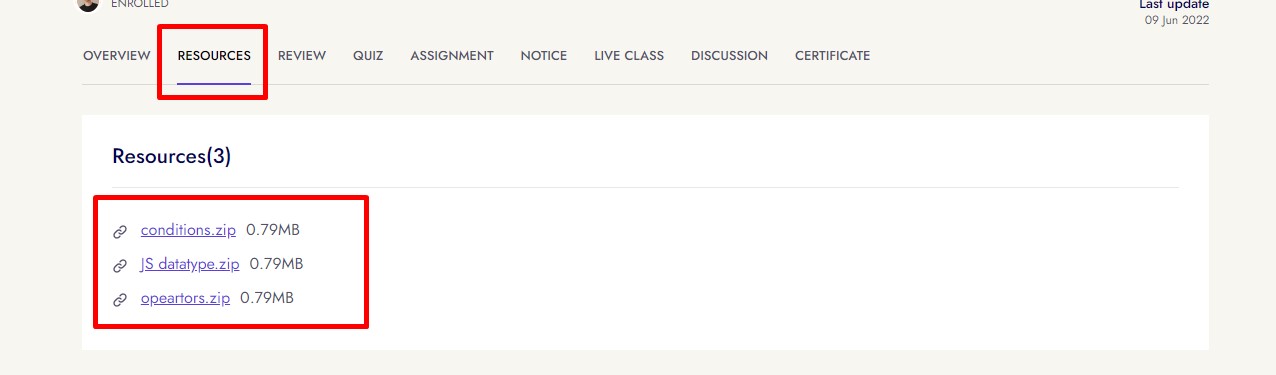
Course resources
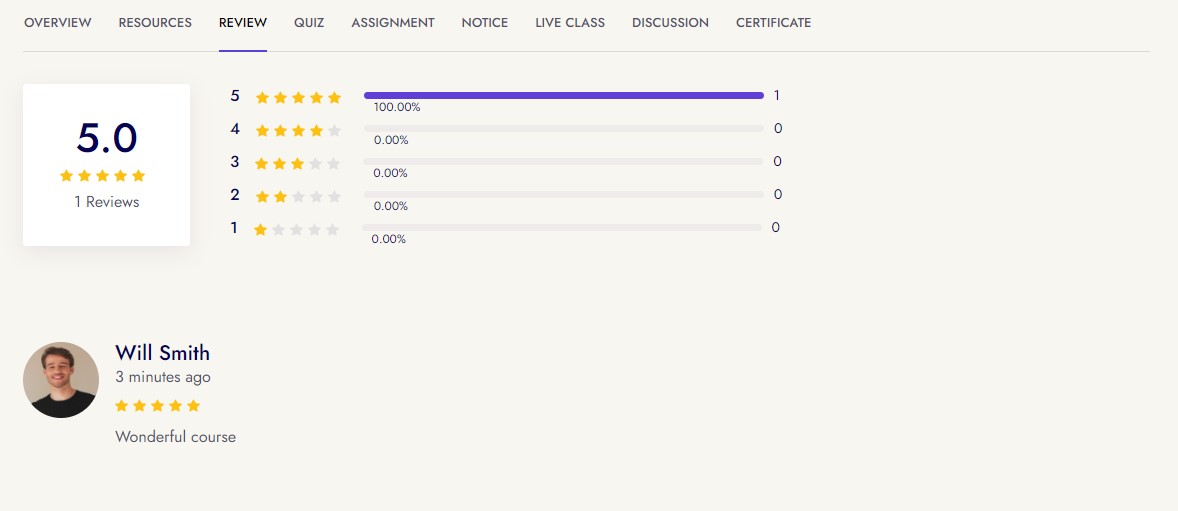
Course Review
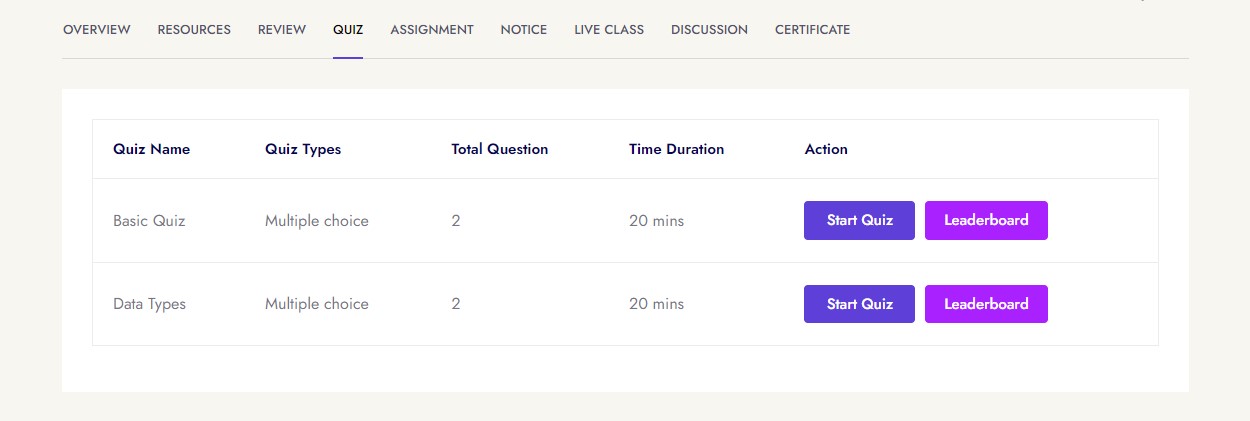
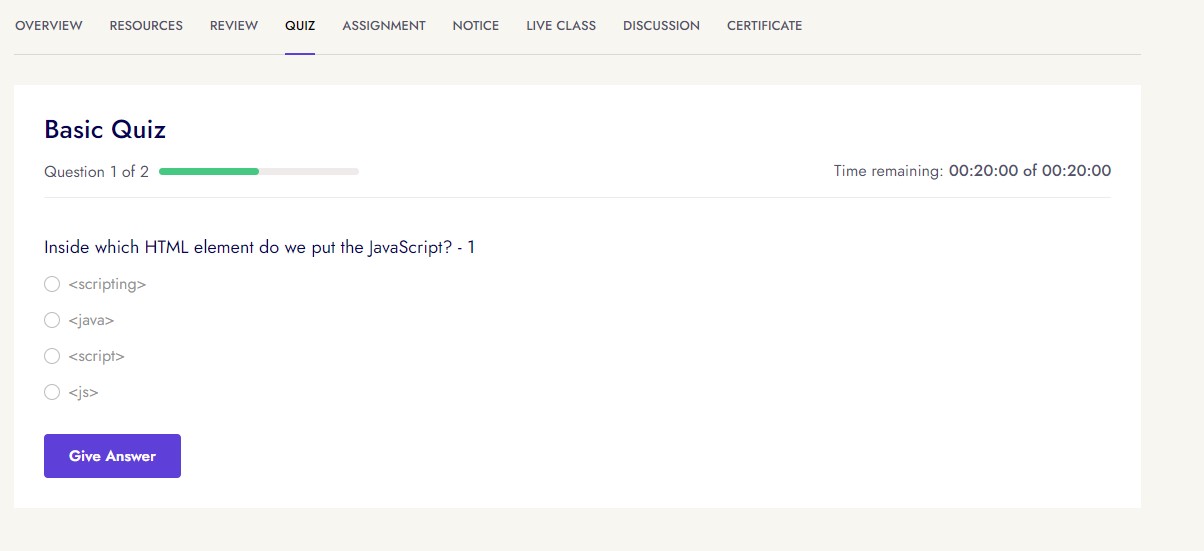
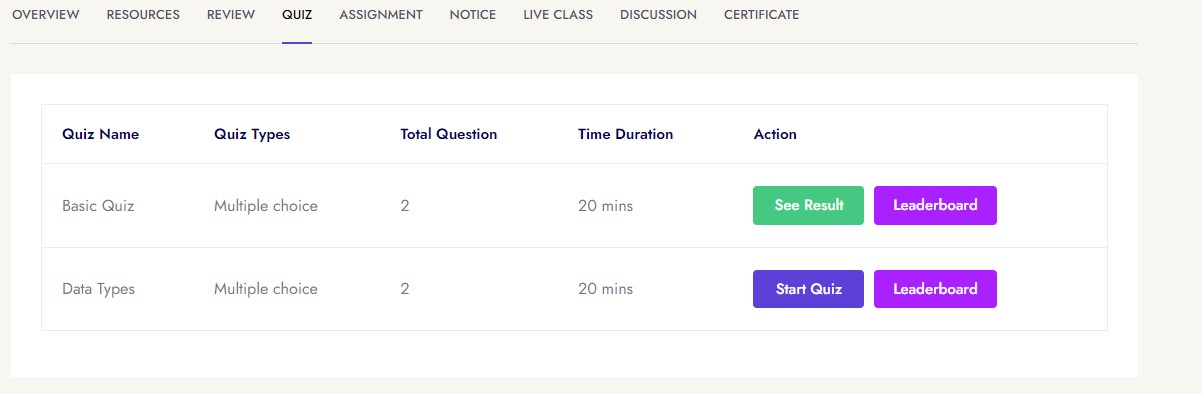
Course Quiz
Some demo images given here


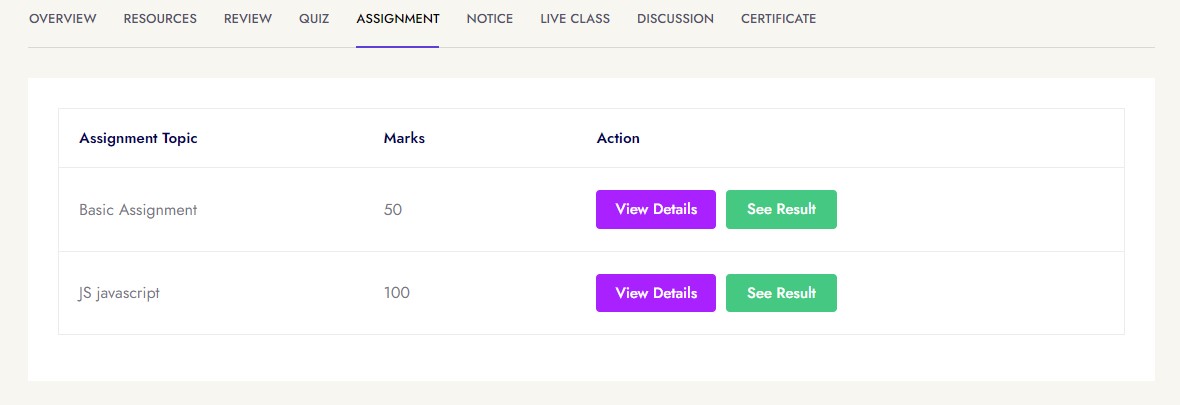
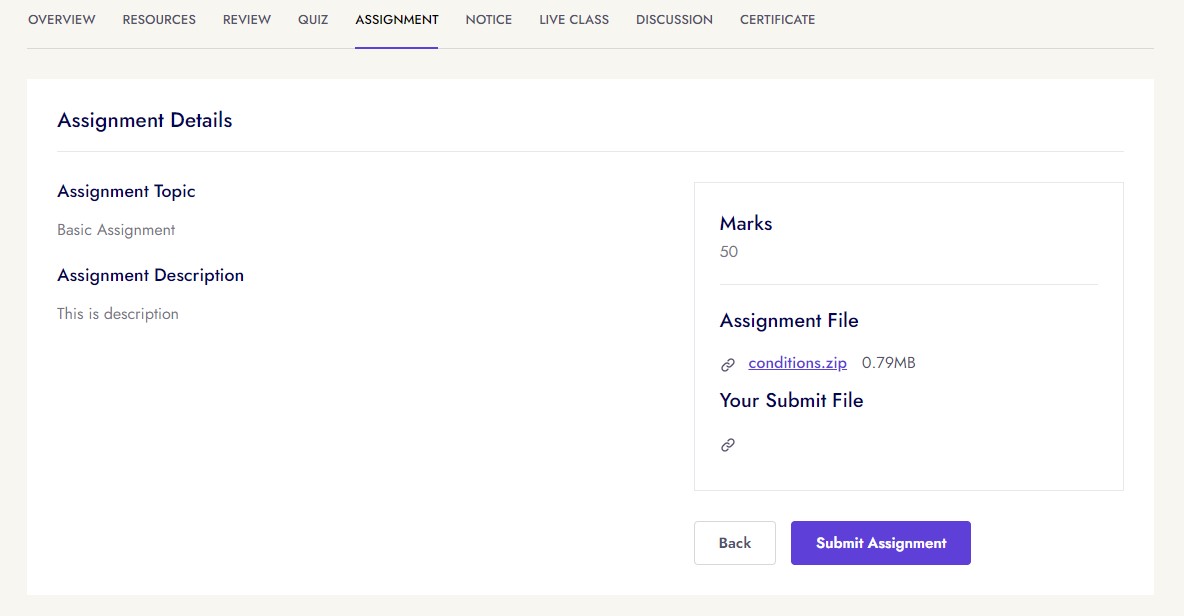
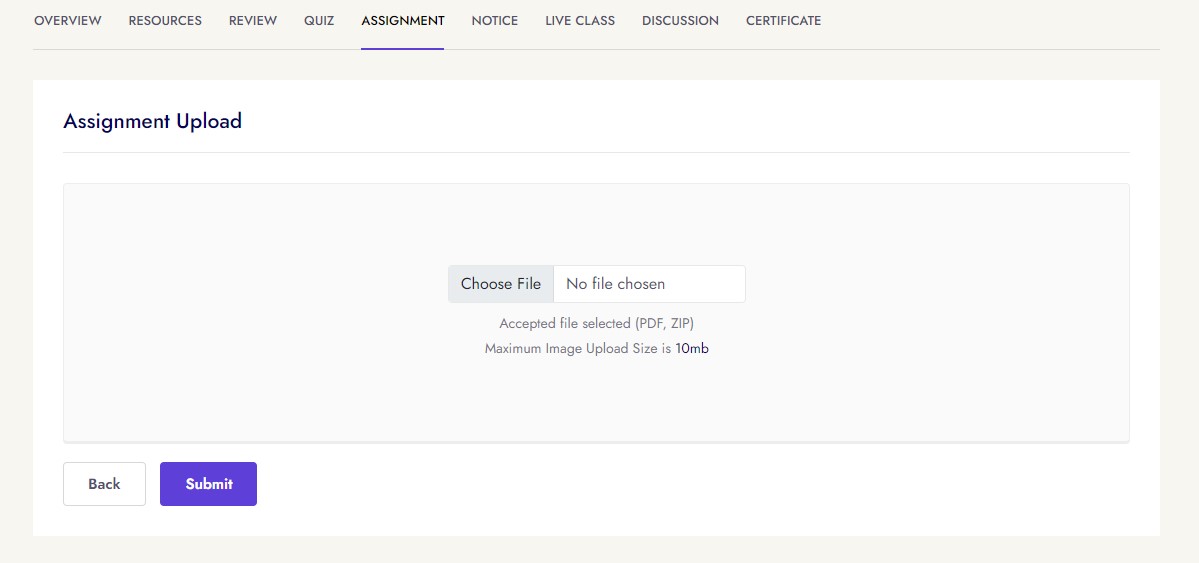
Course Assignment

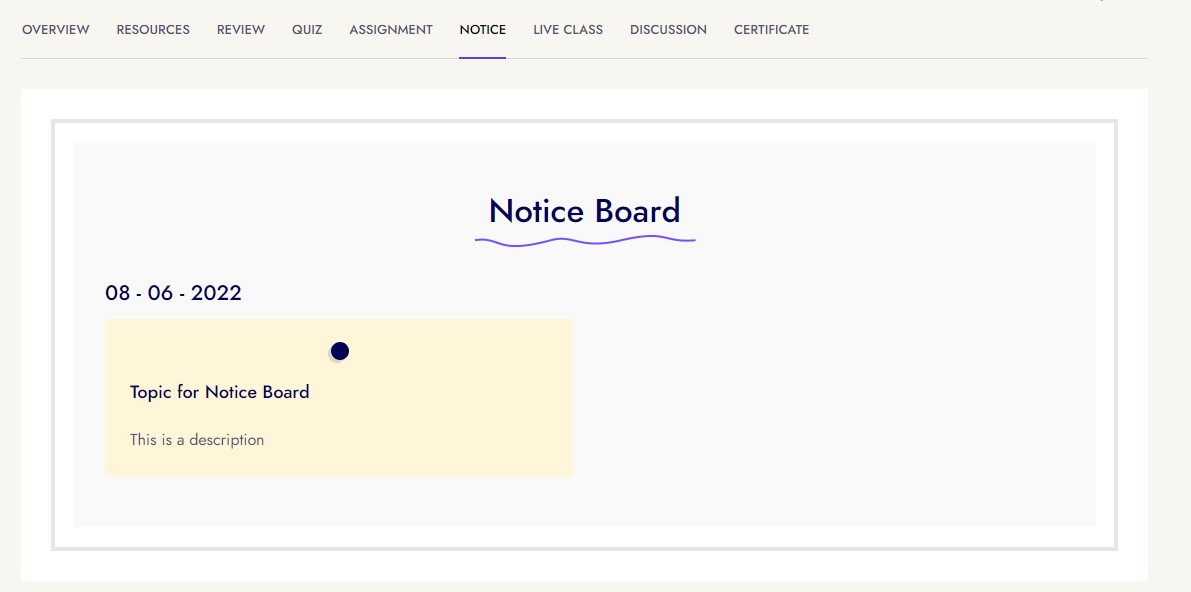
Course Notice
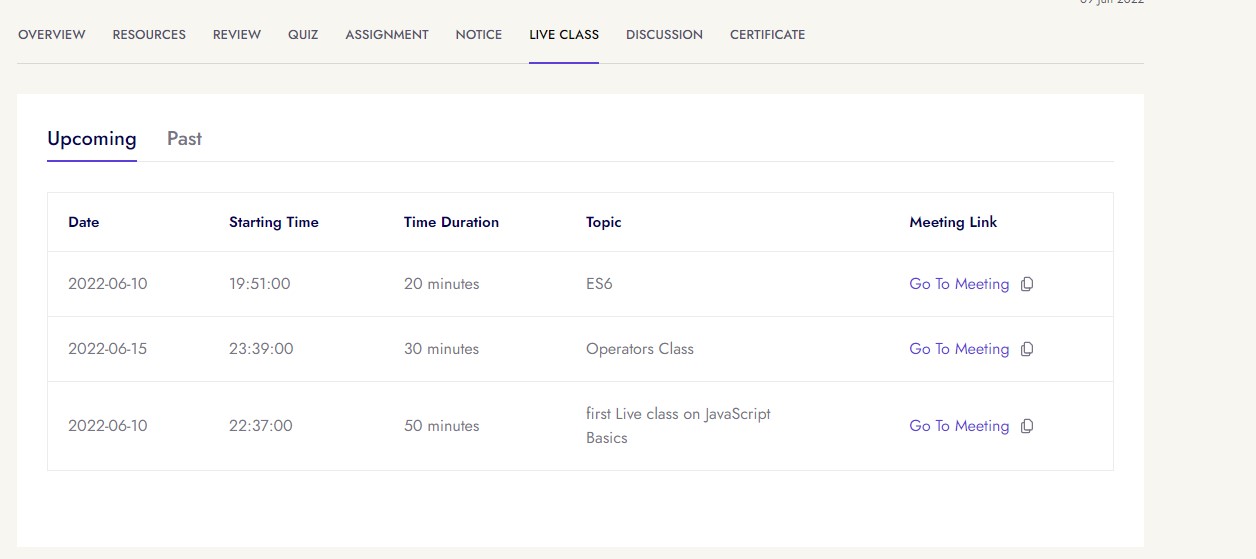
Course Live Classes
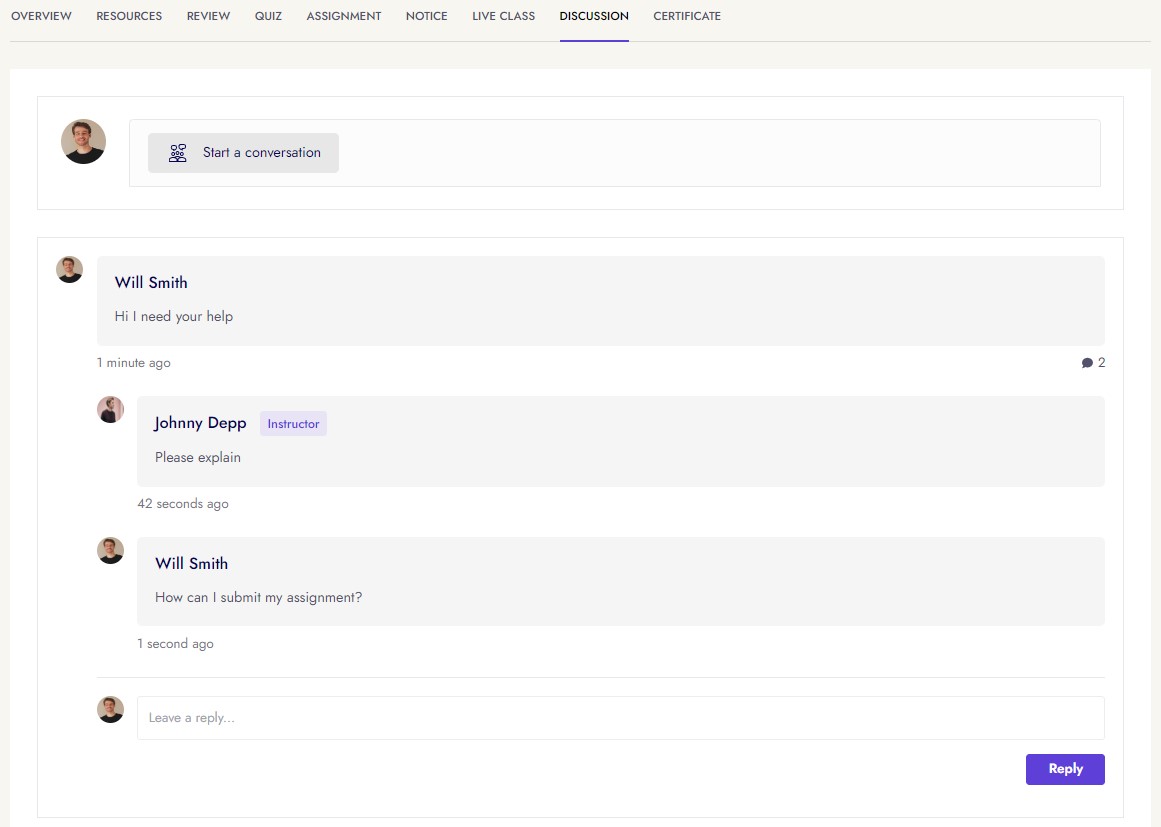
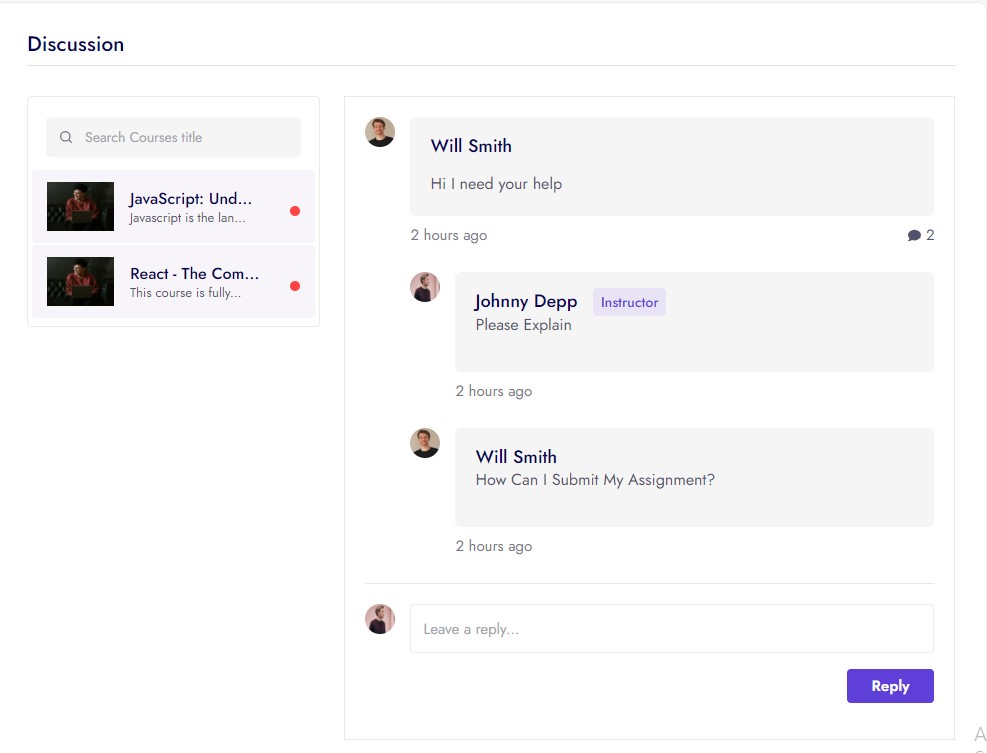
Course Discussion
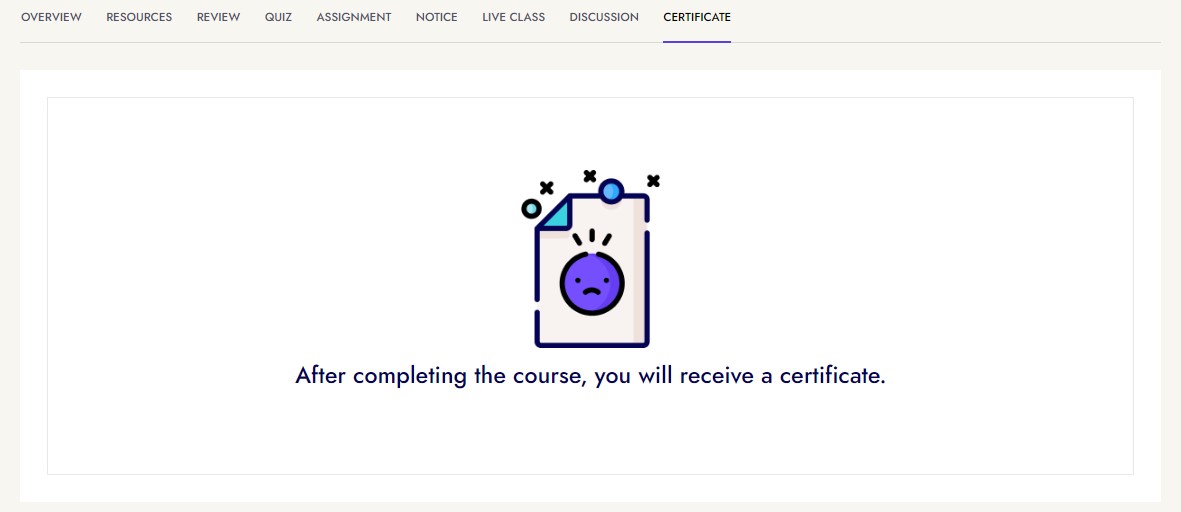
Course Certificate
Geolocation search
Subscription Module


Instructor Account Activities
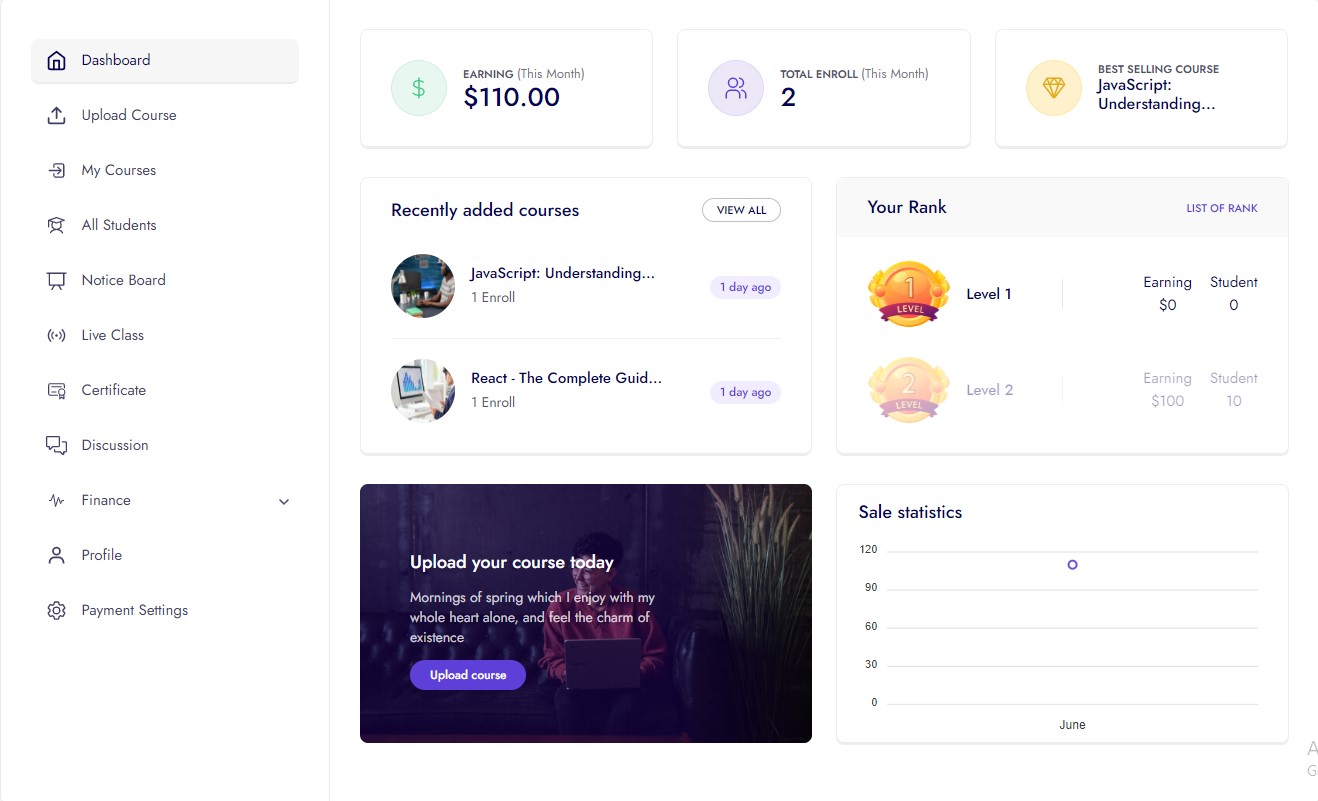
Instructor Dashboard
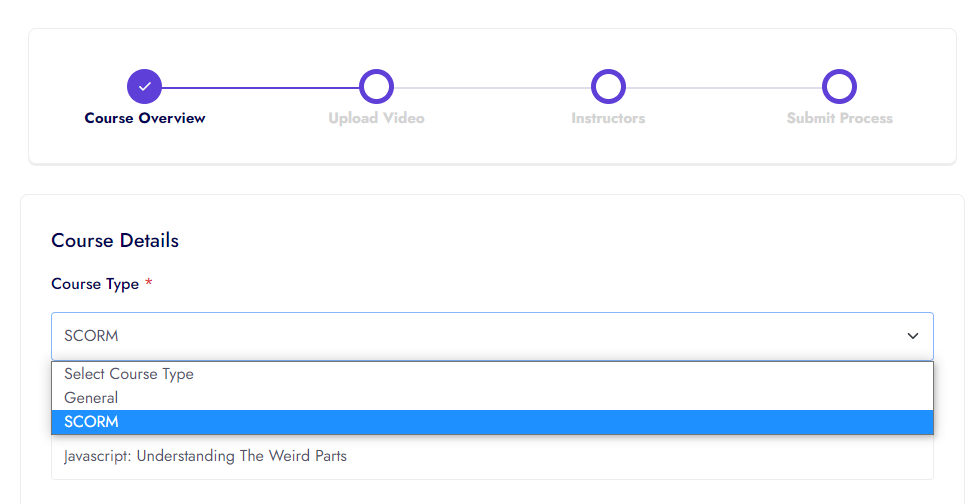
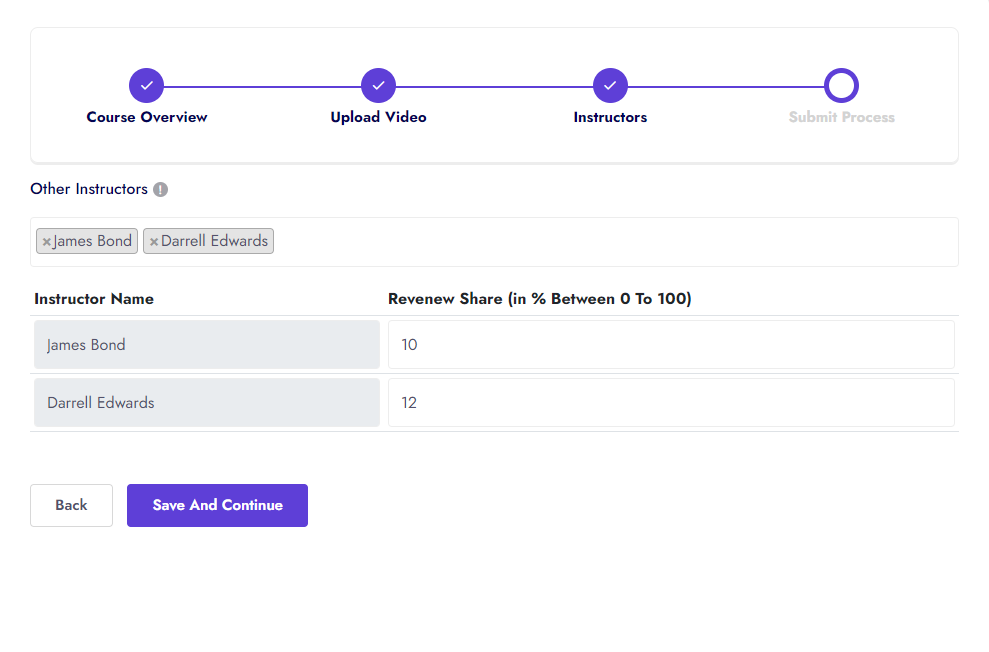
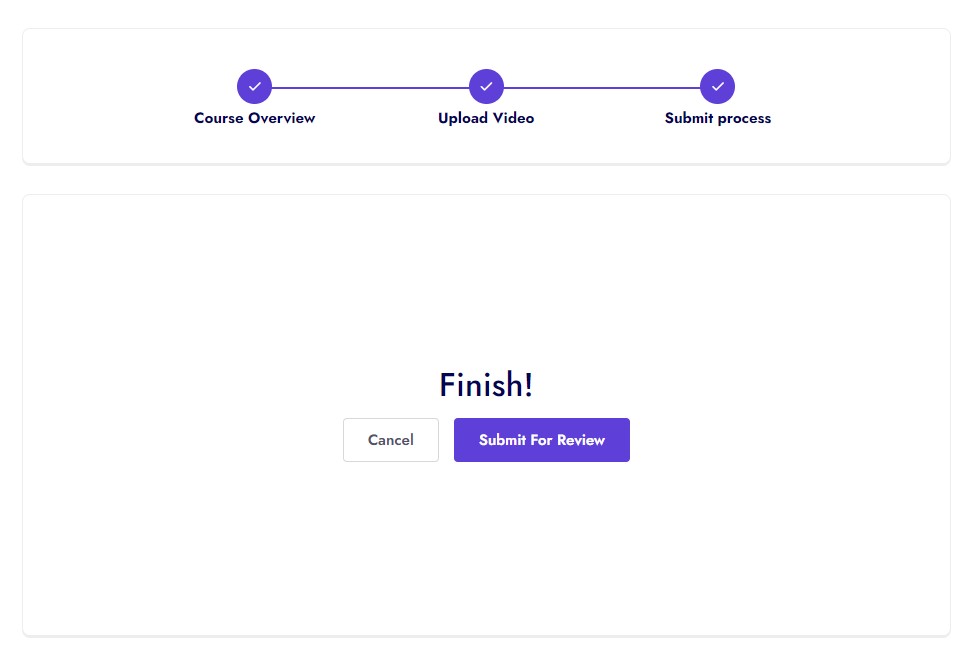
Upload Courses
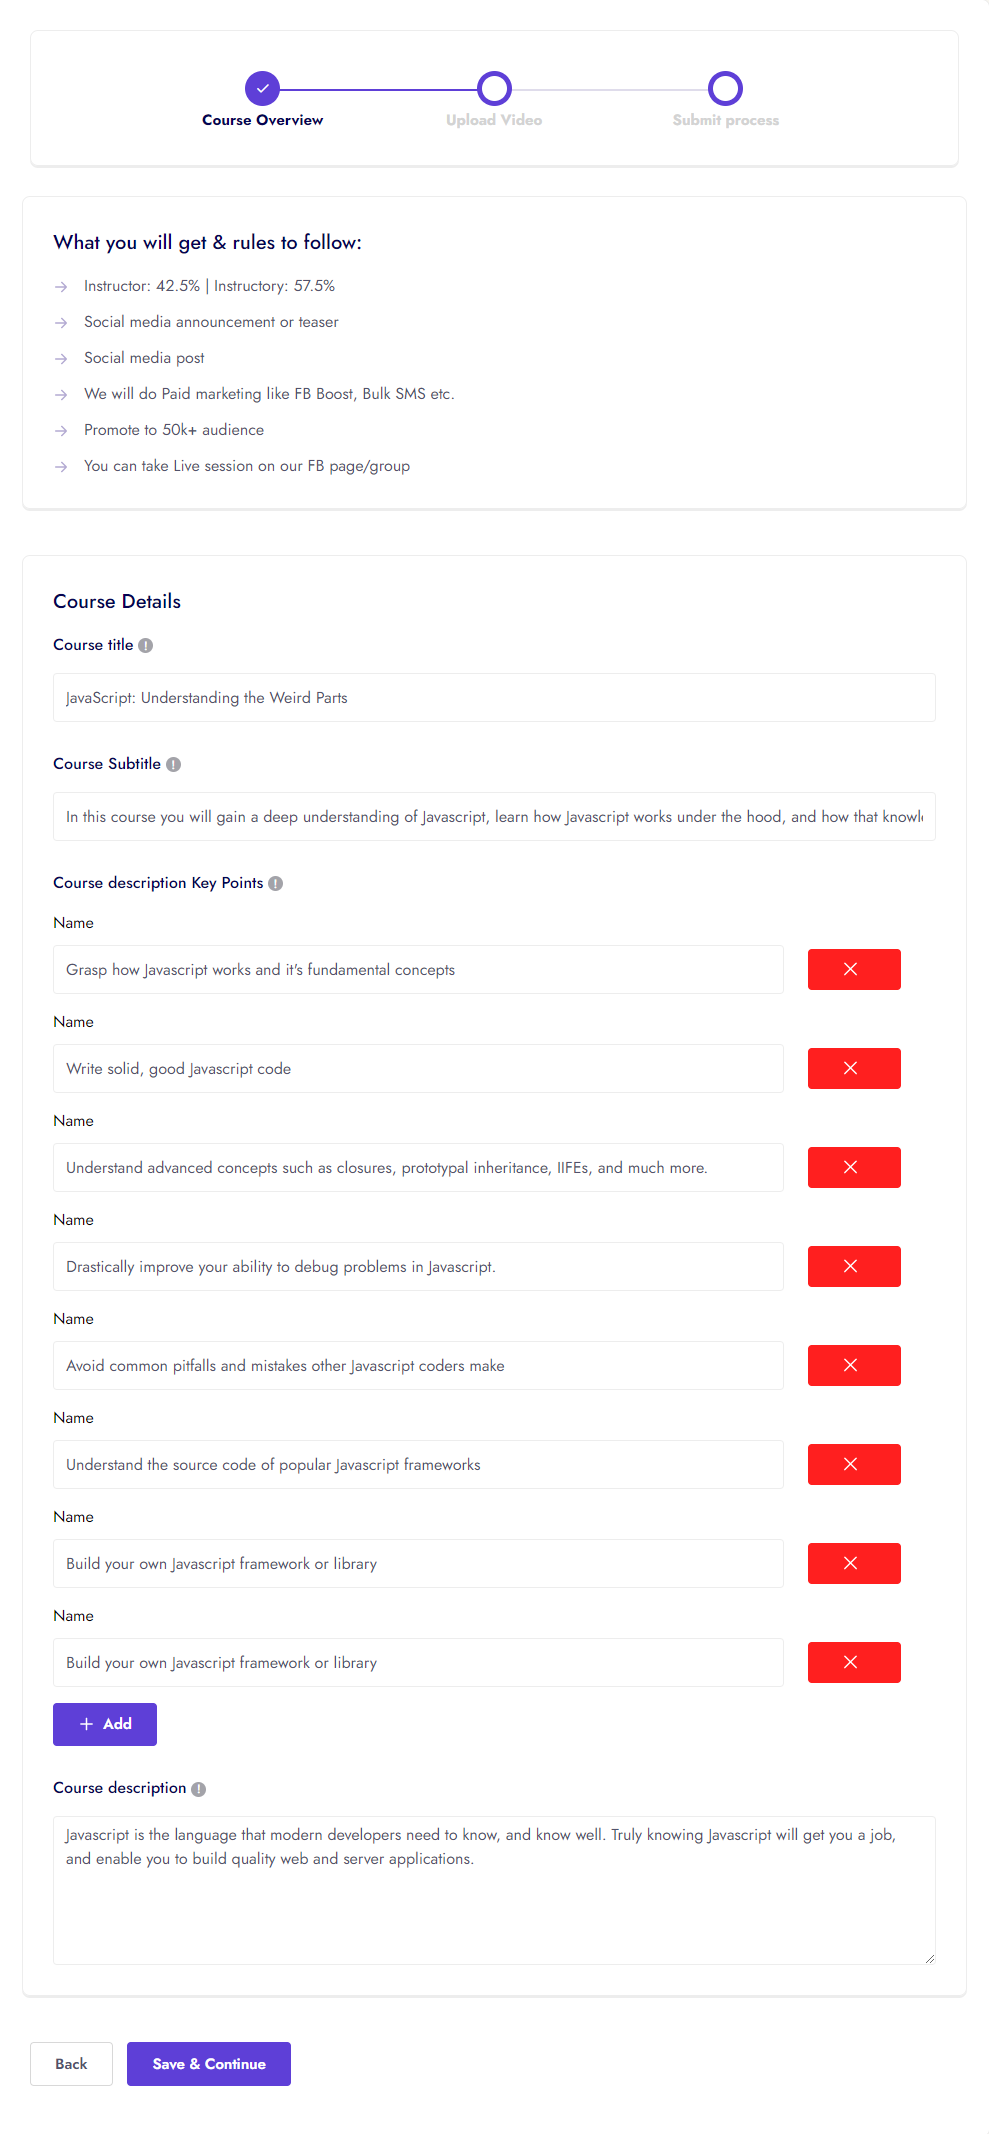
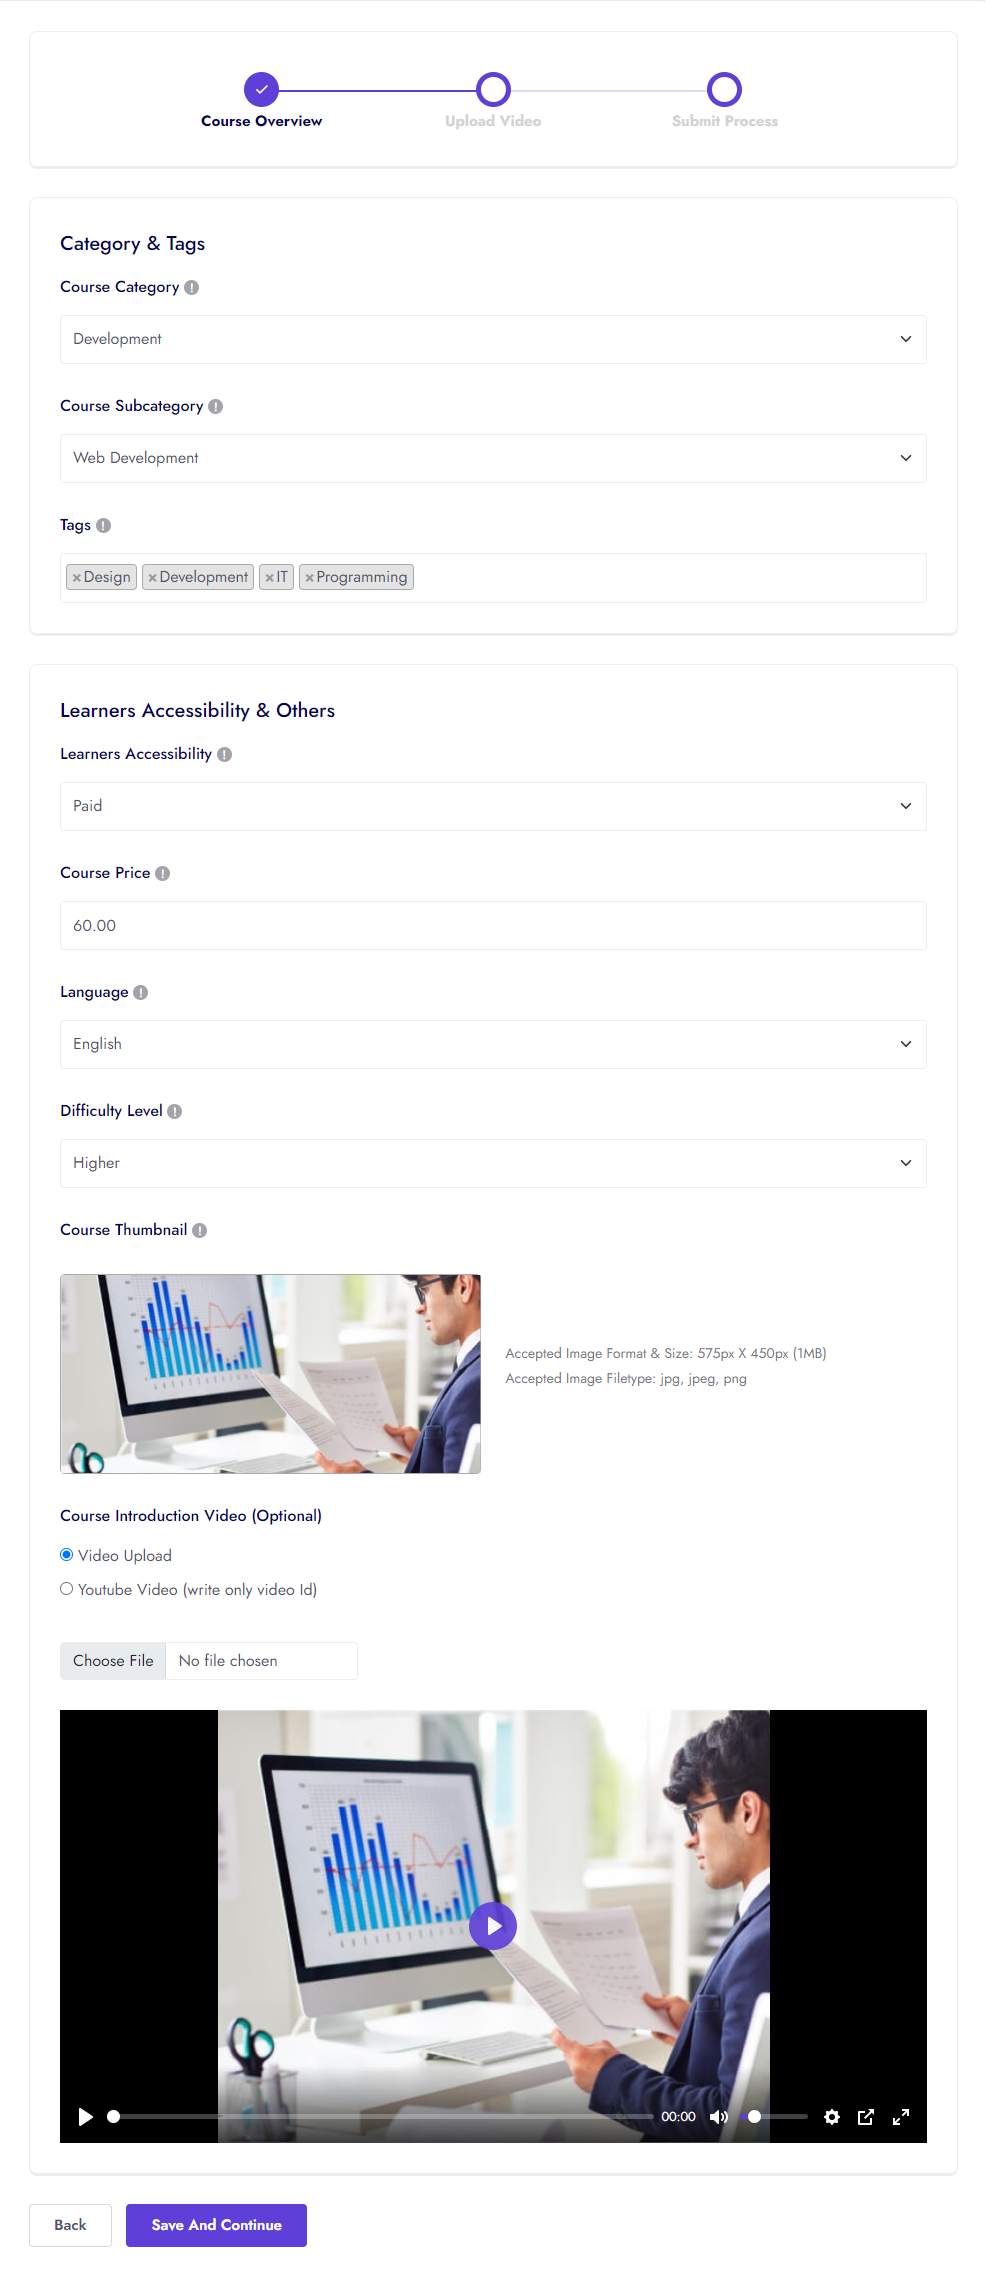
Course drip content, access period and old price

Note:If instructor do not upload any lesson, he/she can't go to next process.


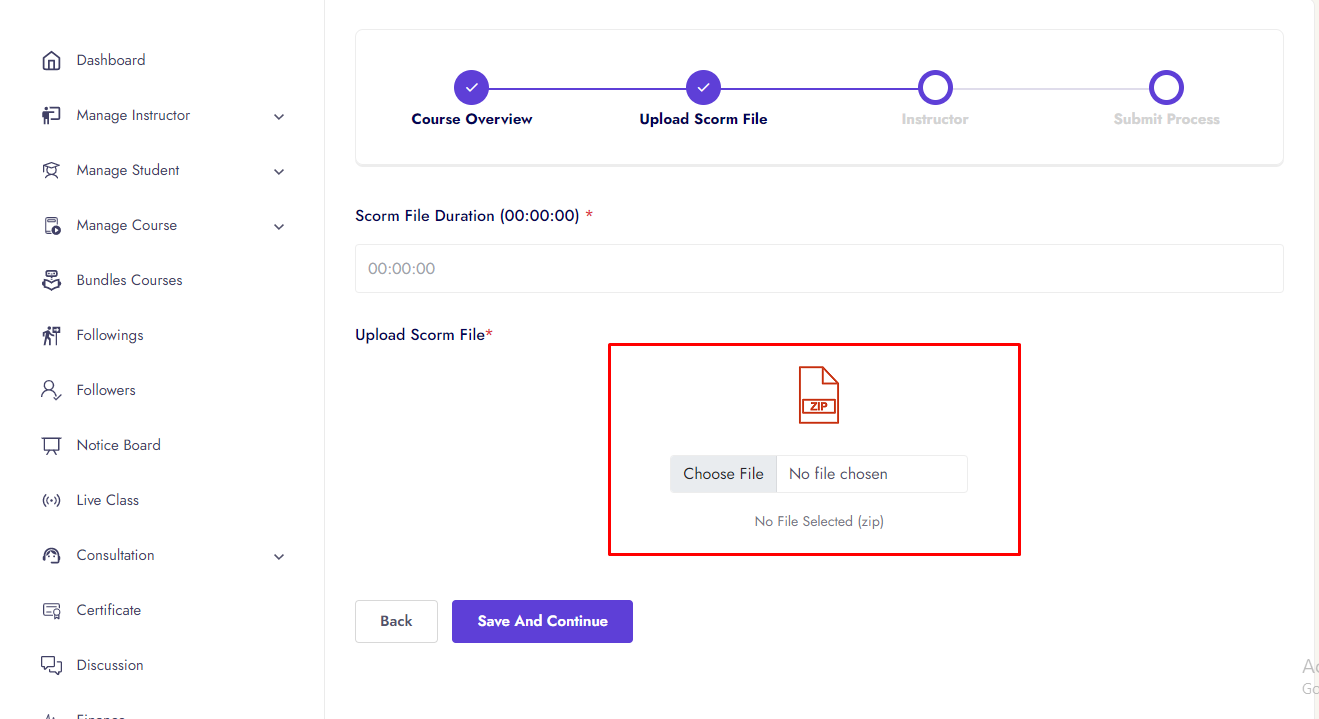
Instructor can upload 8 different types lesson.


Instructor can iSpring, SCORM all version, xAPI (The Experience API), cmi5 (a companion to xAPI), AICC Course
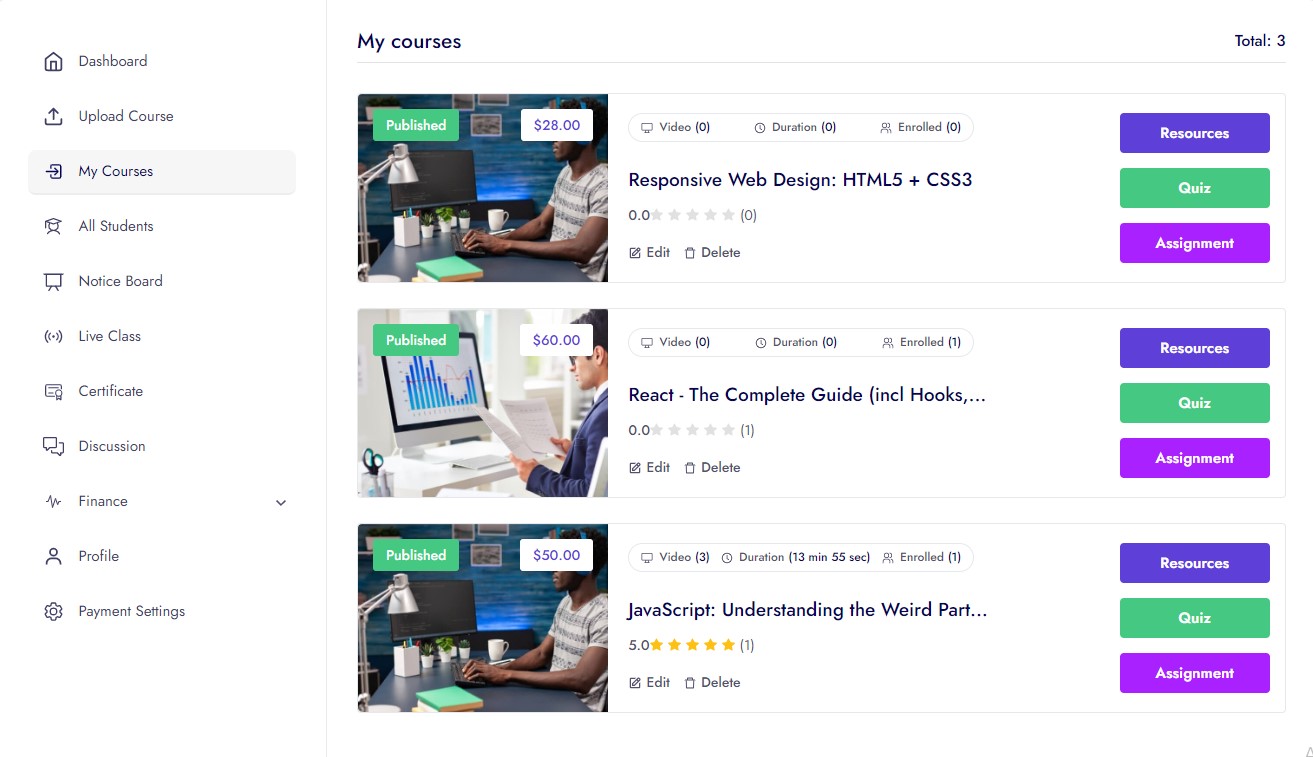
My Courses
Courses Resources


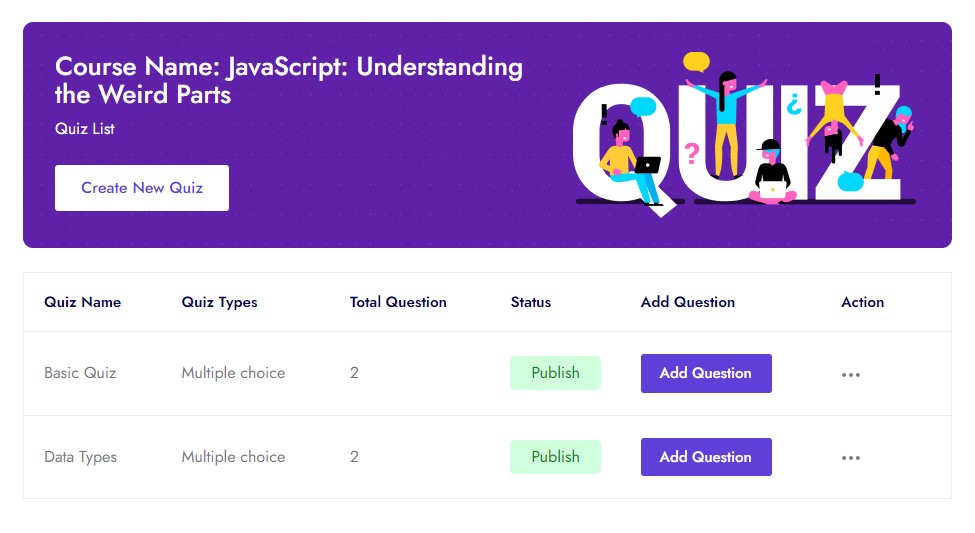
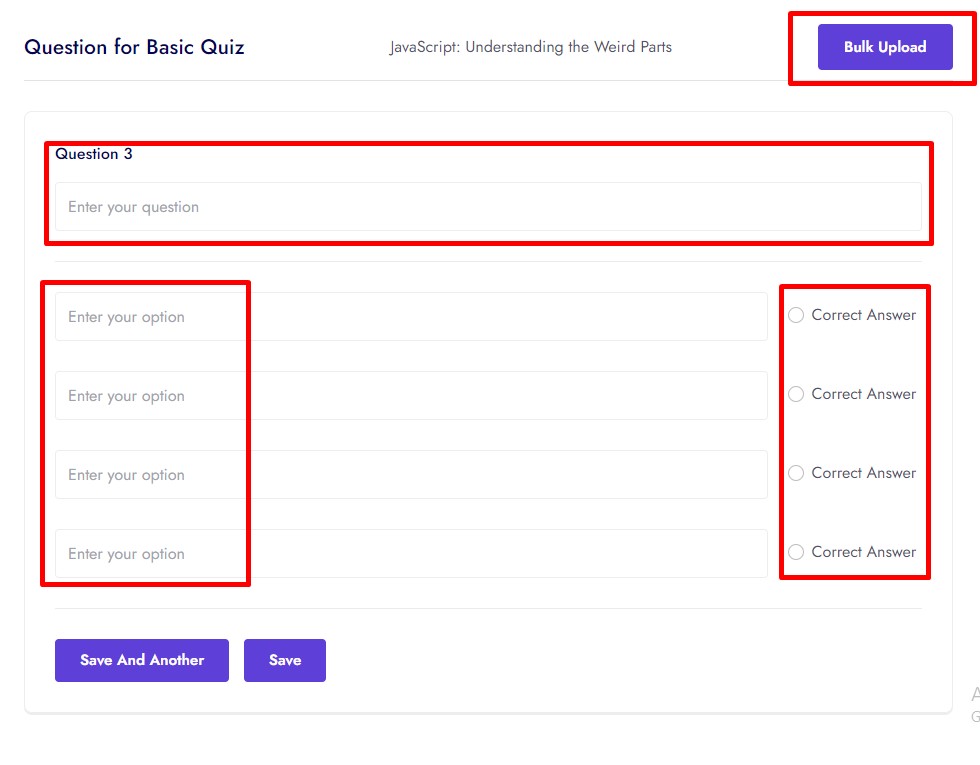
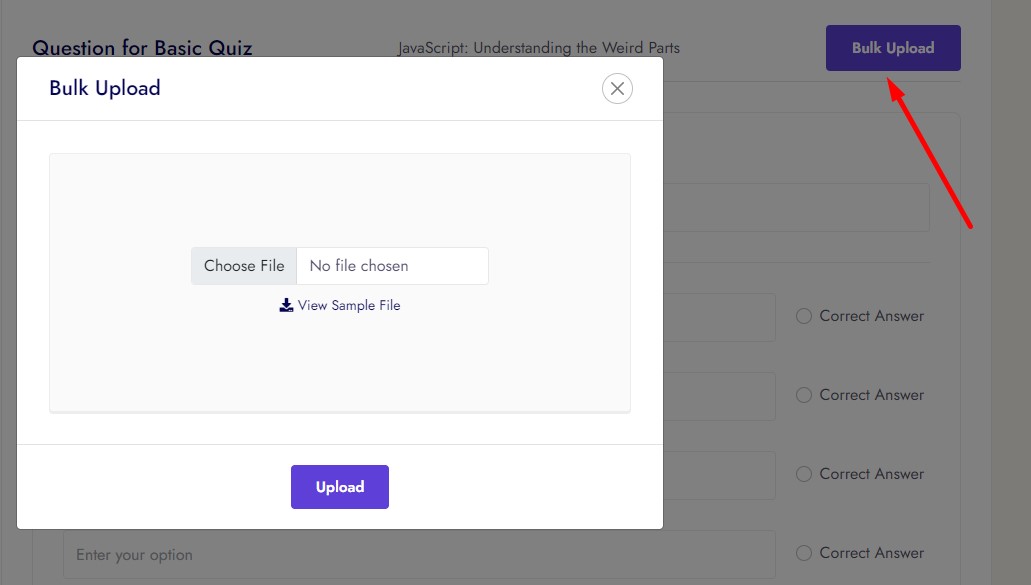
Courses Quiz
Quiz has 2 types
- 1. Multiple Choice
- 2. True-False


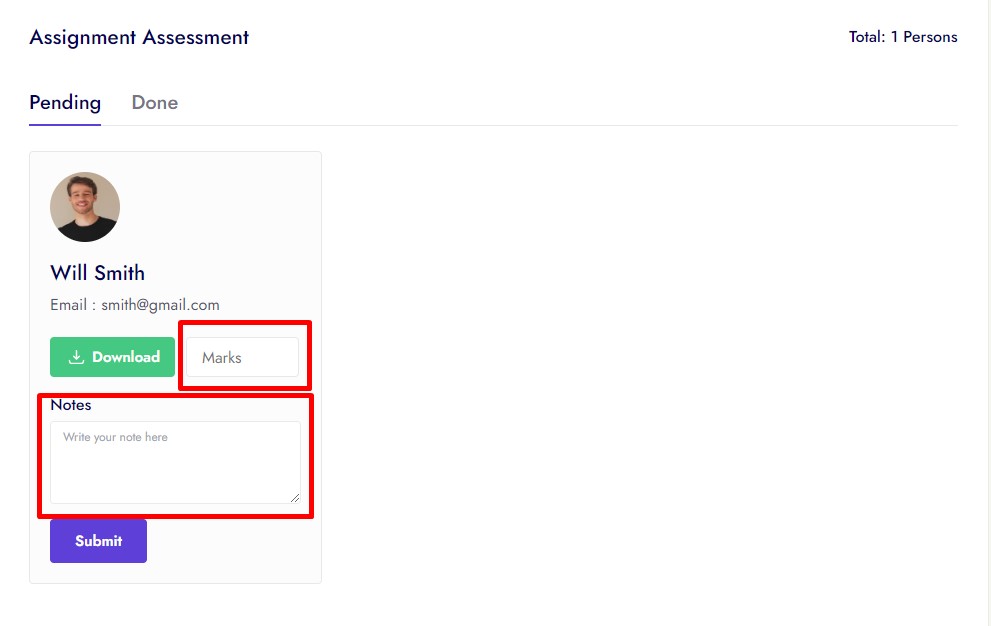
Courses Assignment


All Student


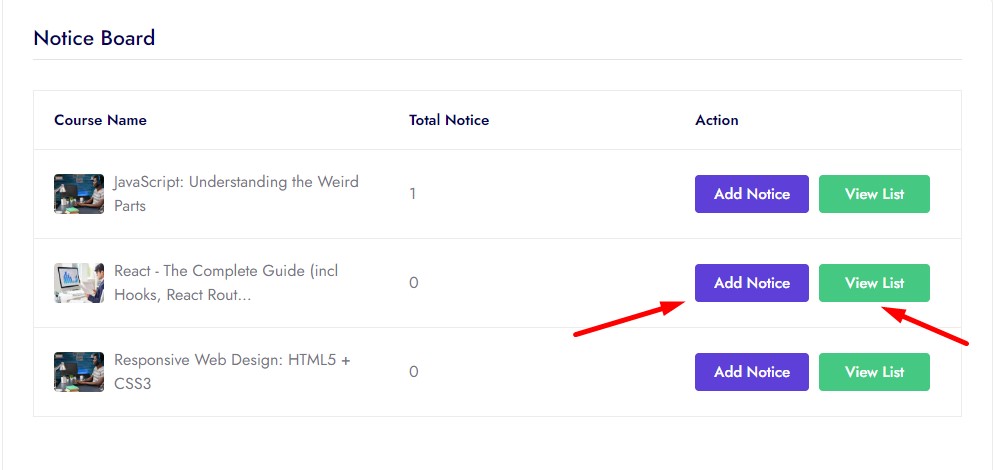
Notice Board


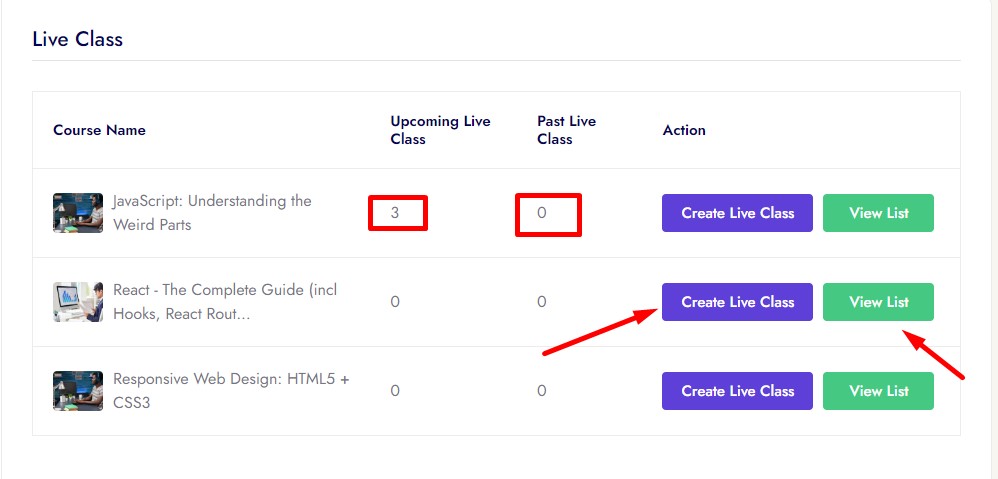
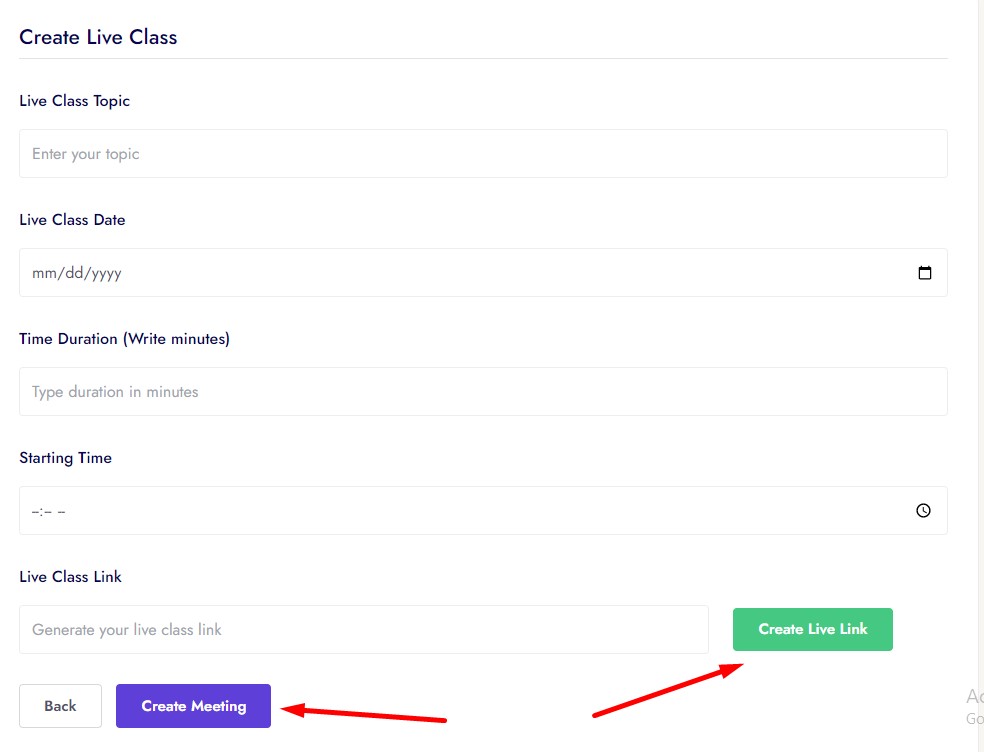
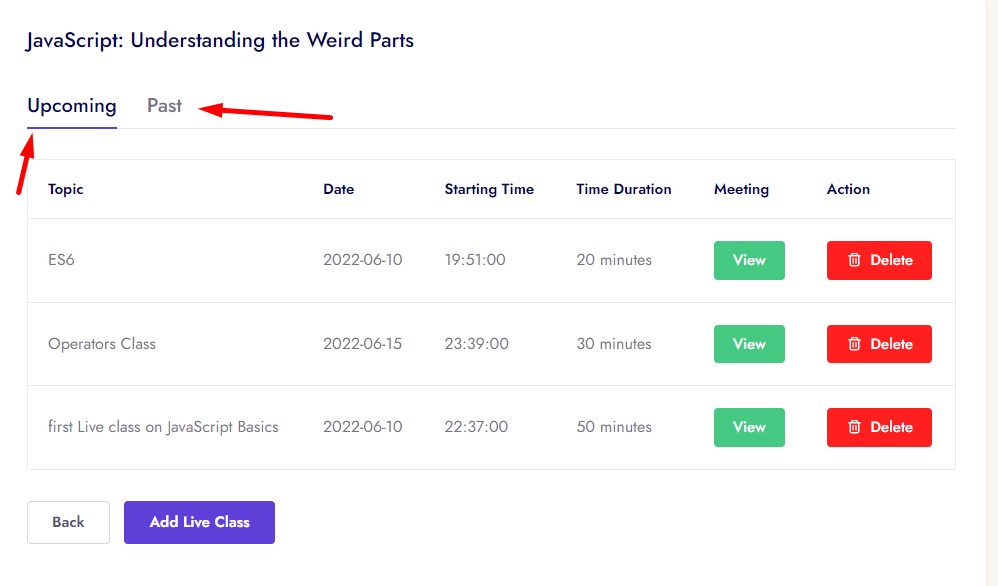
Live Class
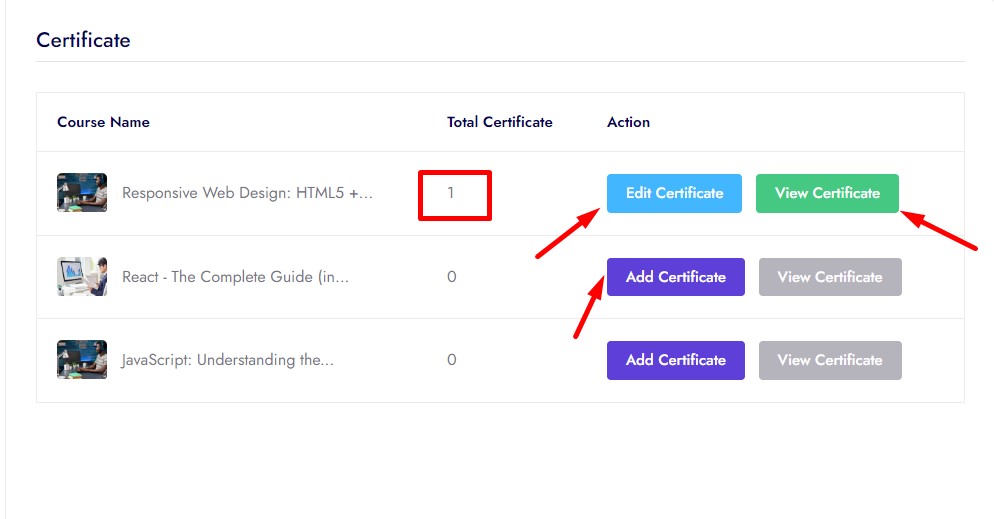
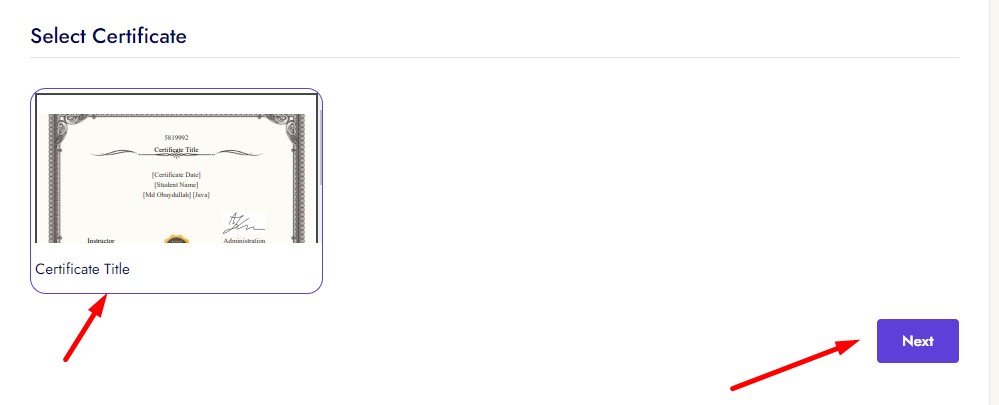
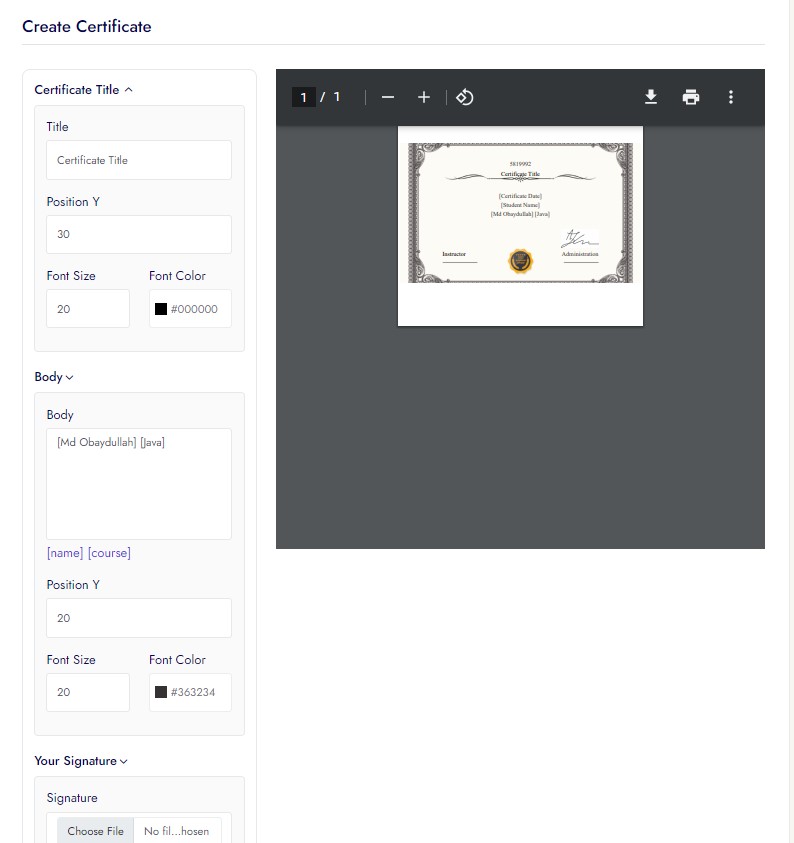
Certificate
Discussion
Finance
Instructor can see how mane student enrolled his/her course, total courses, total earning, total available balance, withdraw money, request withdraw amount, can withdraw from here and sales per month sales statistics.
Finance has 2 options
Analysis

Withdraw History

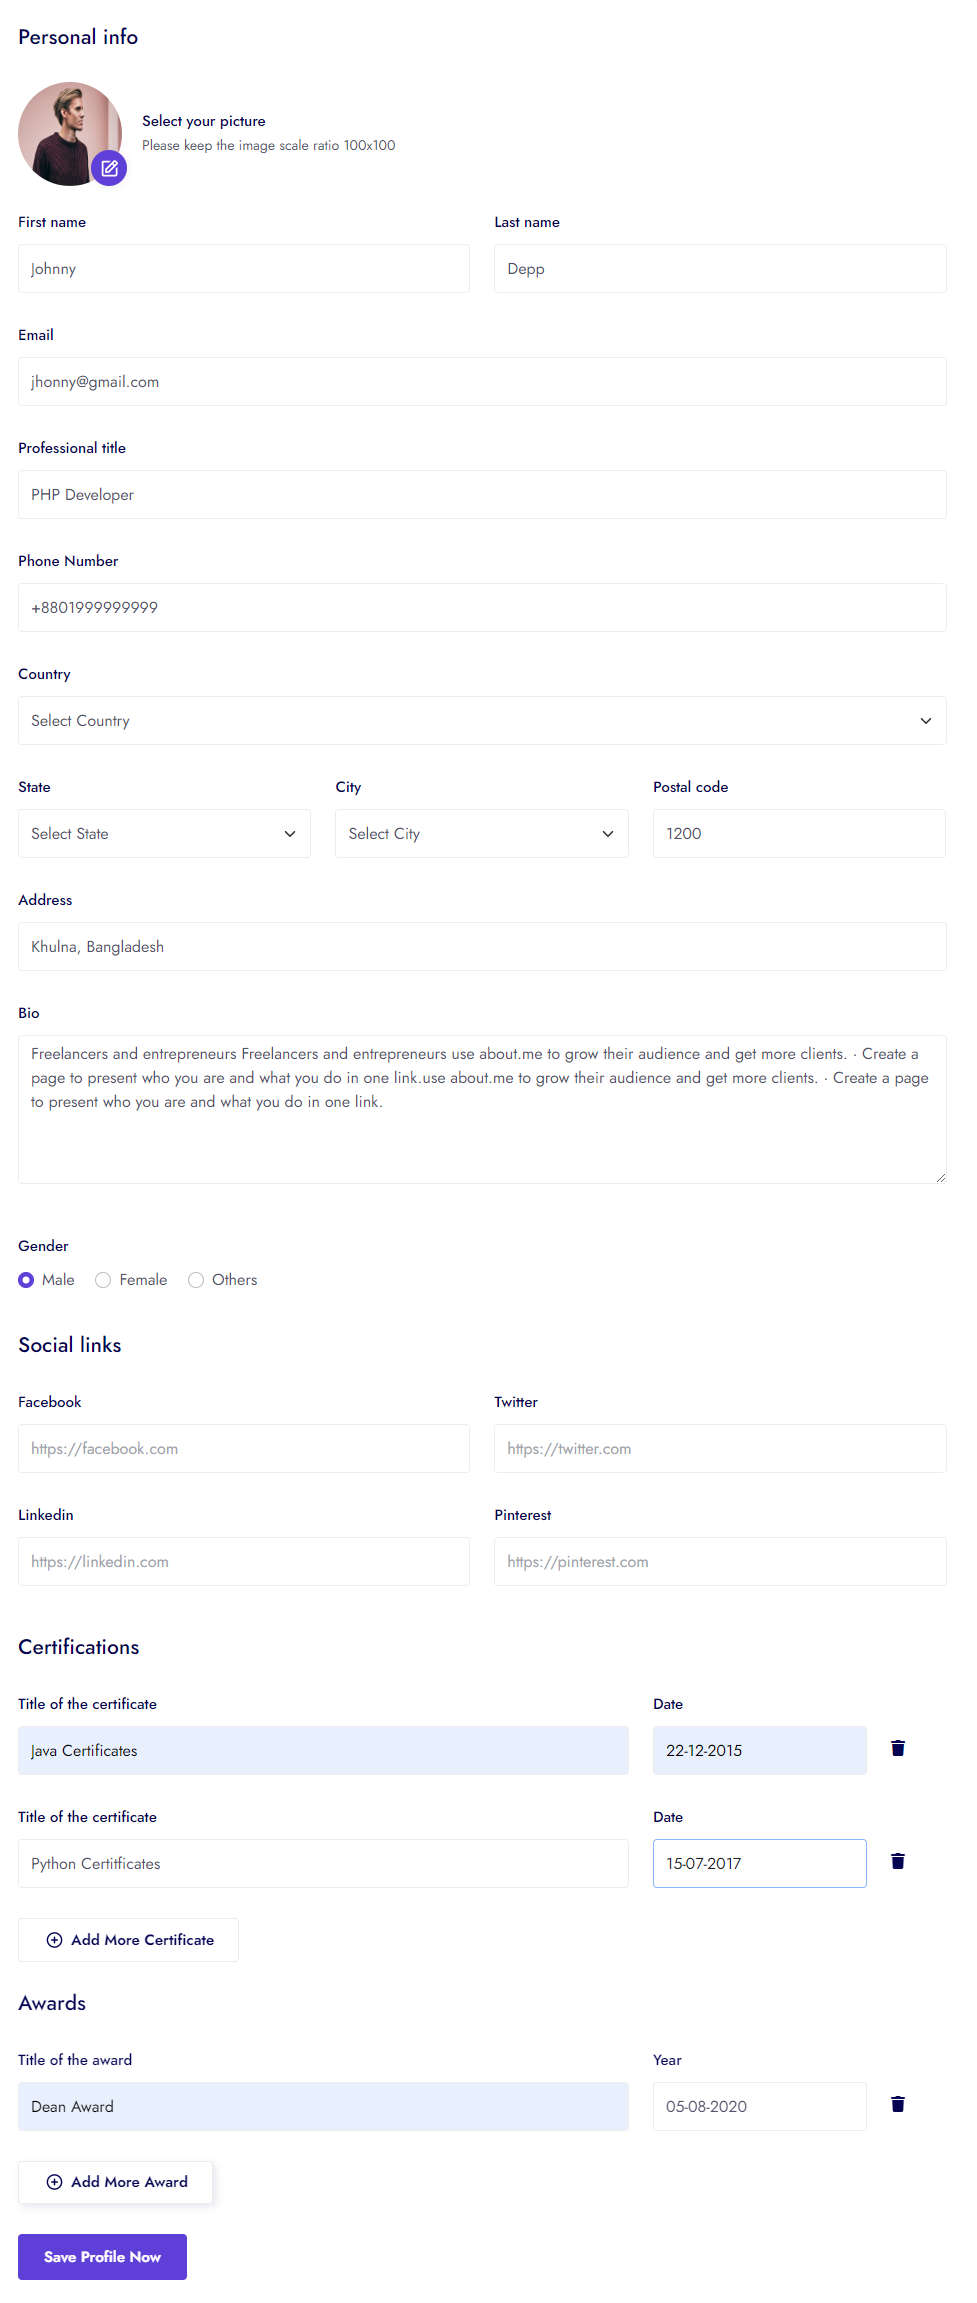
Profile
Instructor can update his profile from here
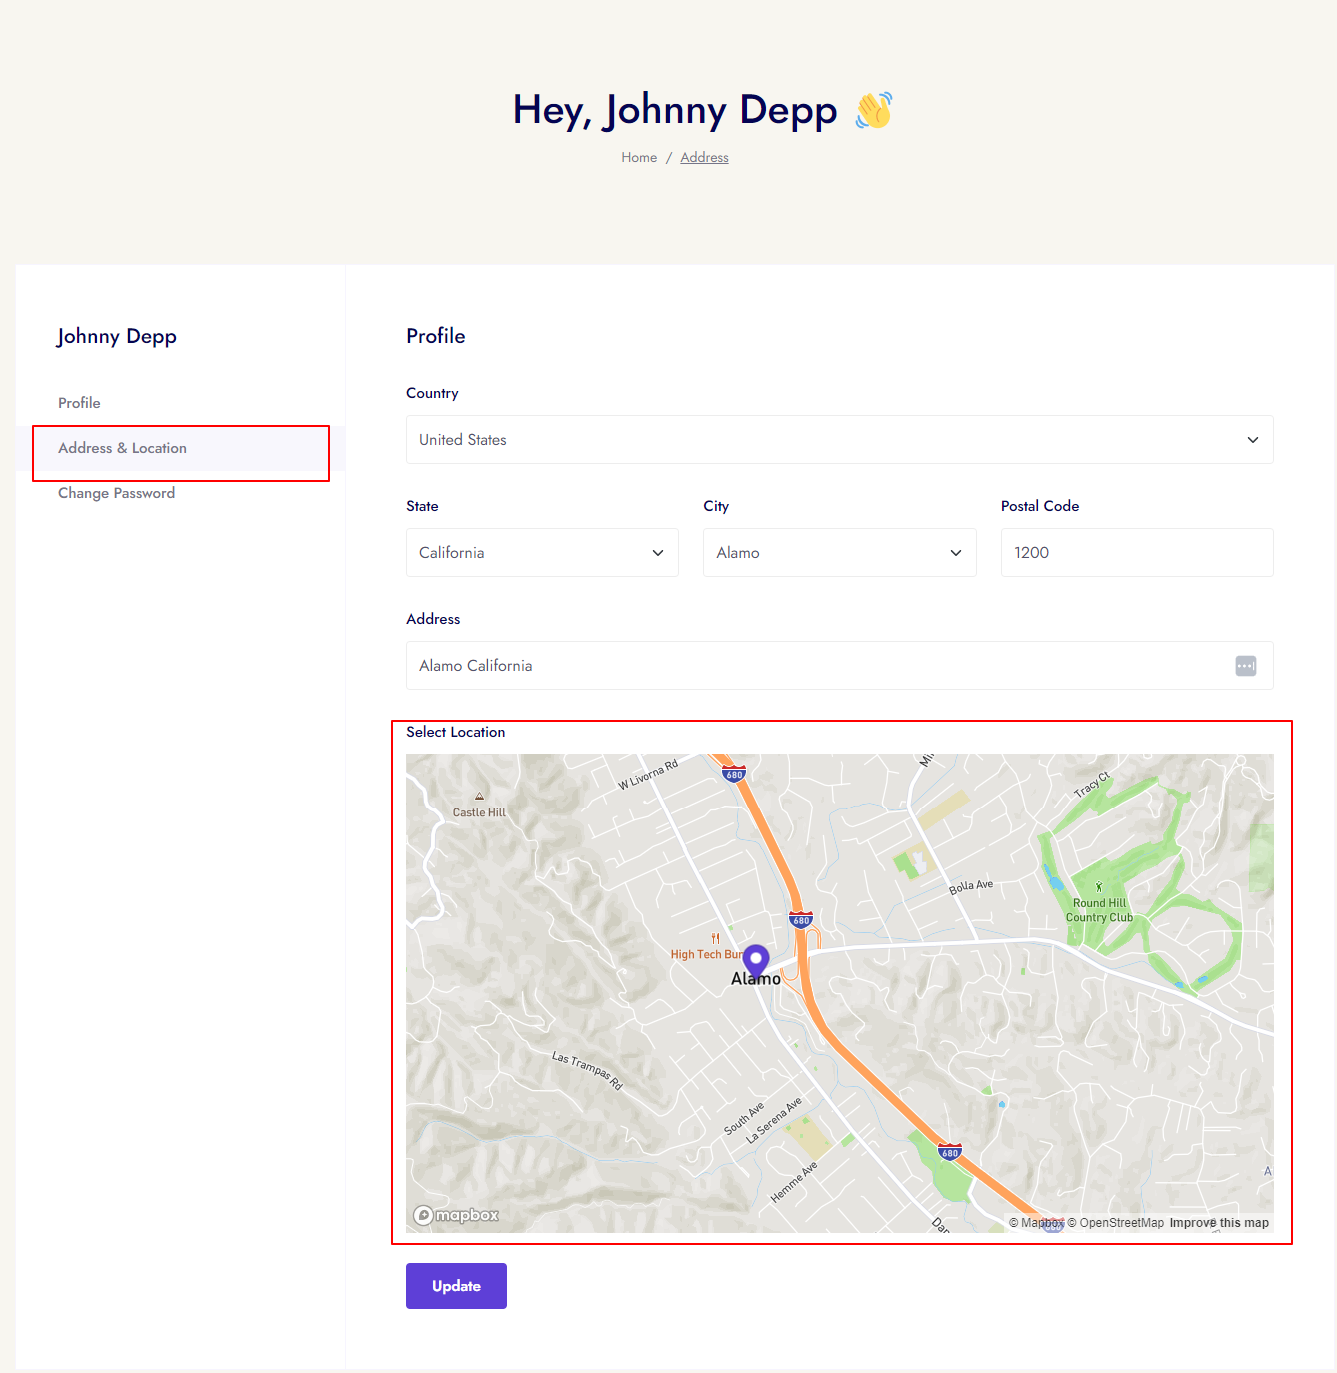
Geolocation Search
Instructor can update his geolocation

Saas Module
Instructor can purchase Saas plan


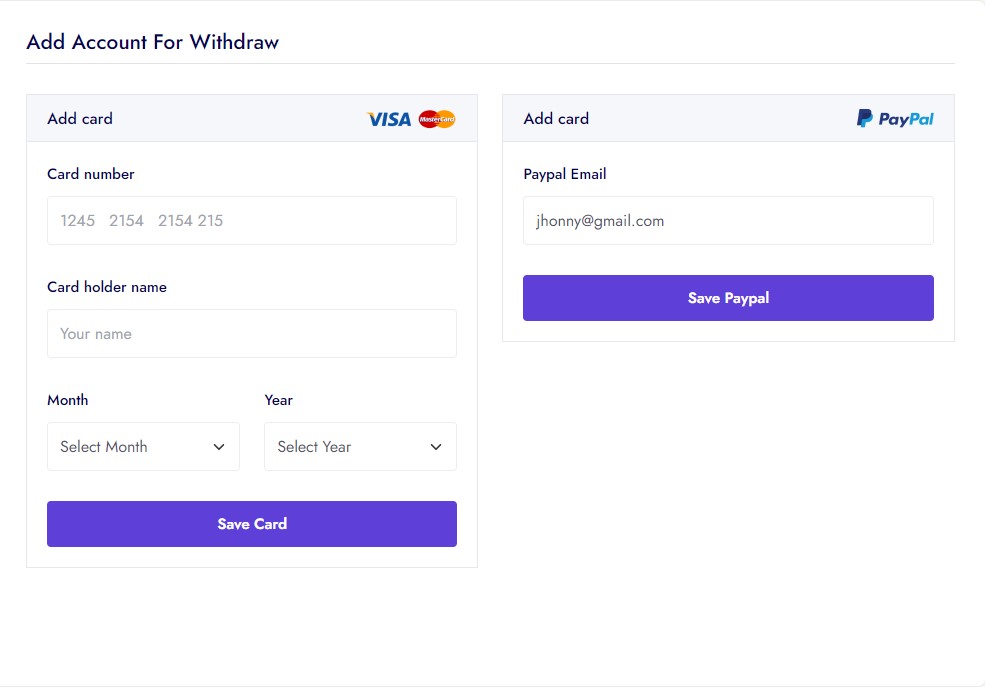
Payment Settings
Instructor can withdraw his income by his/her account. His/her account info add, update form here.
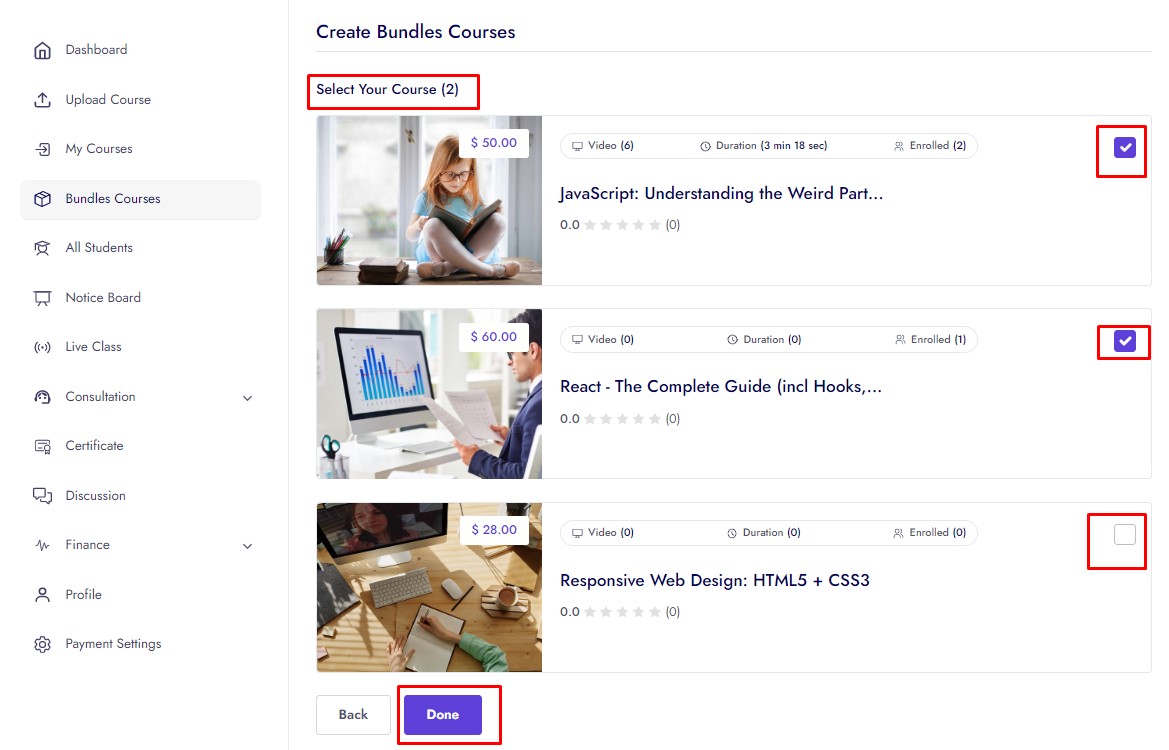
Bundle Offer
Instructor can create, edit, delete bundle from his/her courses. and your created bundle course you can change active/disable. Some create bundle and course add/remove images given here.


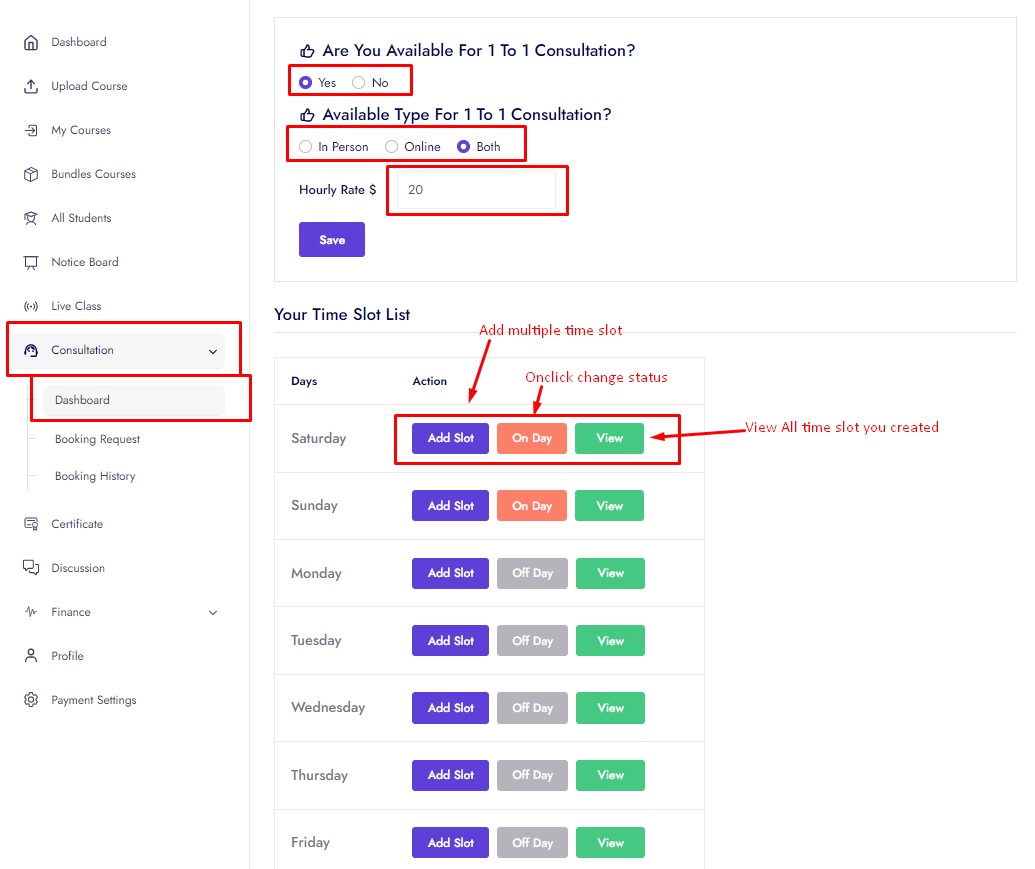
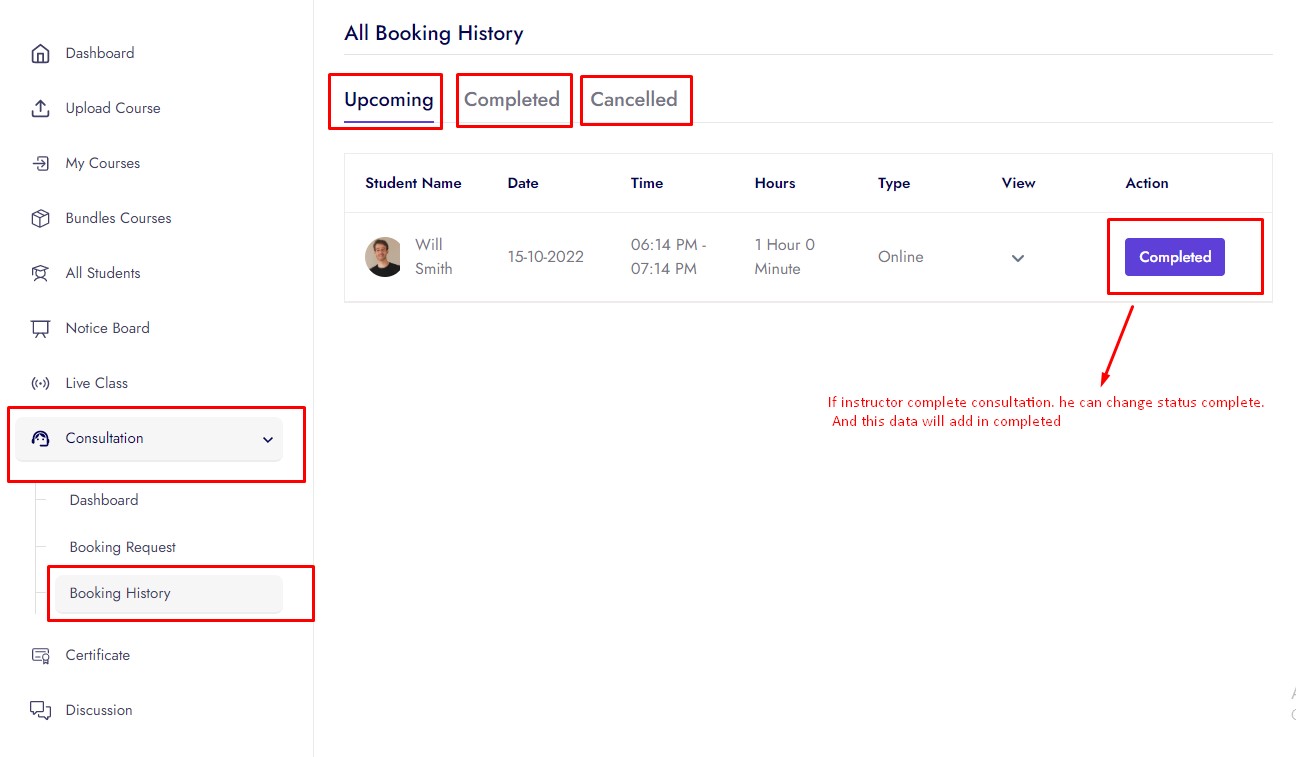
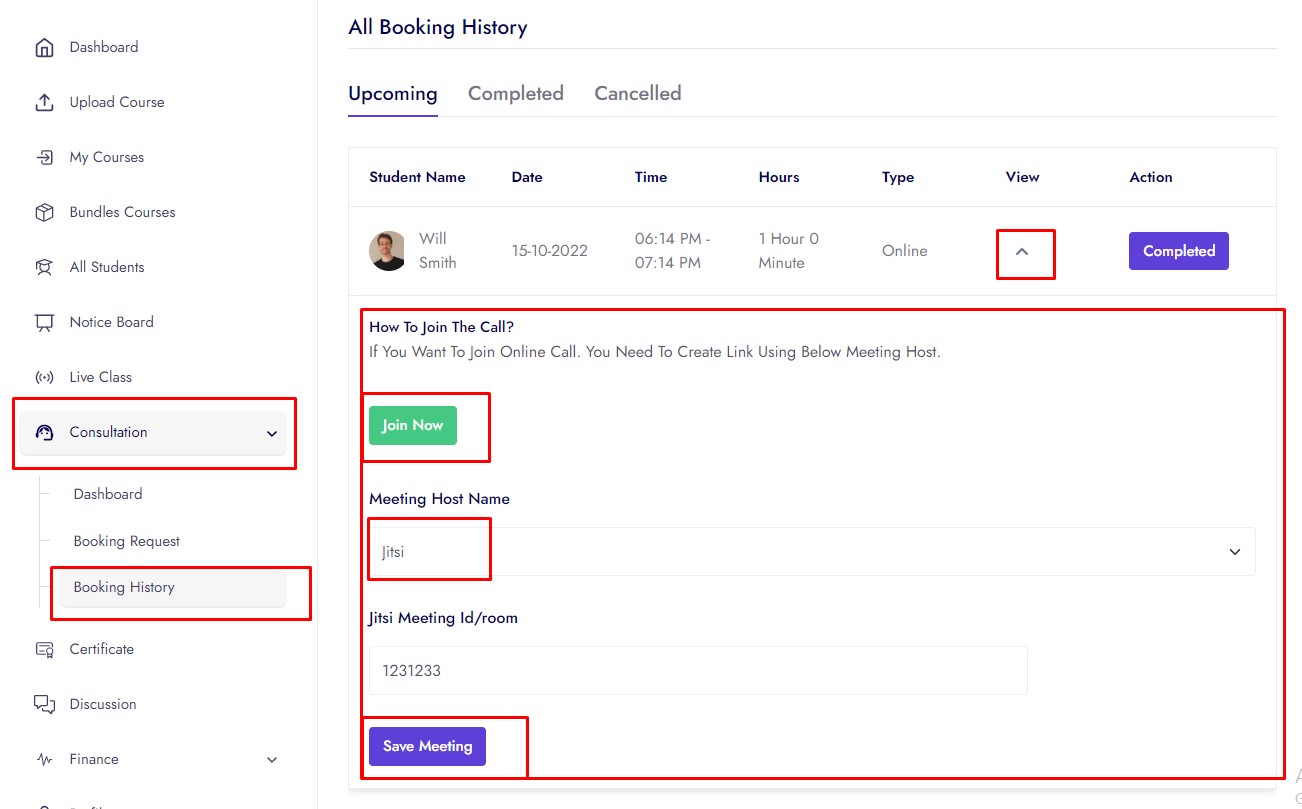
Consultation
In consultation instructor see 3 options. Options are:
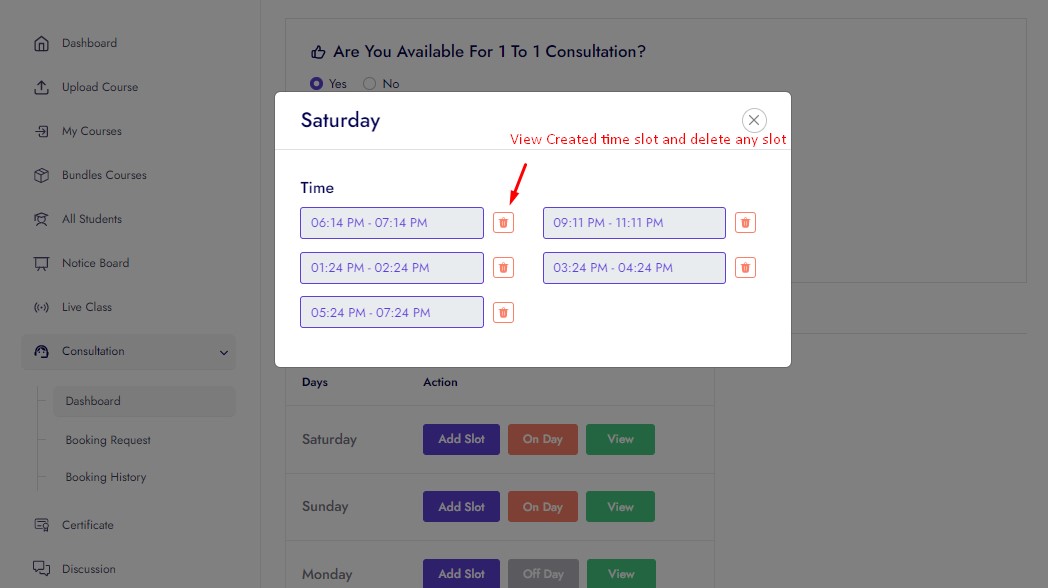
In dashboard instructor set available status for consultation, set available type, set hourly rate, set which day his/her off day/on day, set every day time slot.

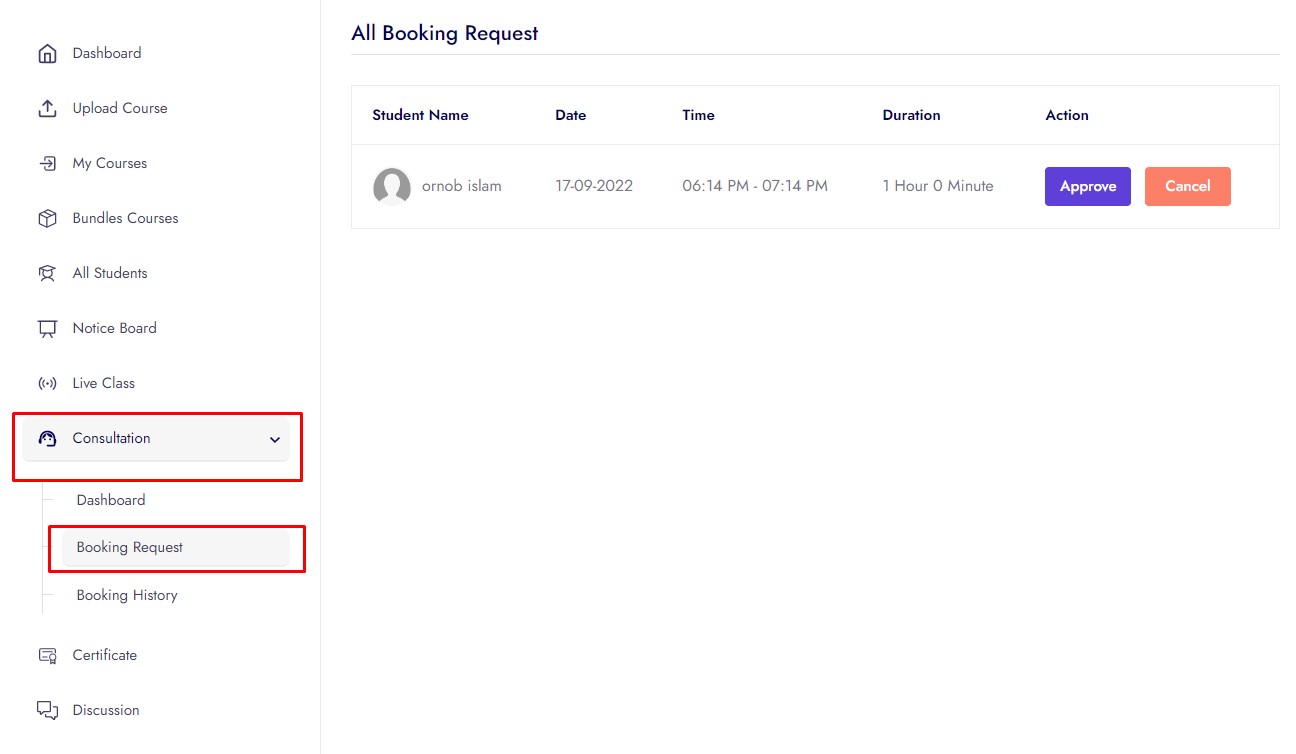
In Booking Request instructor can can approve and cancel consultation request.
In Booking History instructor can can see consultation approved, completed and cancel request history.
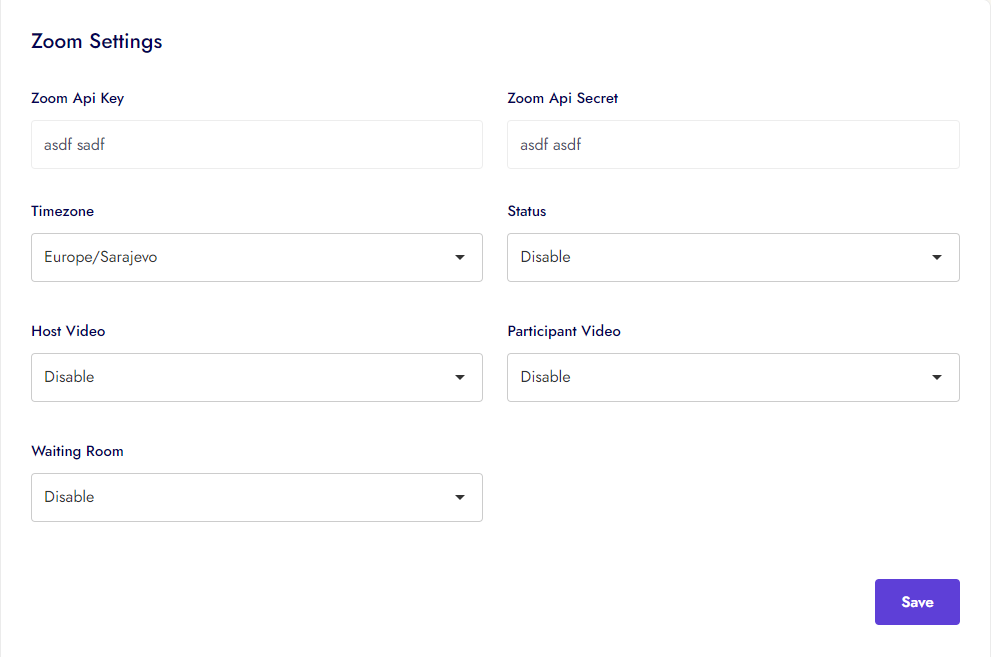
Zoom Setting
Instructor can manage his Zoom Setting
Google Meet
Instructor can manage his Google Meet

Organization Account Activities
Dashboard
Manage Instructor
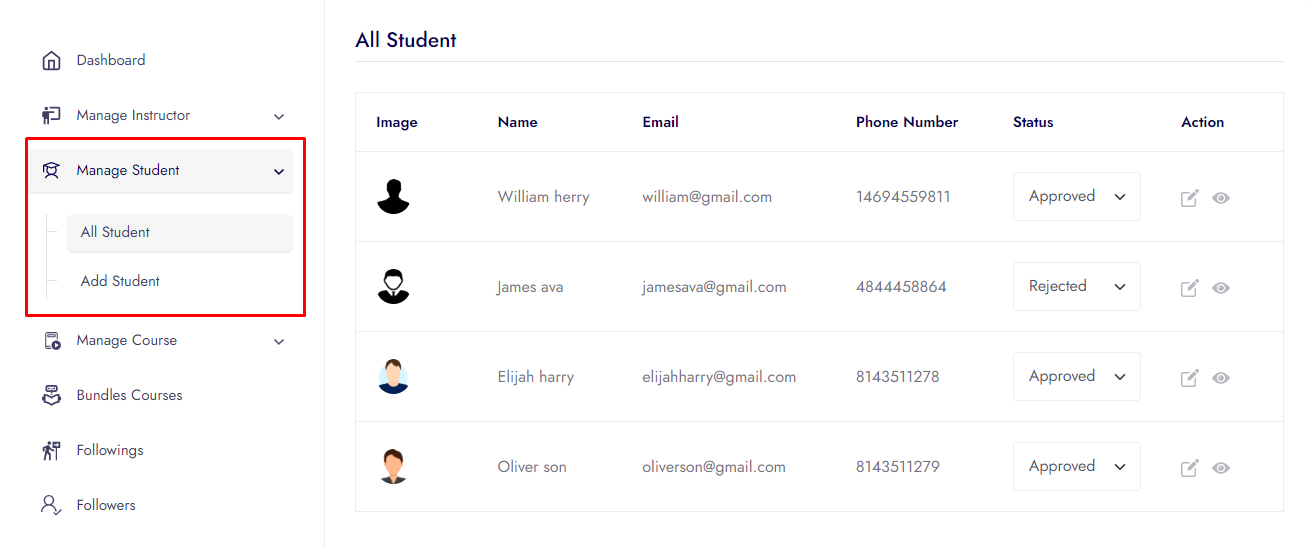
Manage Student
Upload Courses
Course drip content, access period and old price
Note:If organization do not upload any lesson, he/she can't go to next process.
Organization can upload 8 different types lesson.
Organization can iSpring, SCORM all version, xAPI (The Experience API), cmi5 (a companion to xAPI), AICC Course
My Courses
Courses Resources
Courses Quiz
Quiz has 2 types
- 1. Multiple Choice
- 2. True-False
Courses Assignment
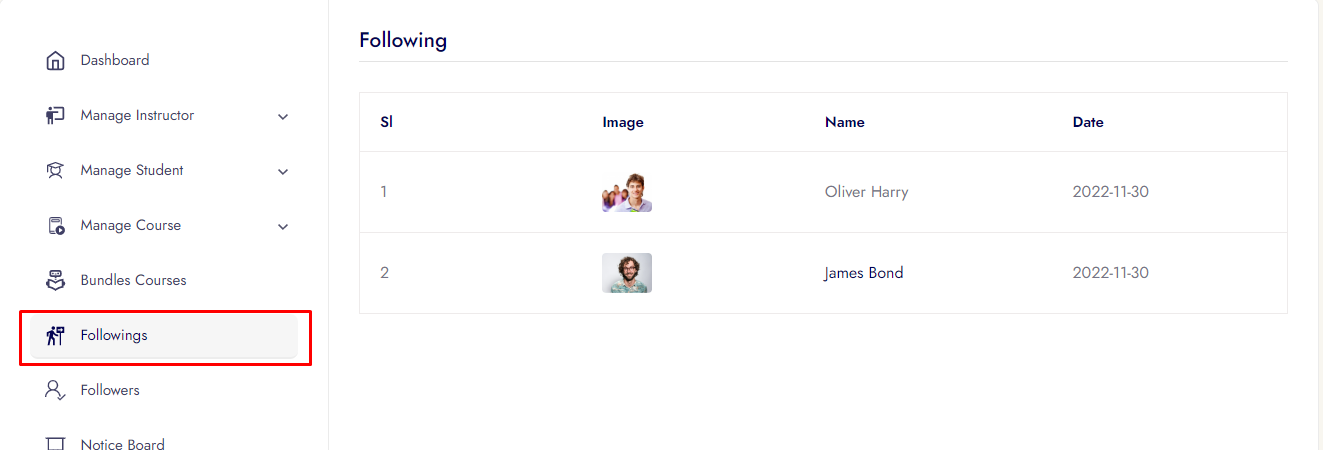
Followings
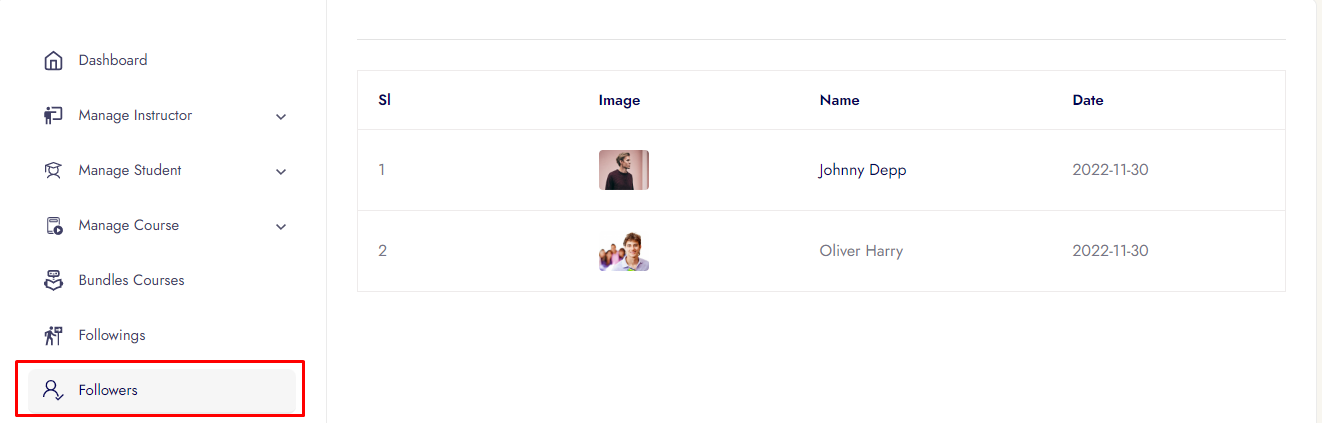
Followers
Notice Board
Live Class
Certificate
Discussion
Finance
Organization can see how mane student enrolled his/her course, total courses, total earning, total available balance, withdraw money, request withdraw amount, can withdraw from here and sales per month sales statistics.
Finance has 2 options
Analysis
Withdraw History
Profile
Organization can update his profile from here
Geolocation Search
Organization can update his geolocation
Saas Module
Organization can purchase Saas plan
Payment Settings
Organization can withdraw his income by his/her account. His/her account info add, update form here.
Bundle Offer
Organization can create, edit, delete bundle from his/her courses. and your created bundle course you can change active/disable. Some create bundle and course add/remove images given here.
Consultation
In consultation organization see 3 options. Options are:
In dashboard organization set available status for consultation, set available type, set hourly rate, set which day his/her off day/on day, set every day time slot.
In Booking Request organization can can approve and cancel consultation request.
In Booking History organization can can see consultation approved, completed and cancel request history.
Zoom Setting
Organization can manage his Google Meet
Google Meet
Organization can manage his Google Meet
Admin Account Activities
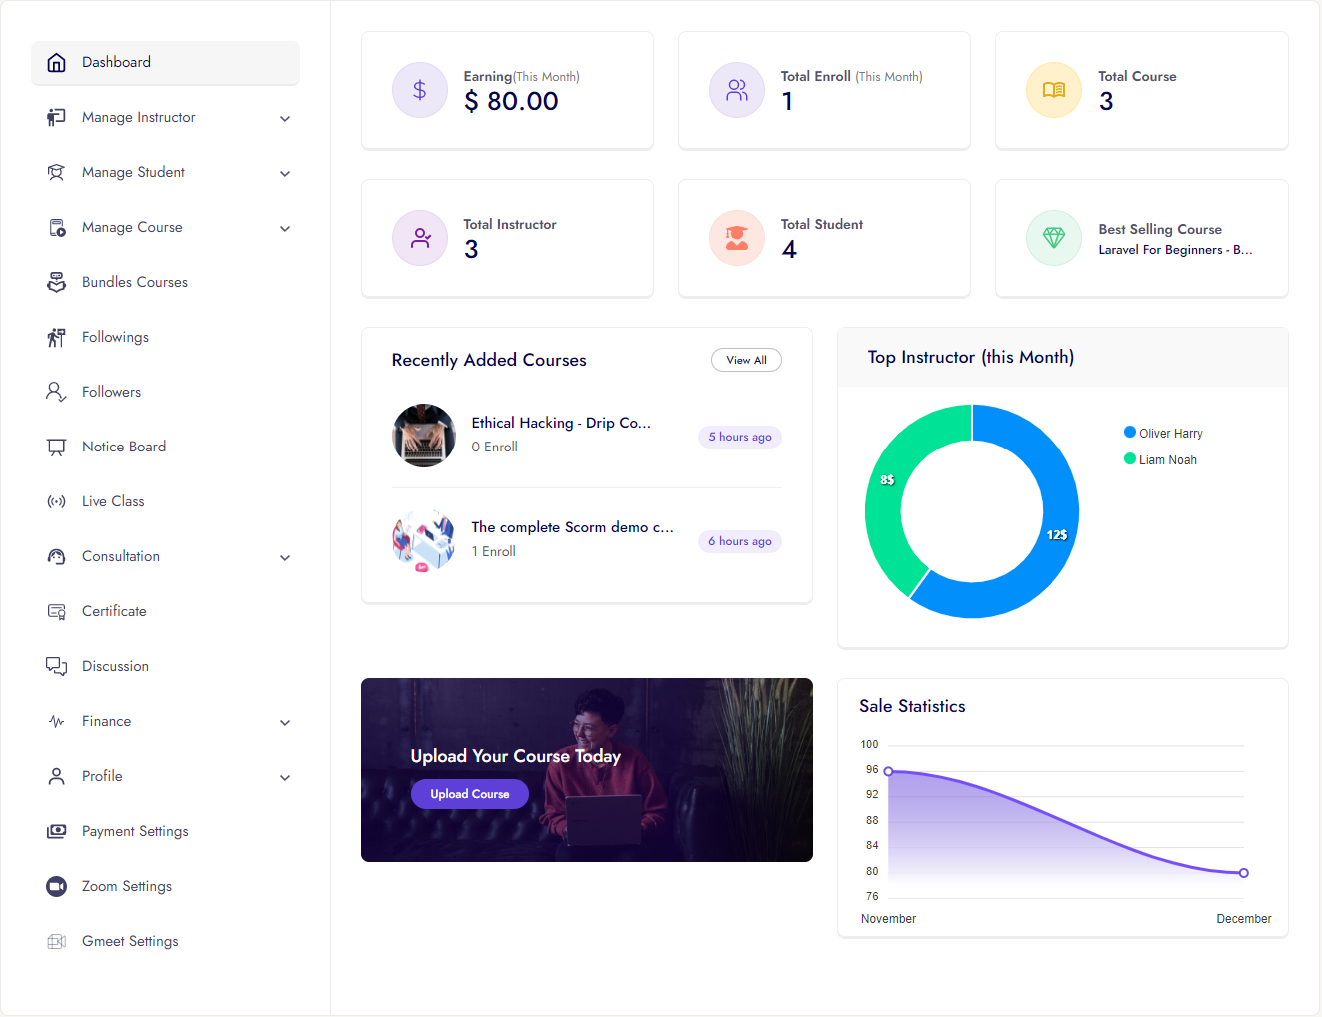
Admin Dashboard
Admin can see all the key points/information from the dashboard. And also from the dashboard admin can see all the graph and chart information.

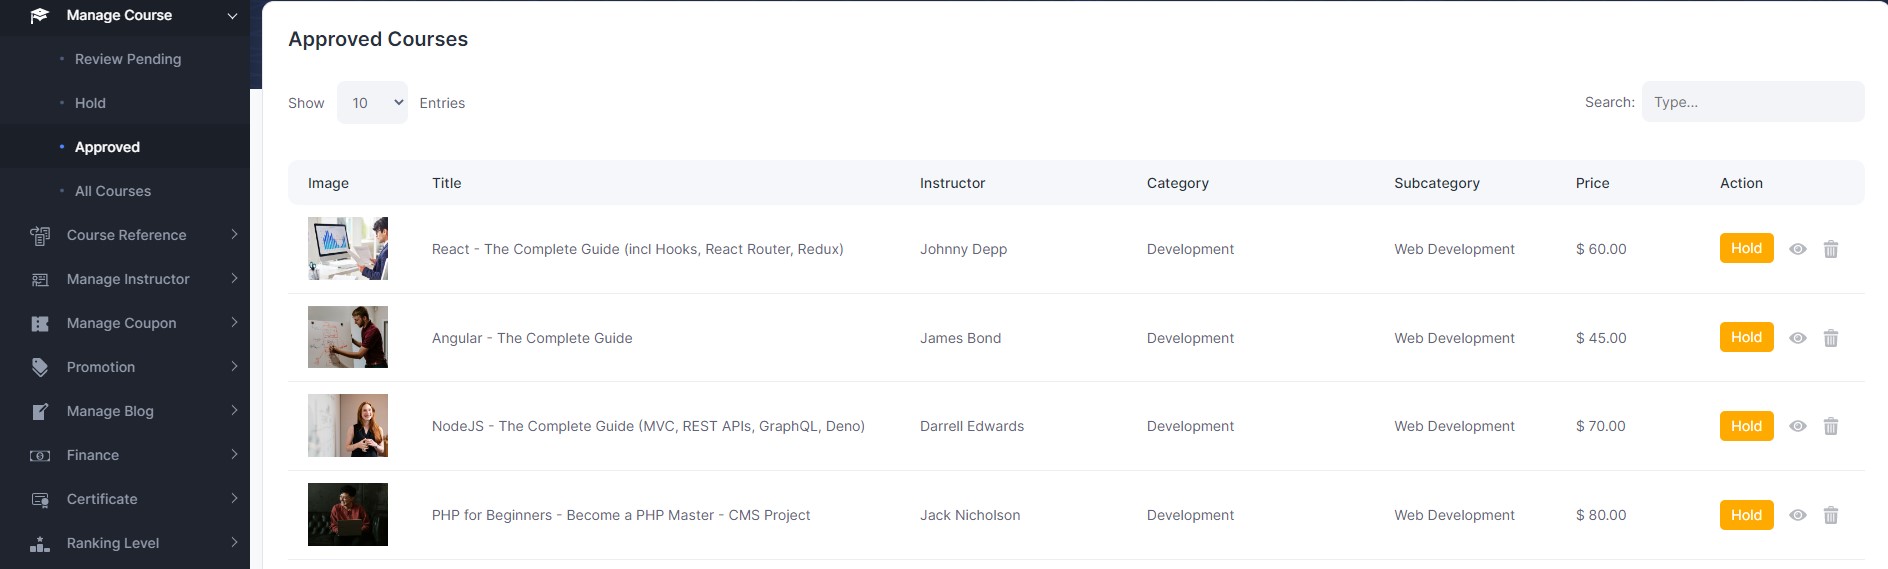
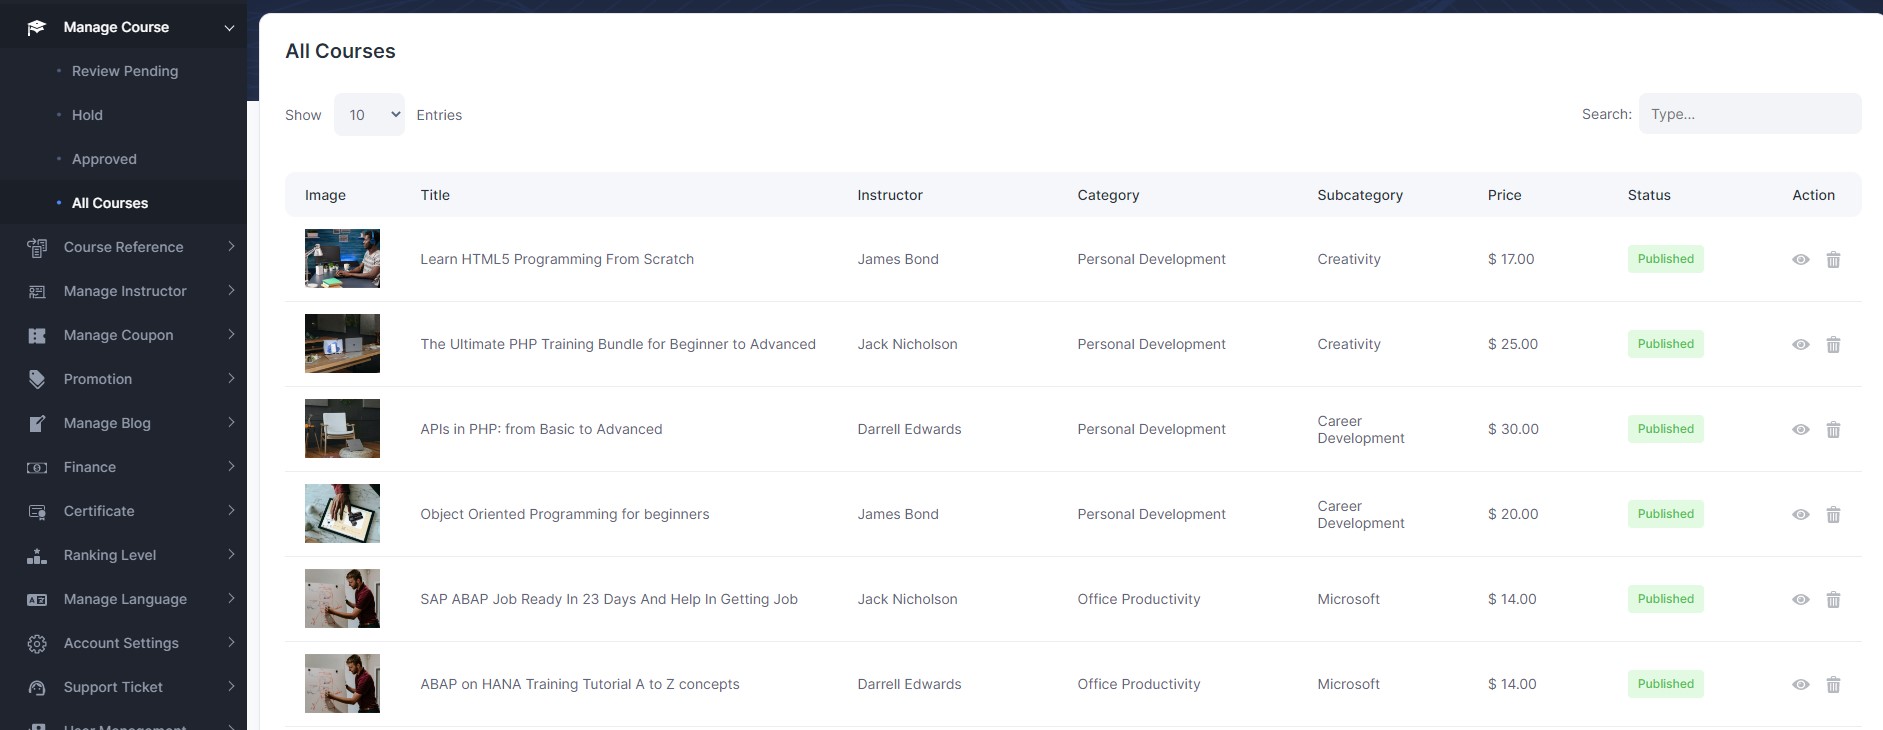
Manage Course
Admin can manage all activity for course management from here.
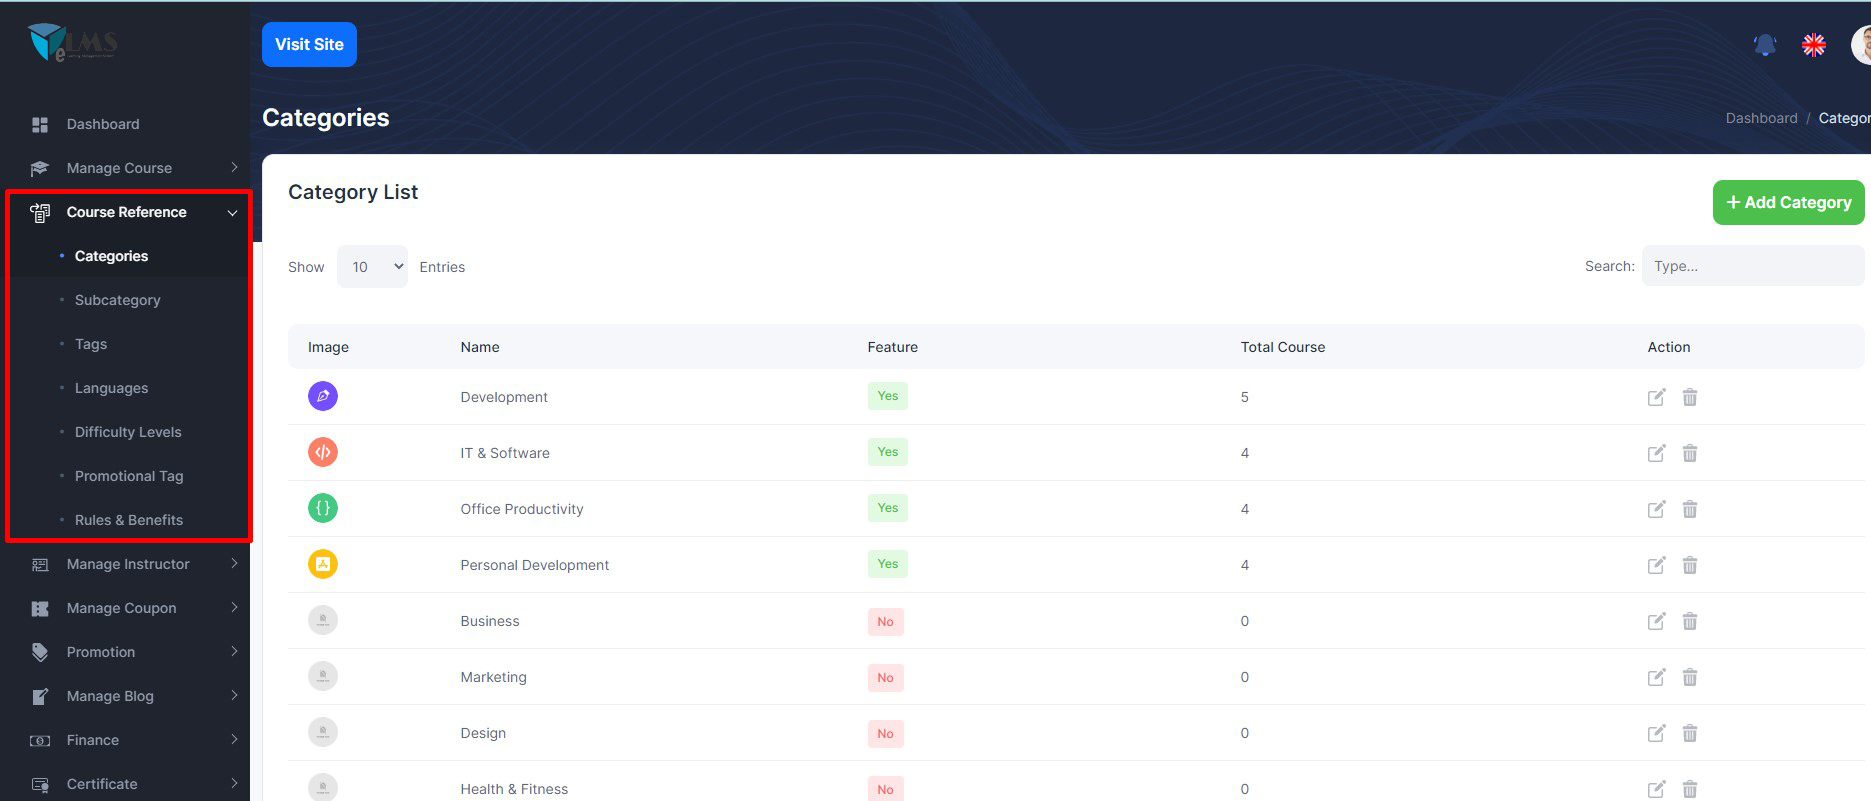
Course Reference
For course upload purpose admin can create all the course related important field from here.
Course reference has many functions. Given here-
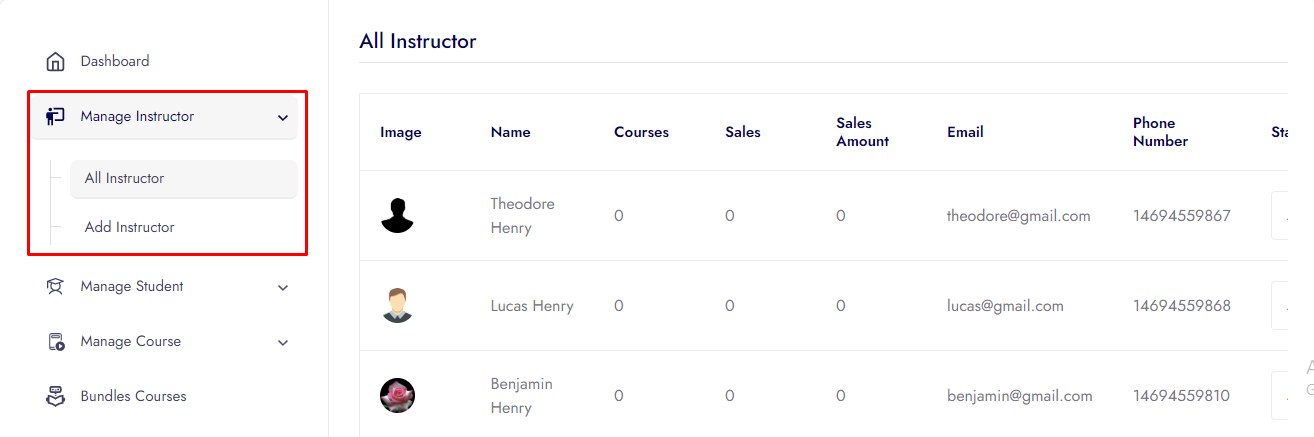
Manage Instructor
Admin can manage all the instuctors (Pending application to approved, instructor details, delete)
Manage Instrutor has many functions. Given here

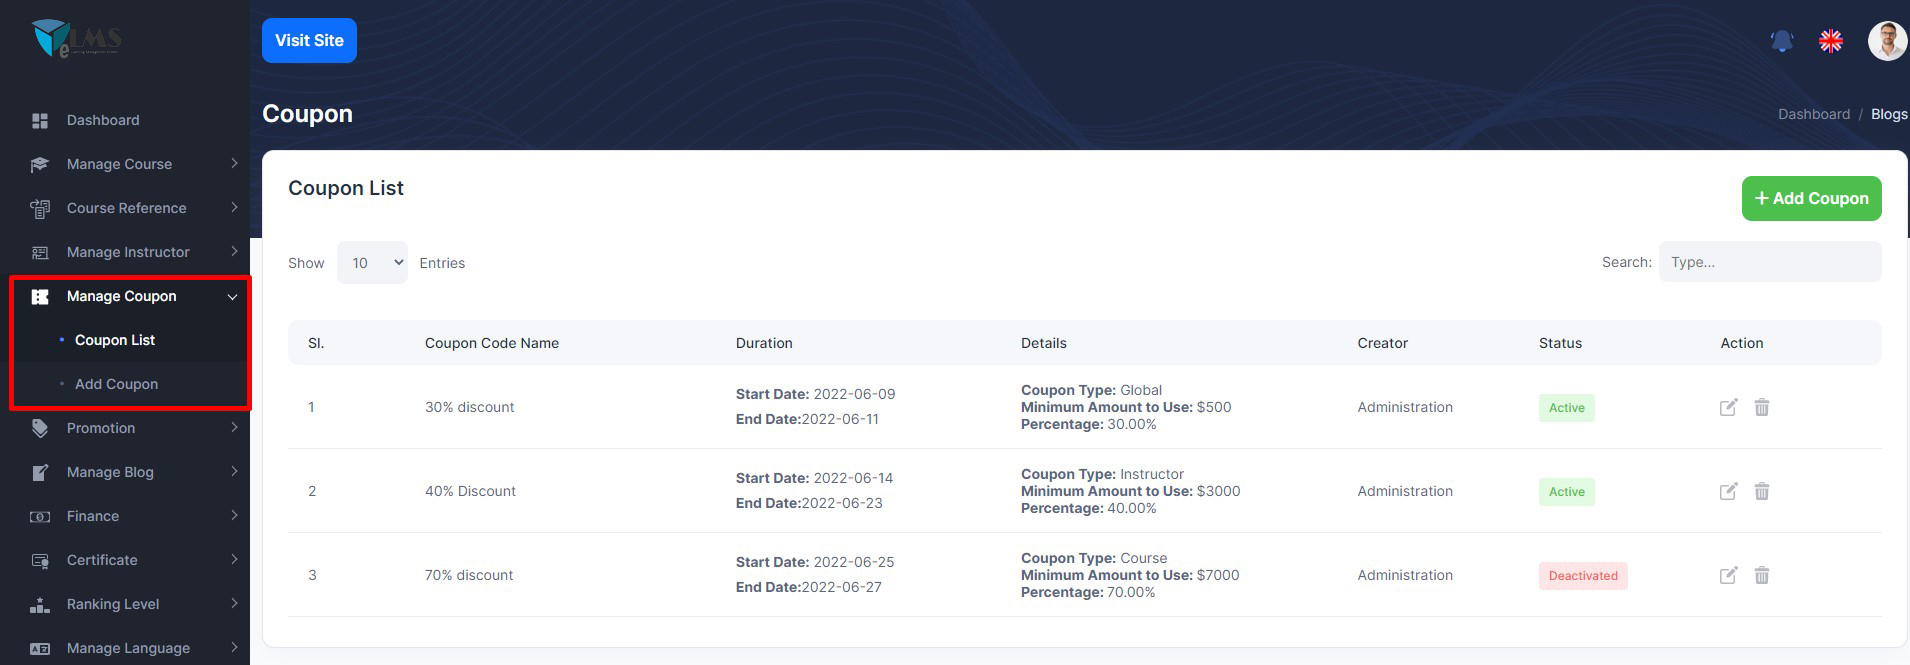
Manage Coupon
Admin can create 3 types coupon
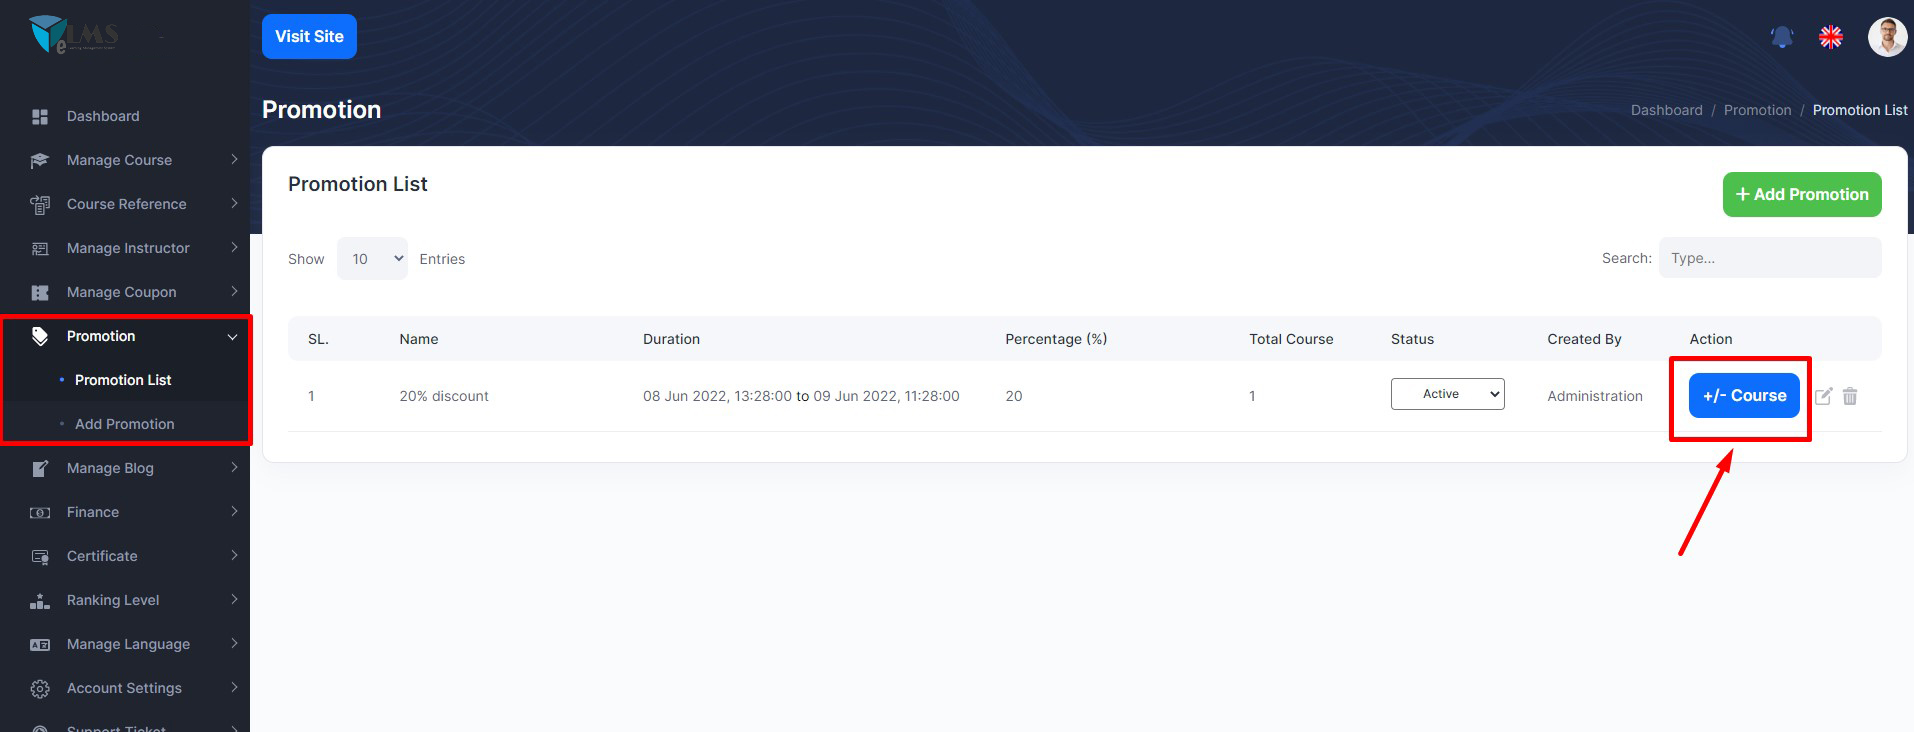
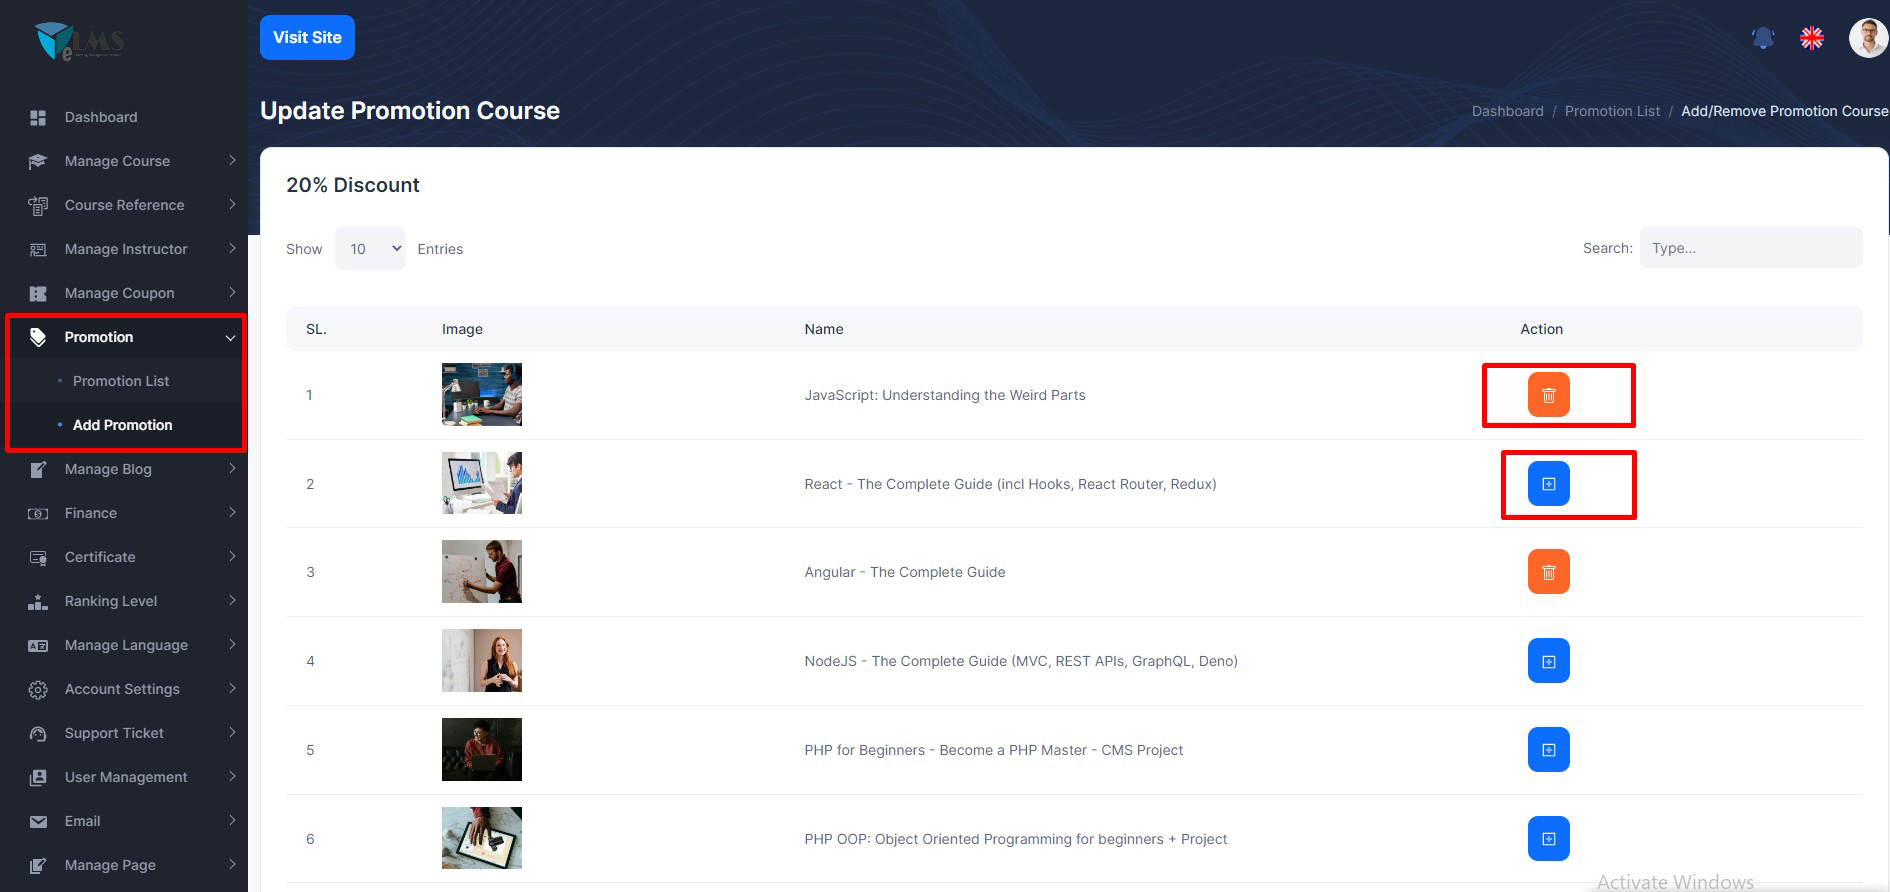
Manage Promotion
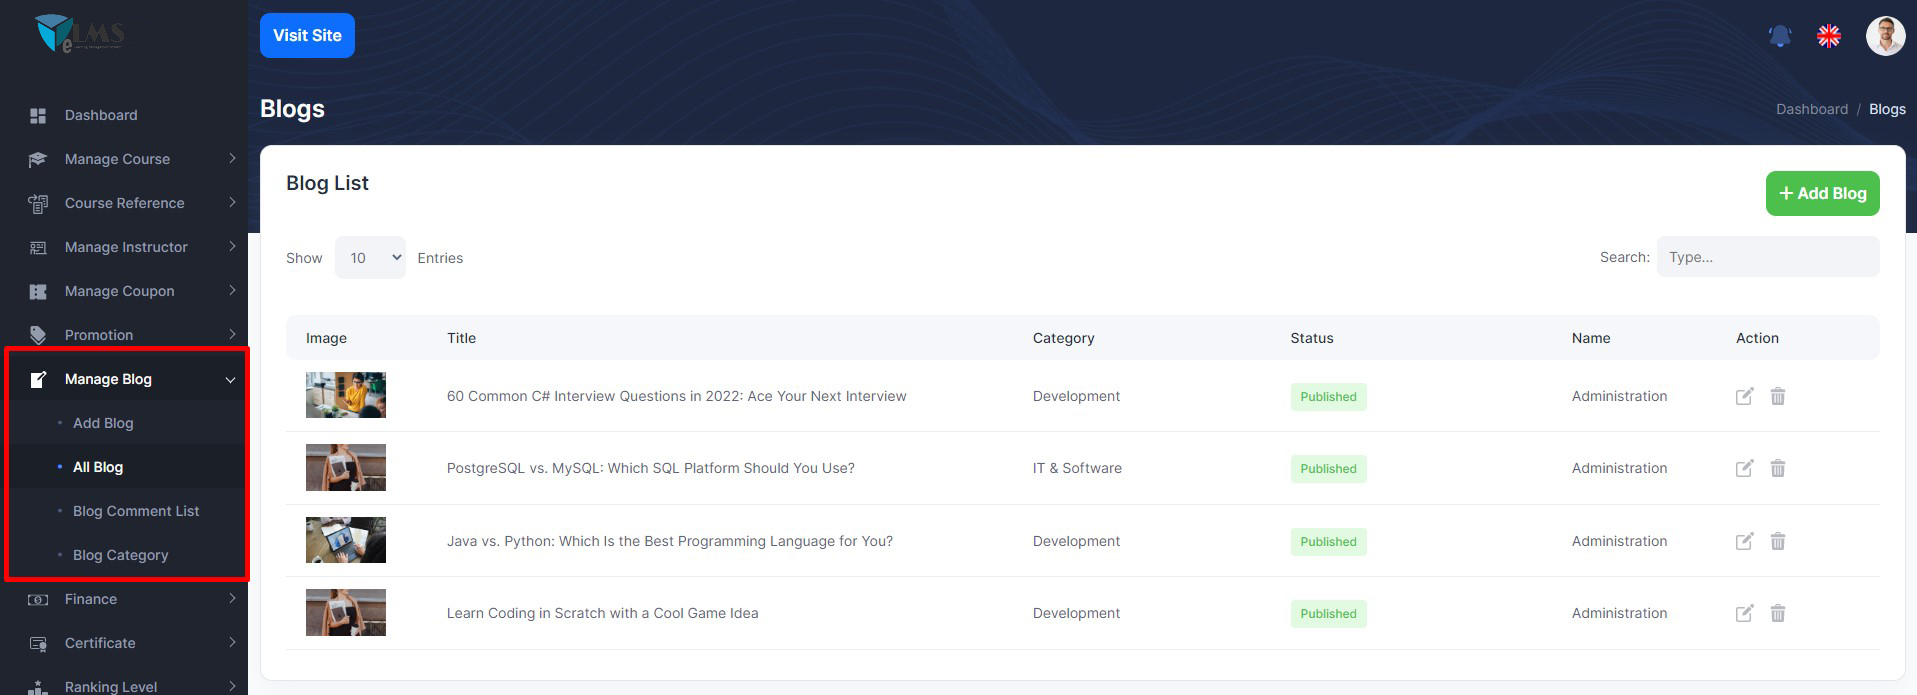
Manage Blog
Blog has many functions. Given here-
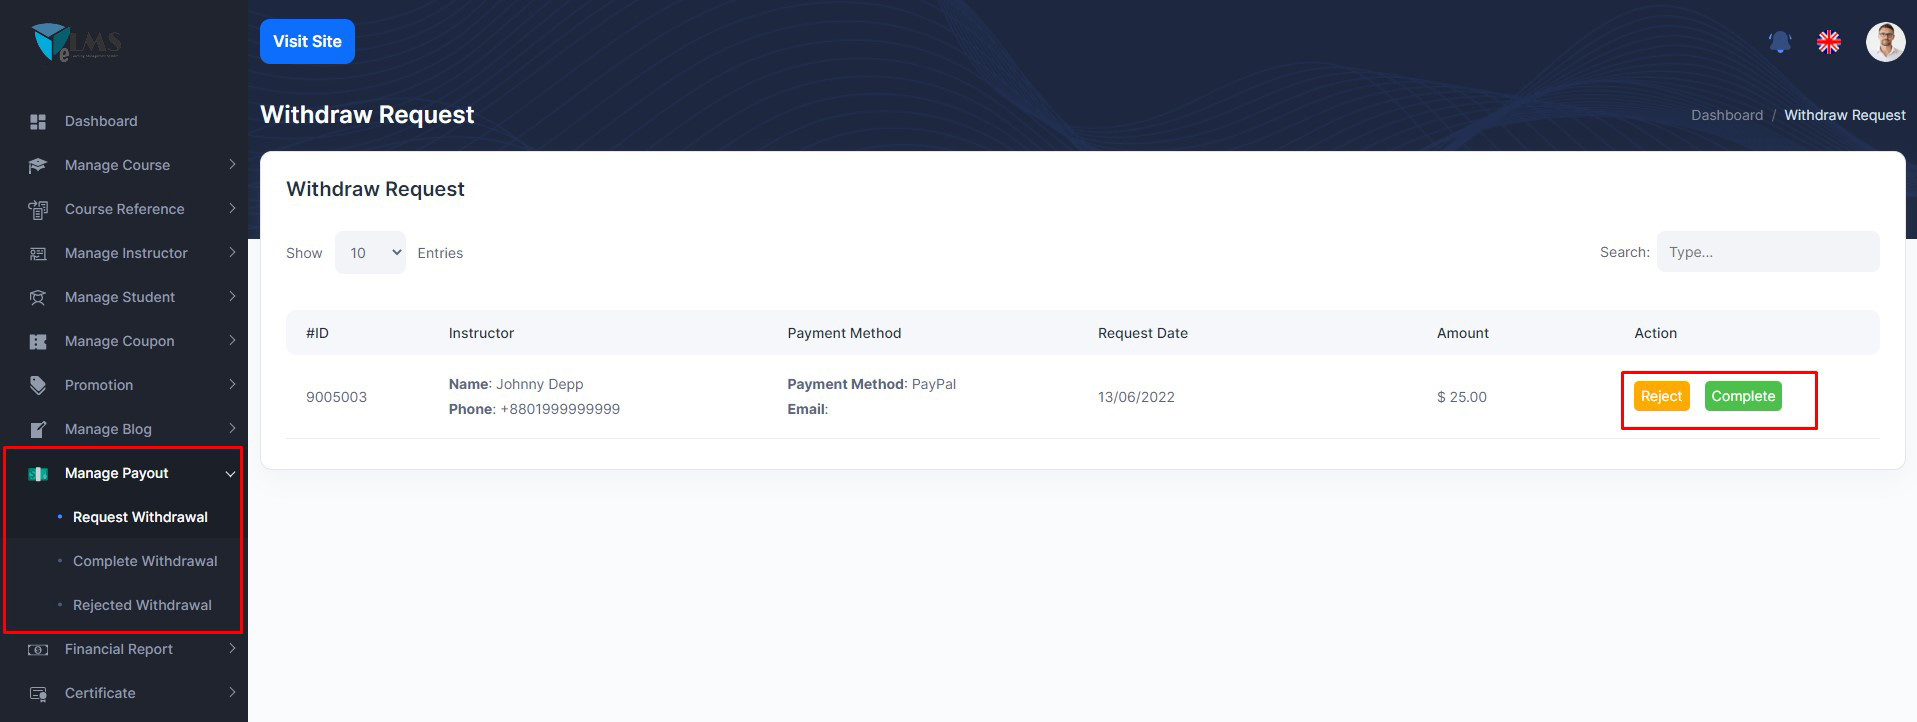
Manage Finance
Manage Payout has many functions. Given here-
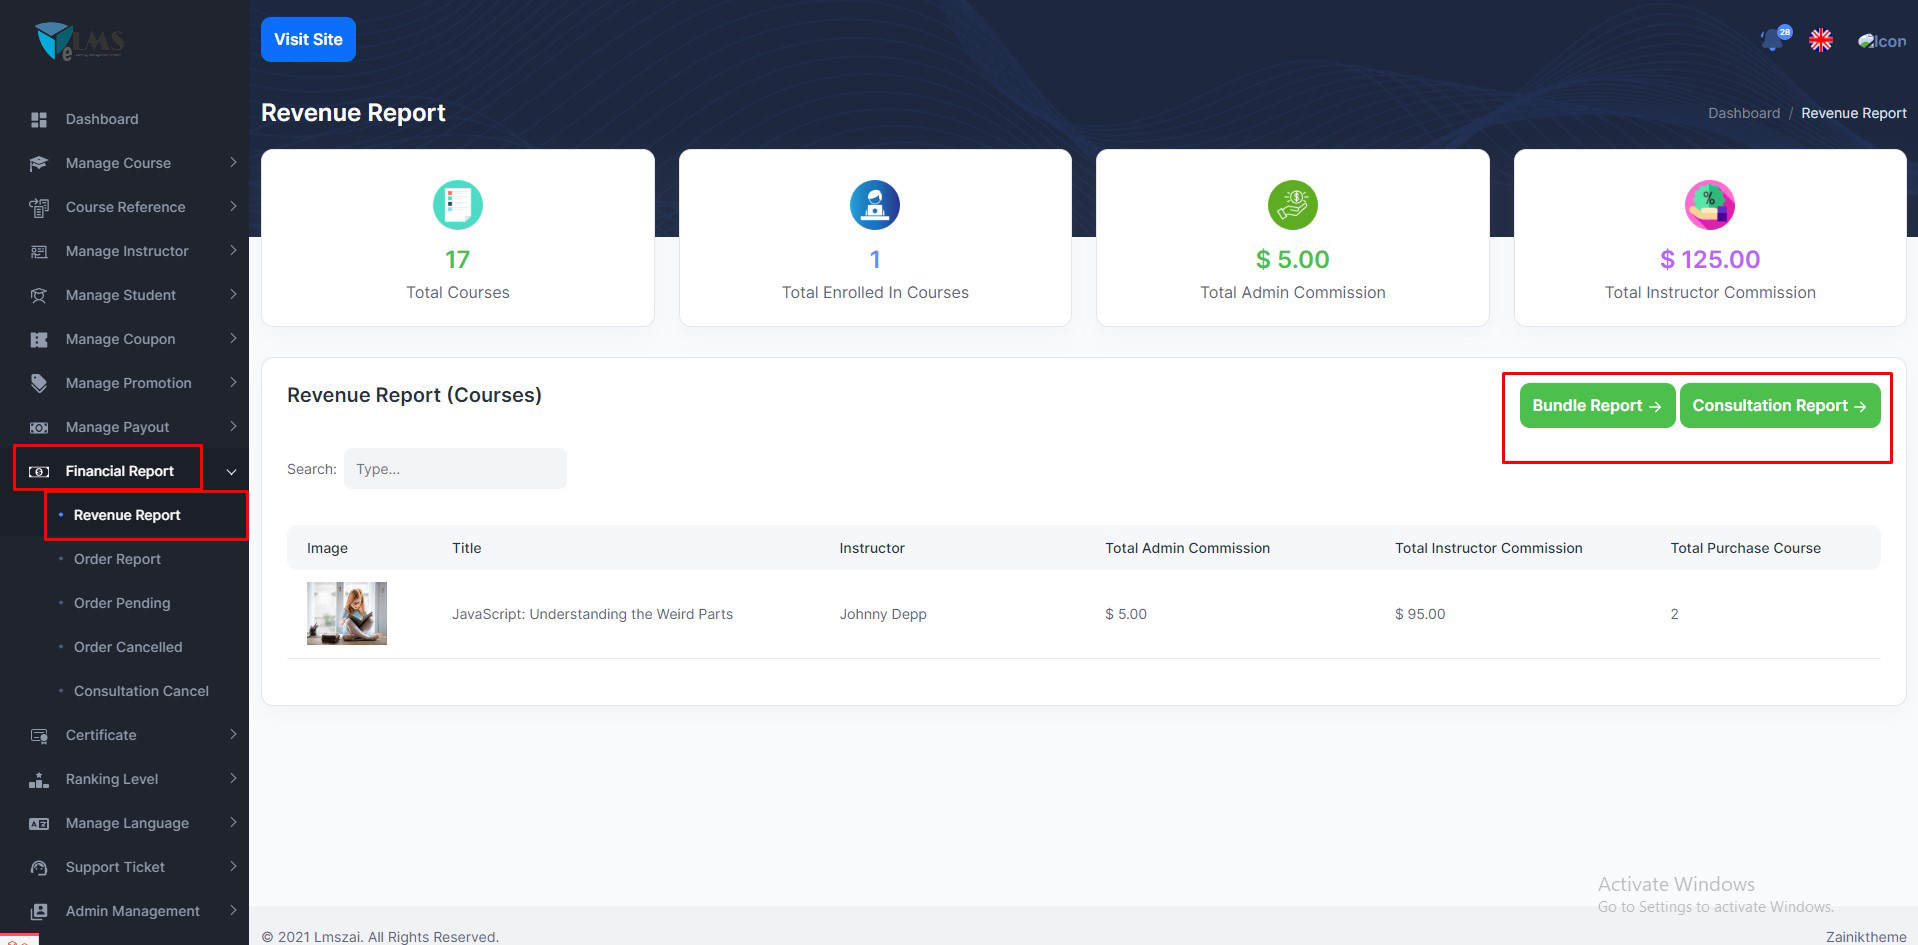
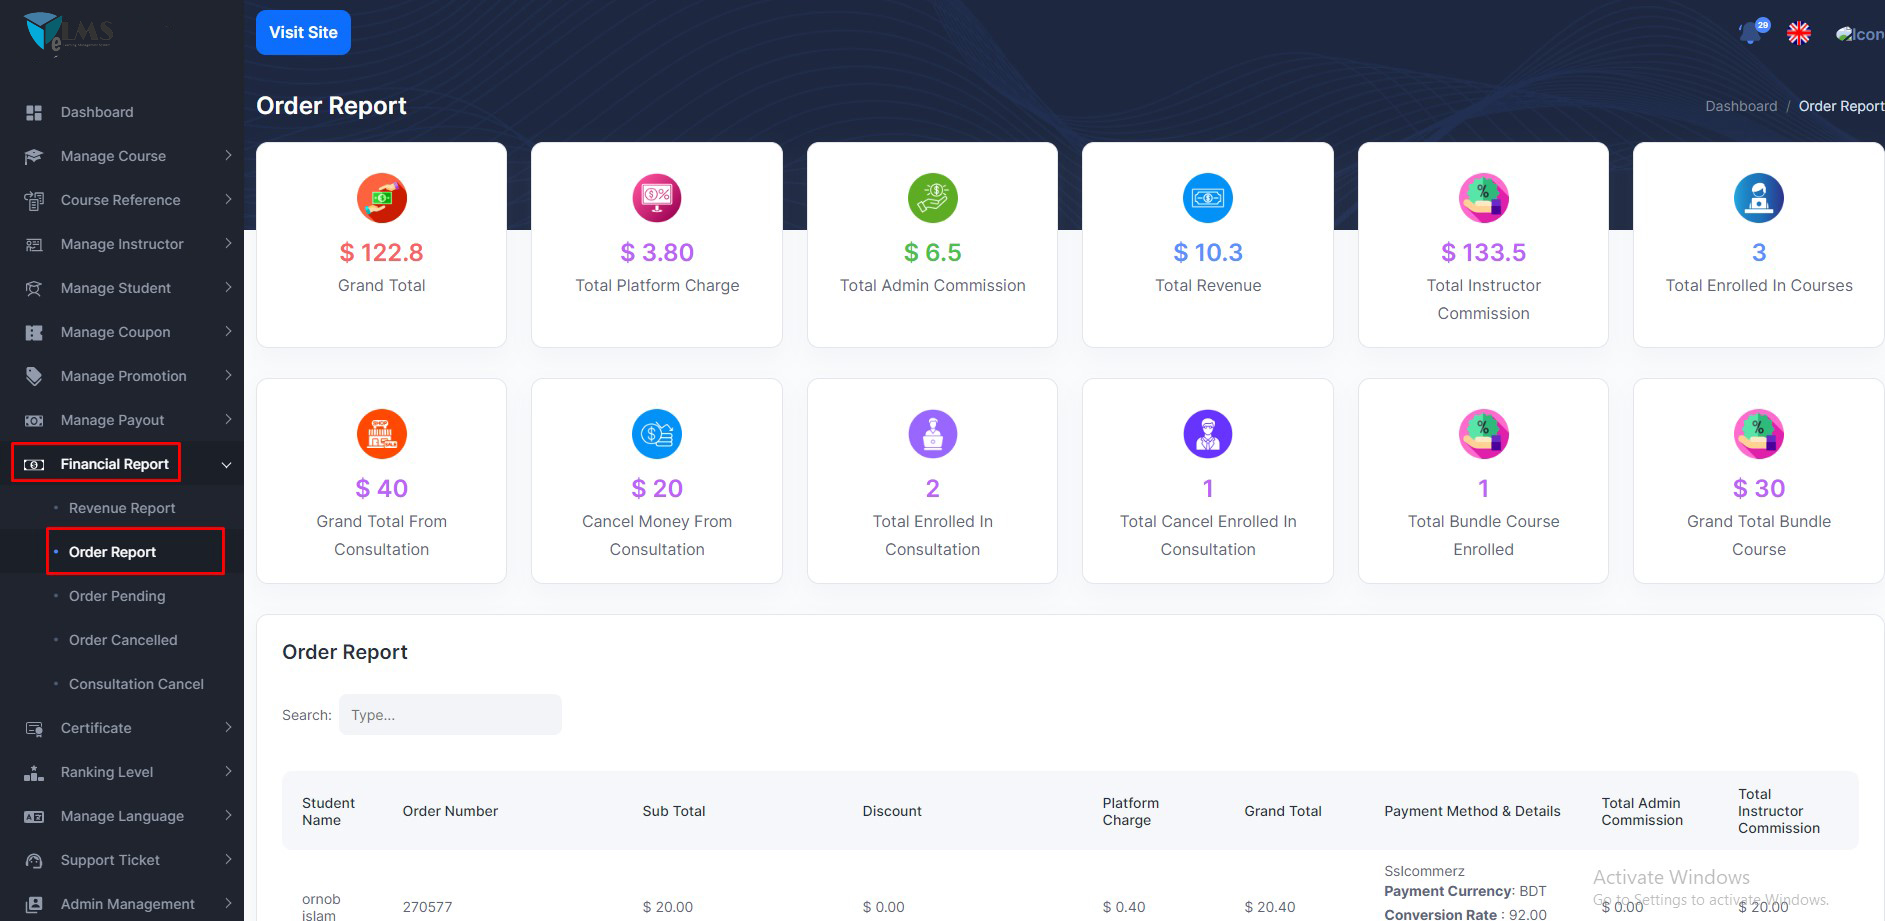
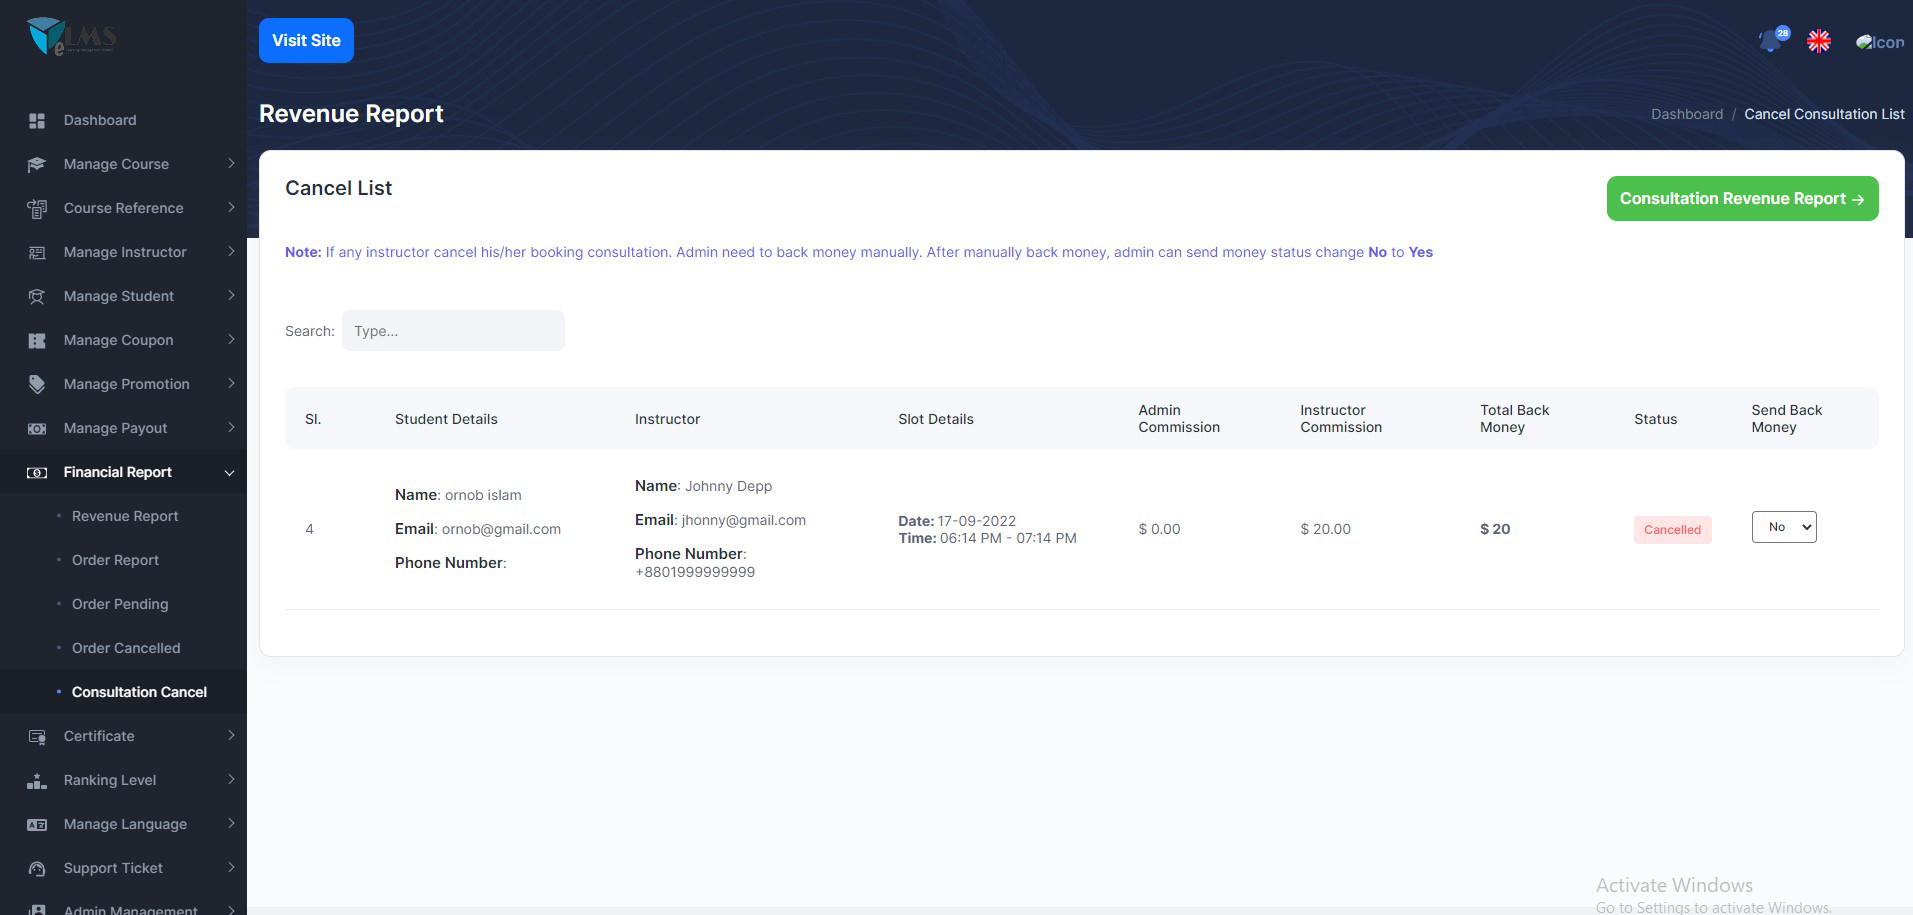
Financial Report
Finance report has 5 functions. Given here-
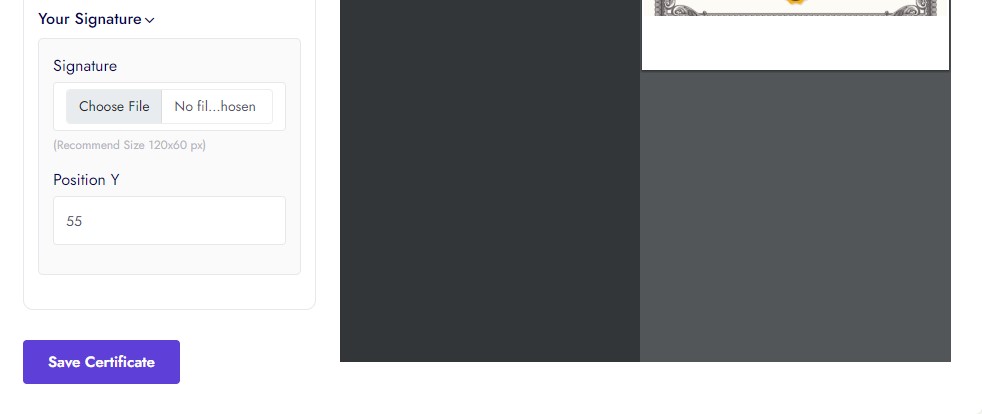
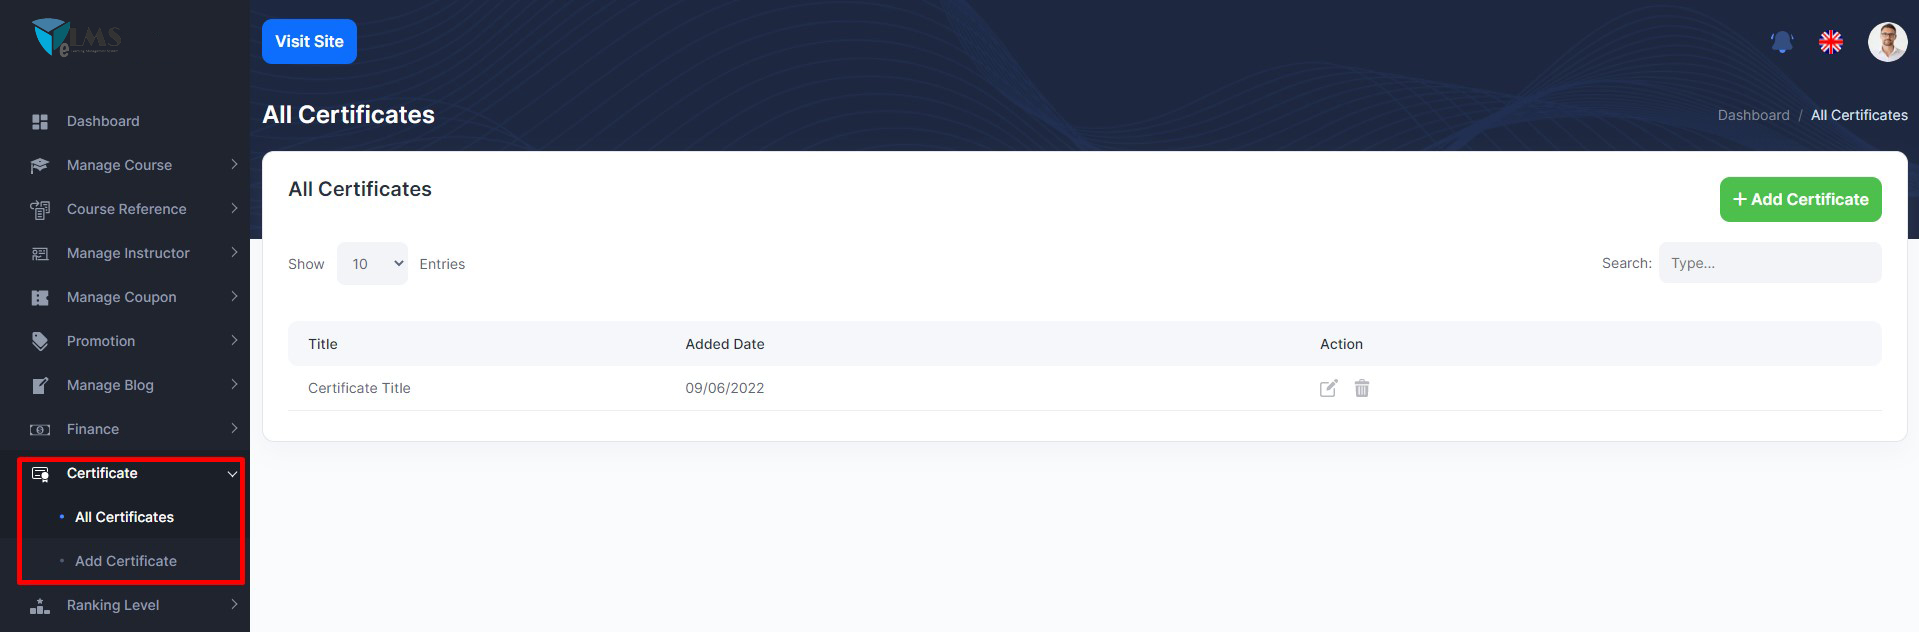
Certificate
Admin dynamically can create, update delete sample template for course certificate and instructor can add from instructor panel.
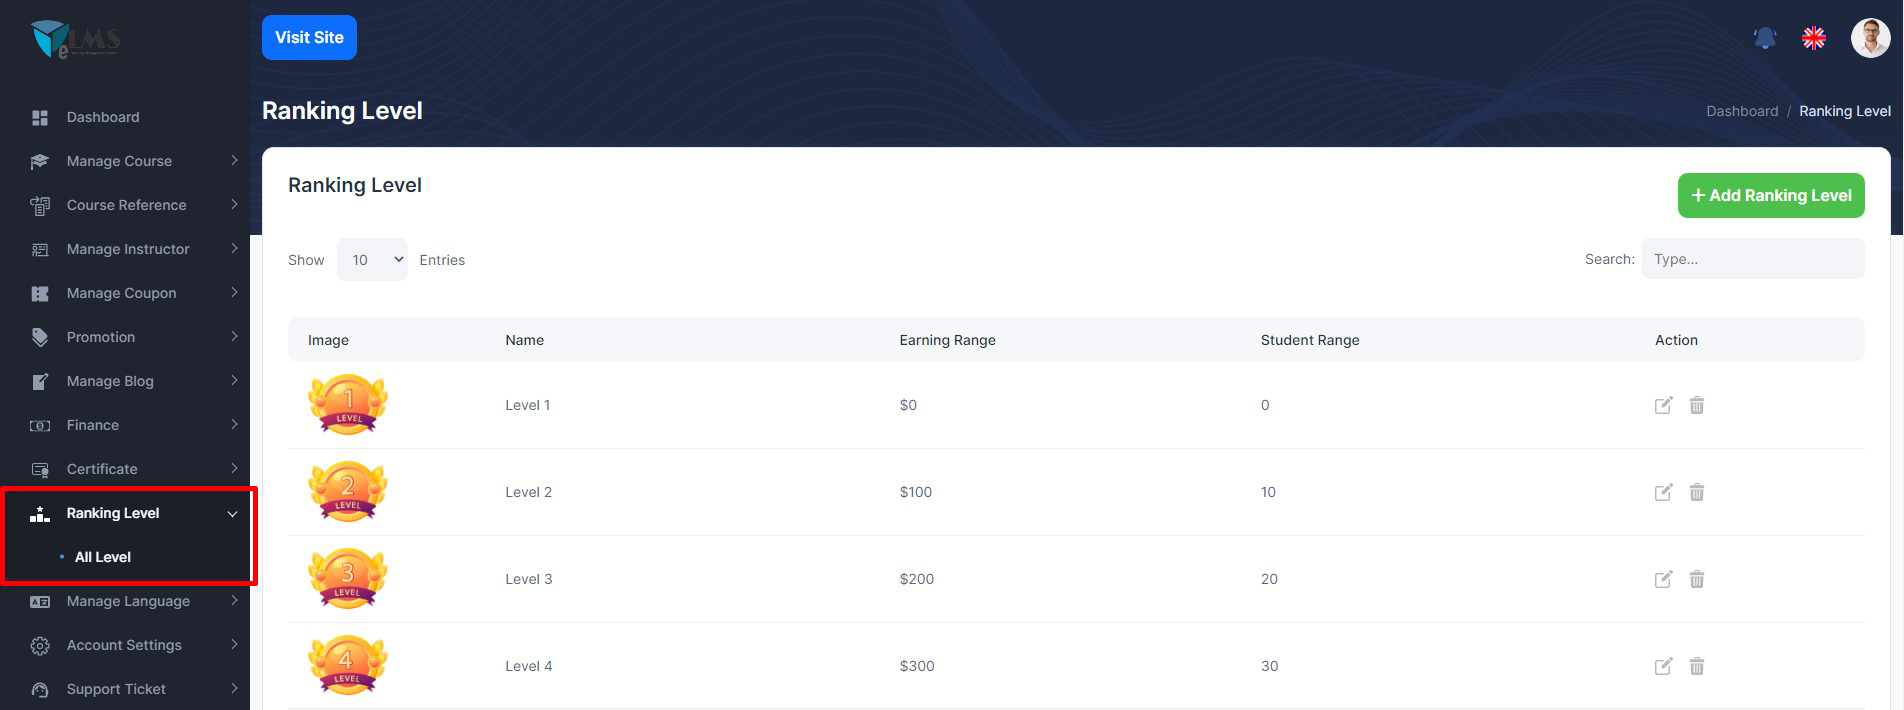
Ranking
Admin can create ranking for instructors and define specific criteria for defining the ranking . For example: Level 1, Level 2, Level 3. If any instructor achieves level 1 and then upgrades to level 2.
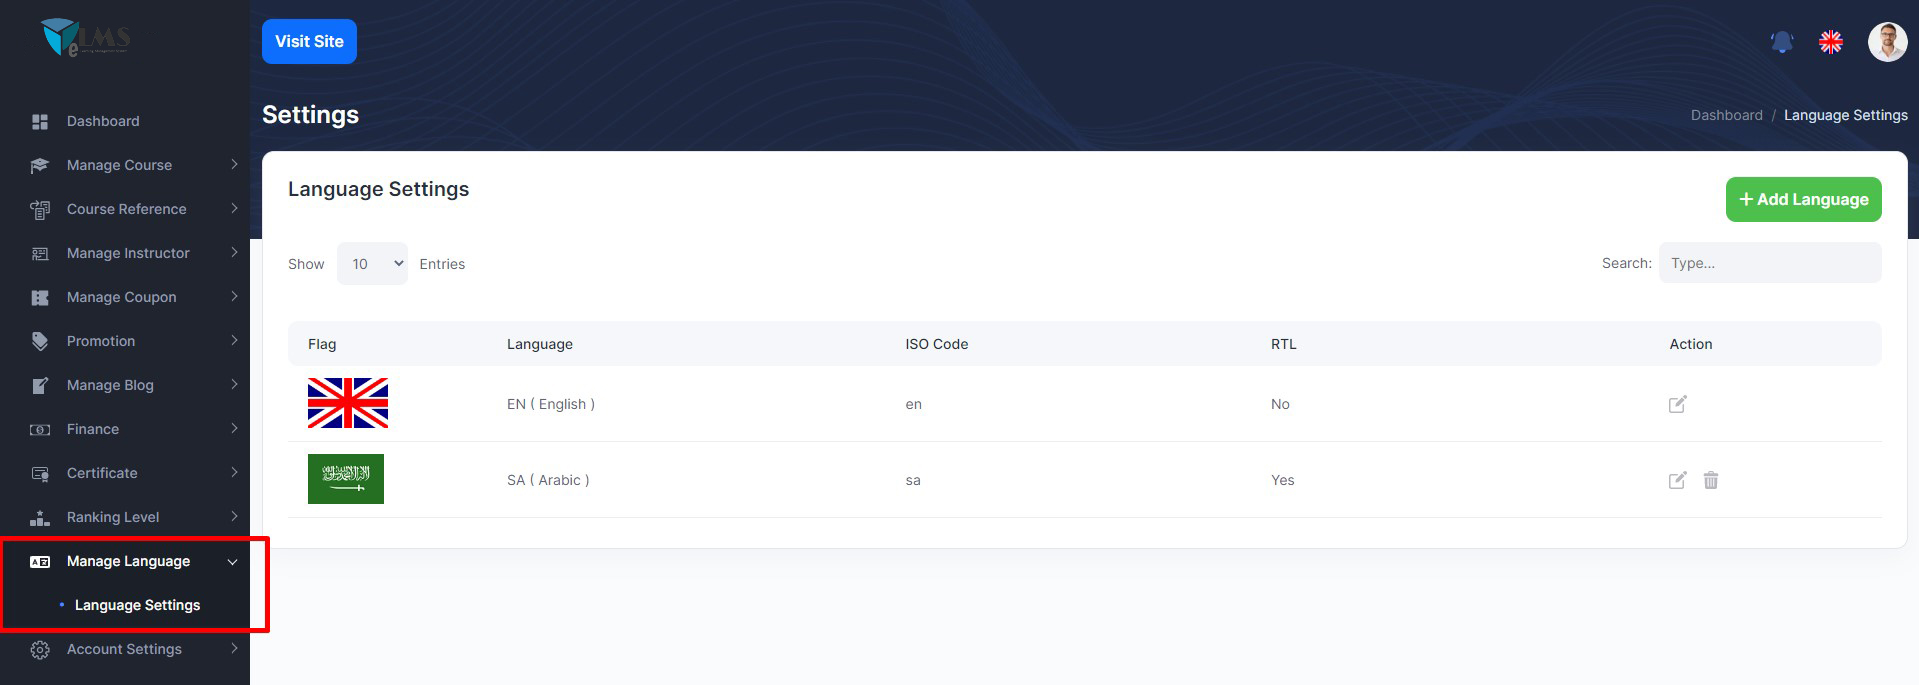
Manage Language
Admin can create, update, delete any language from here
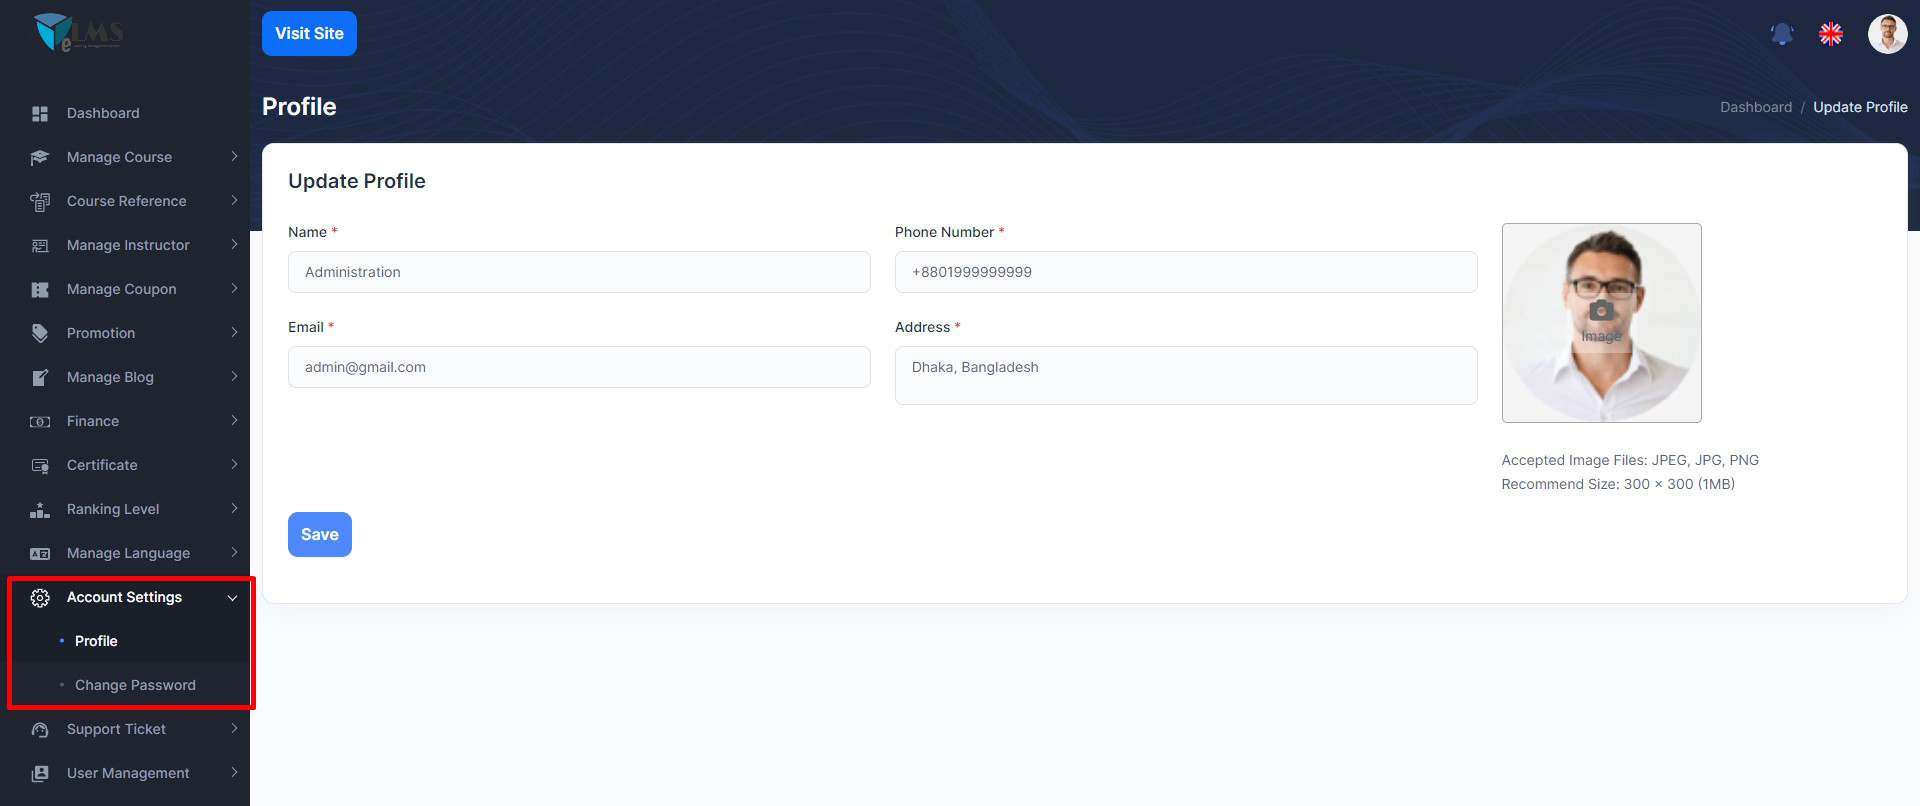
Account Settings
Admin can update his profile, change password
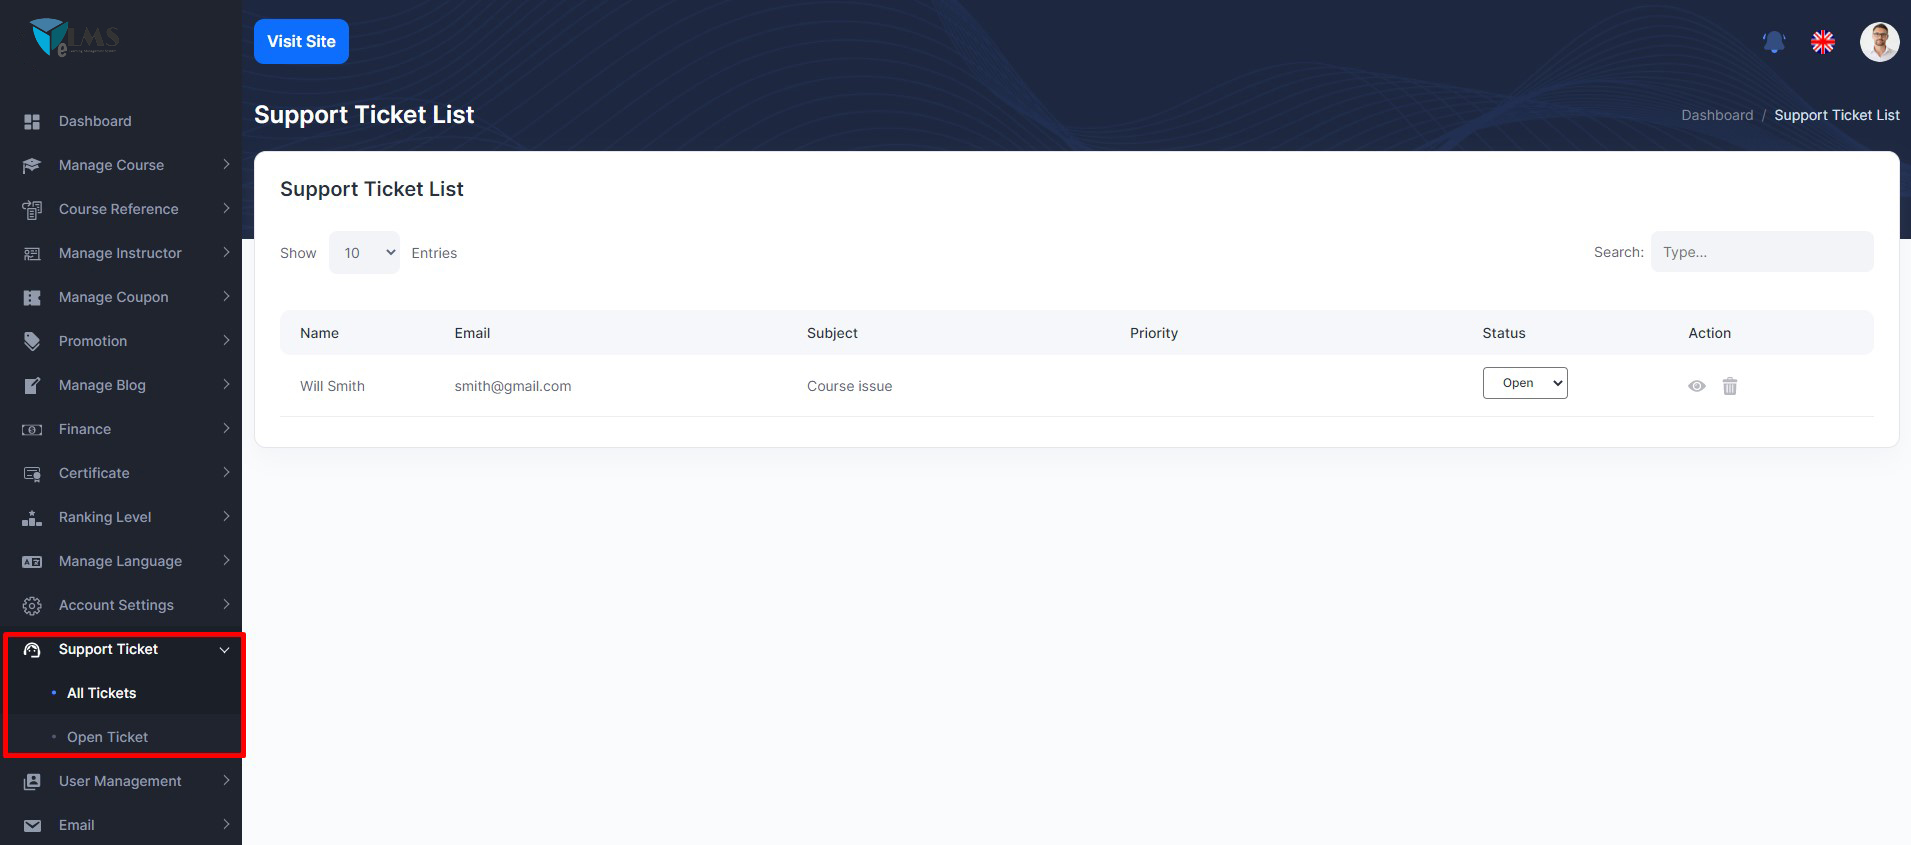
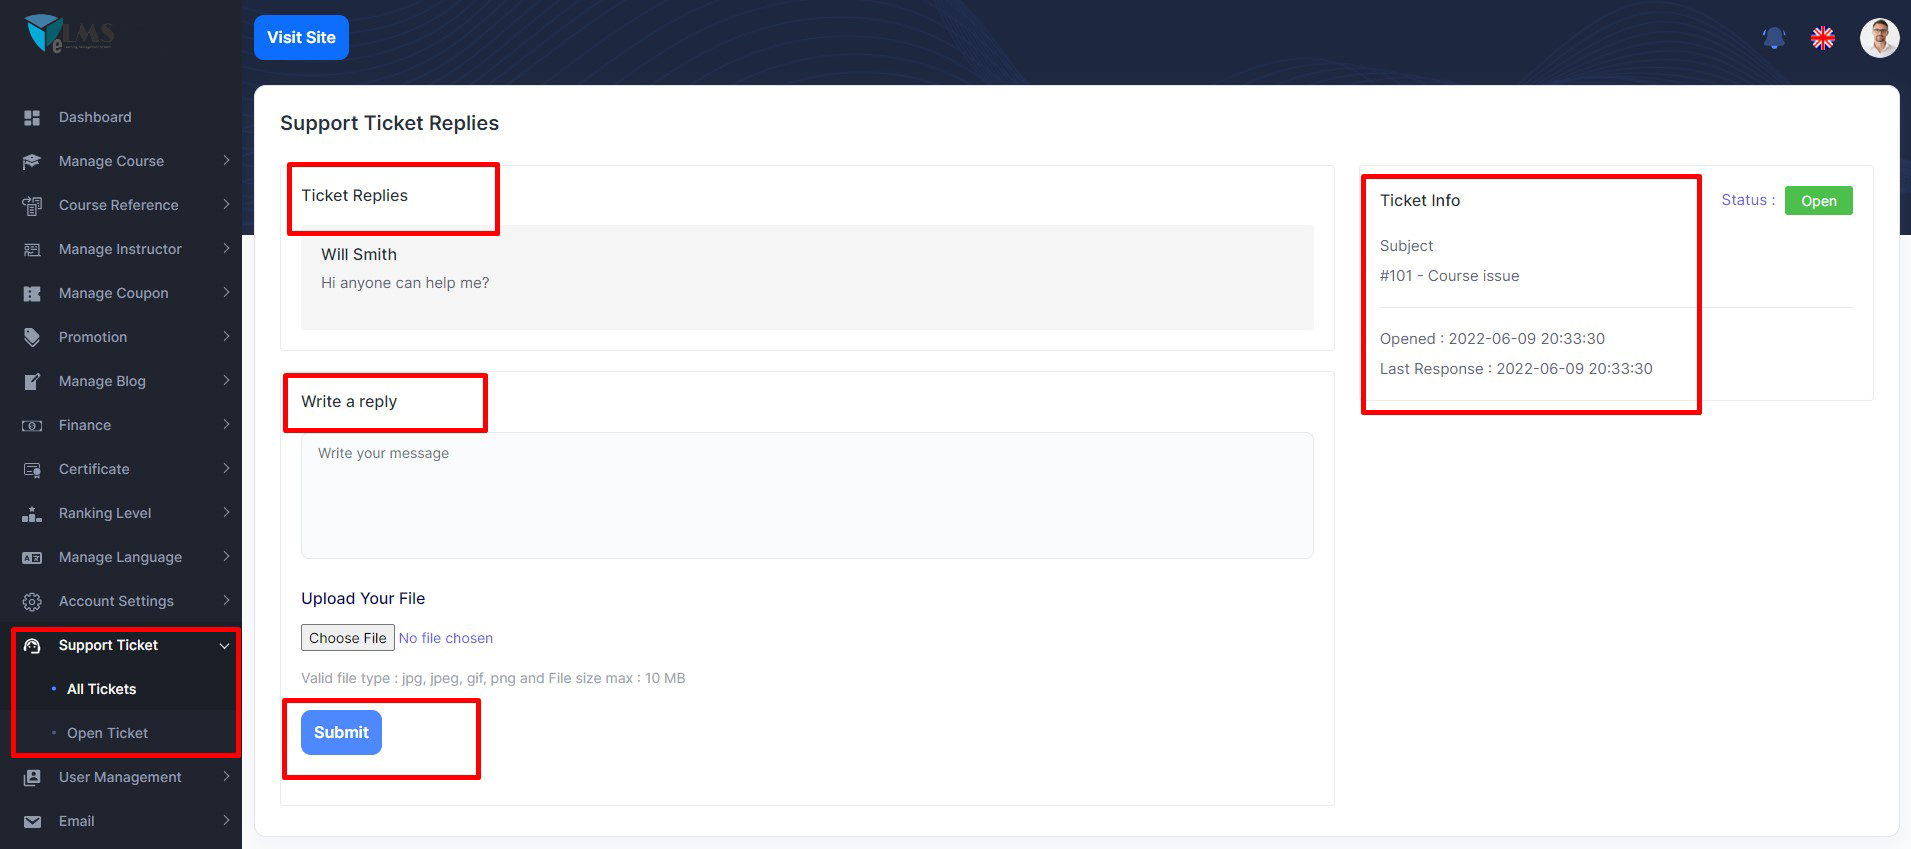
Support Ticket
If any user needs any help/support form the admin or administration he can create a ticket from support in the front end. And the admin will get all this ticket here. He will manage, answer, delete it from here.
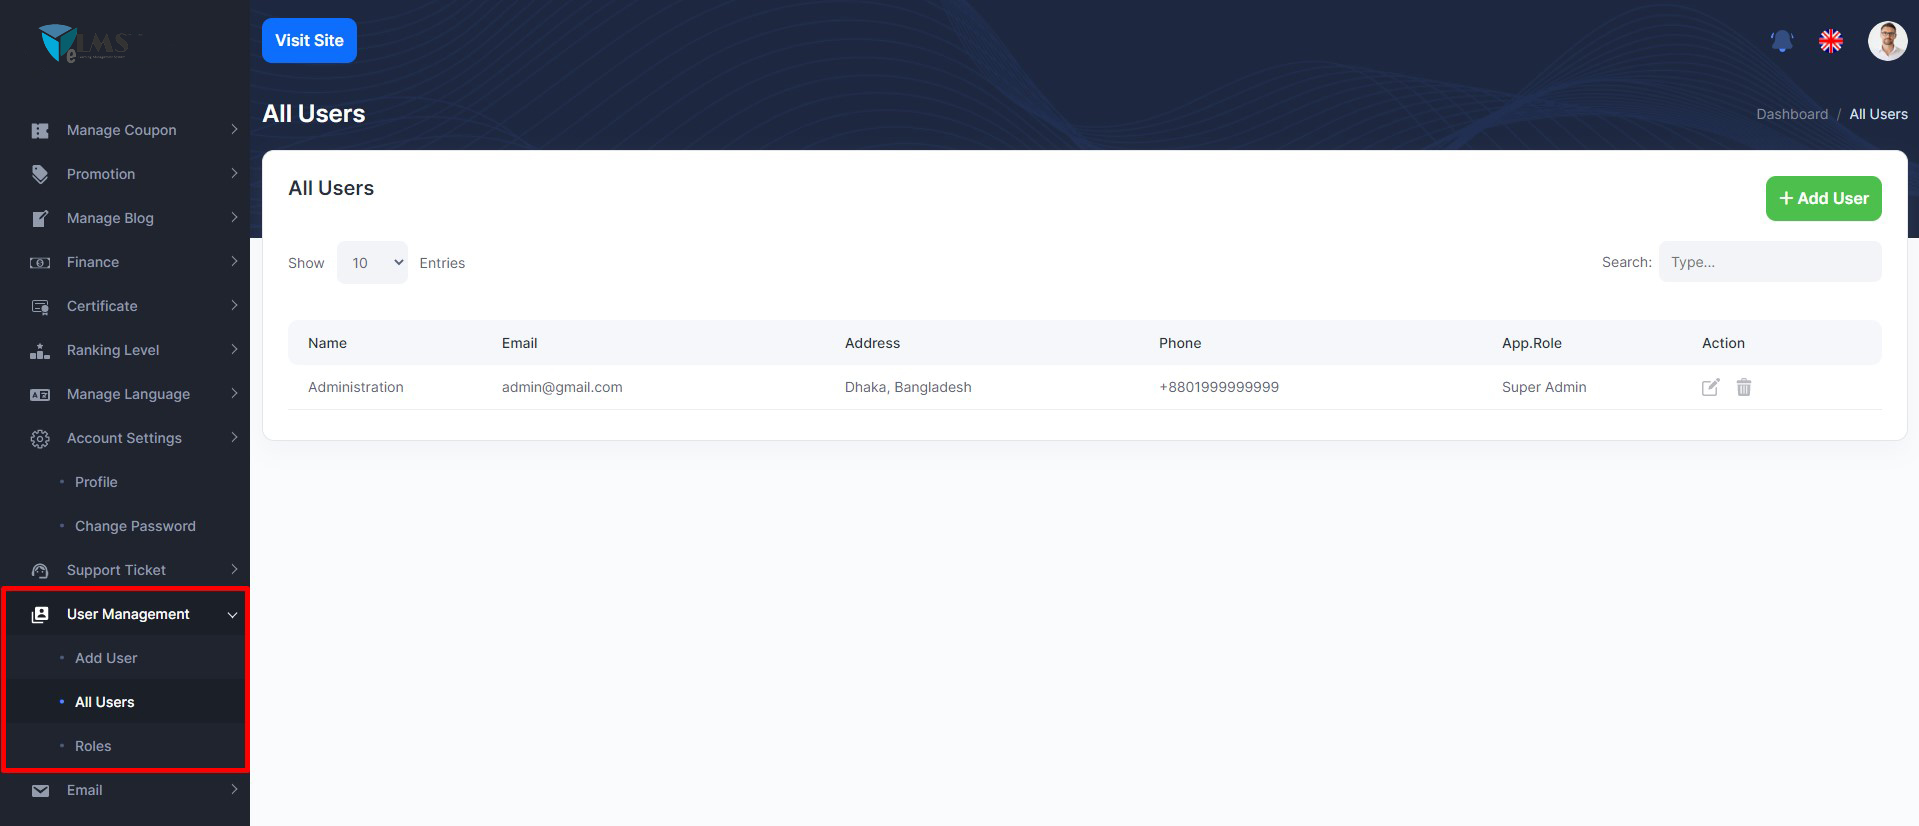
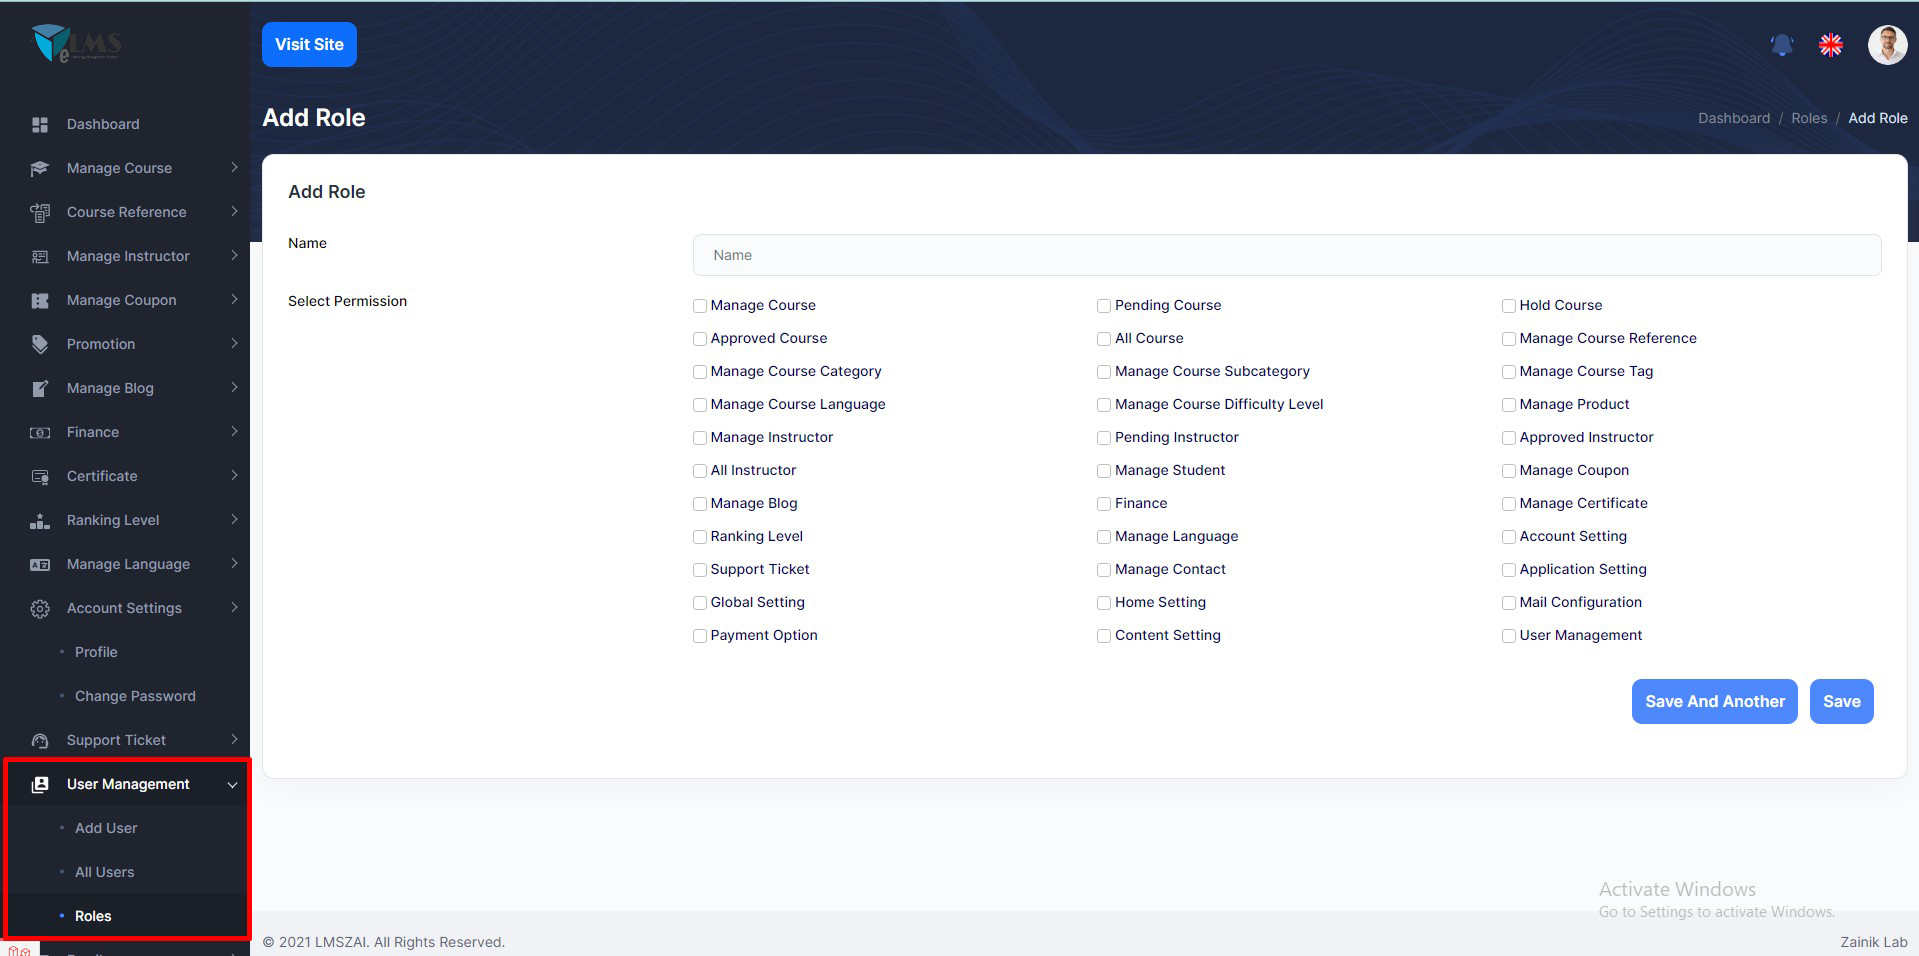
User Management
Admin can see admin list
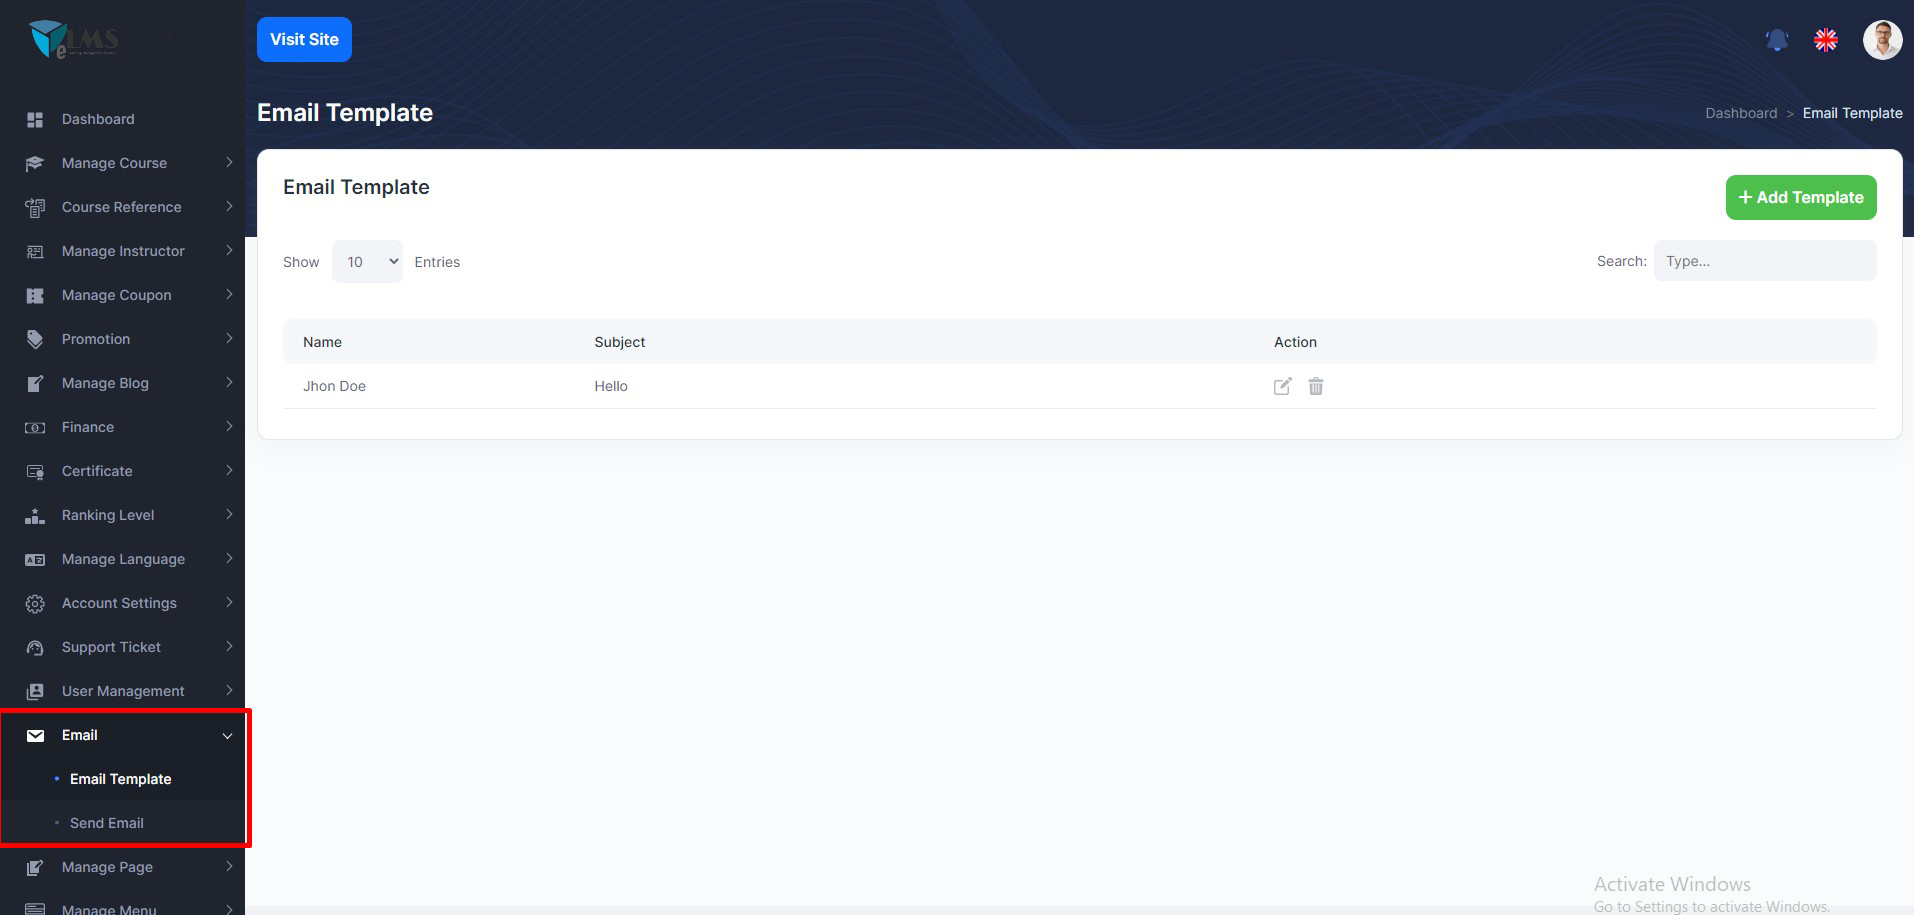
Admin can create email template ad send email instructor and student.
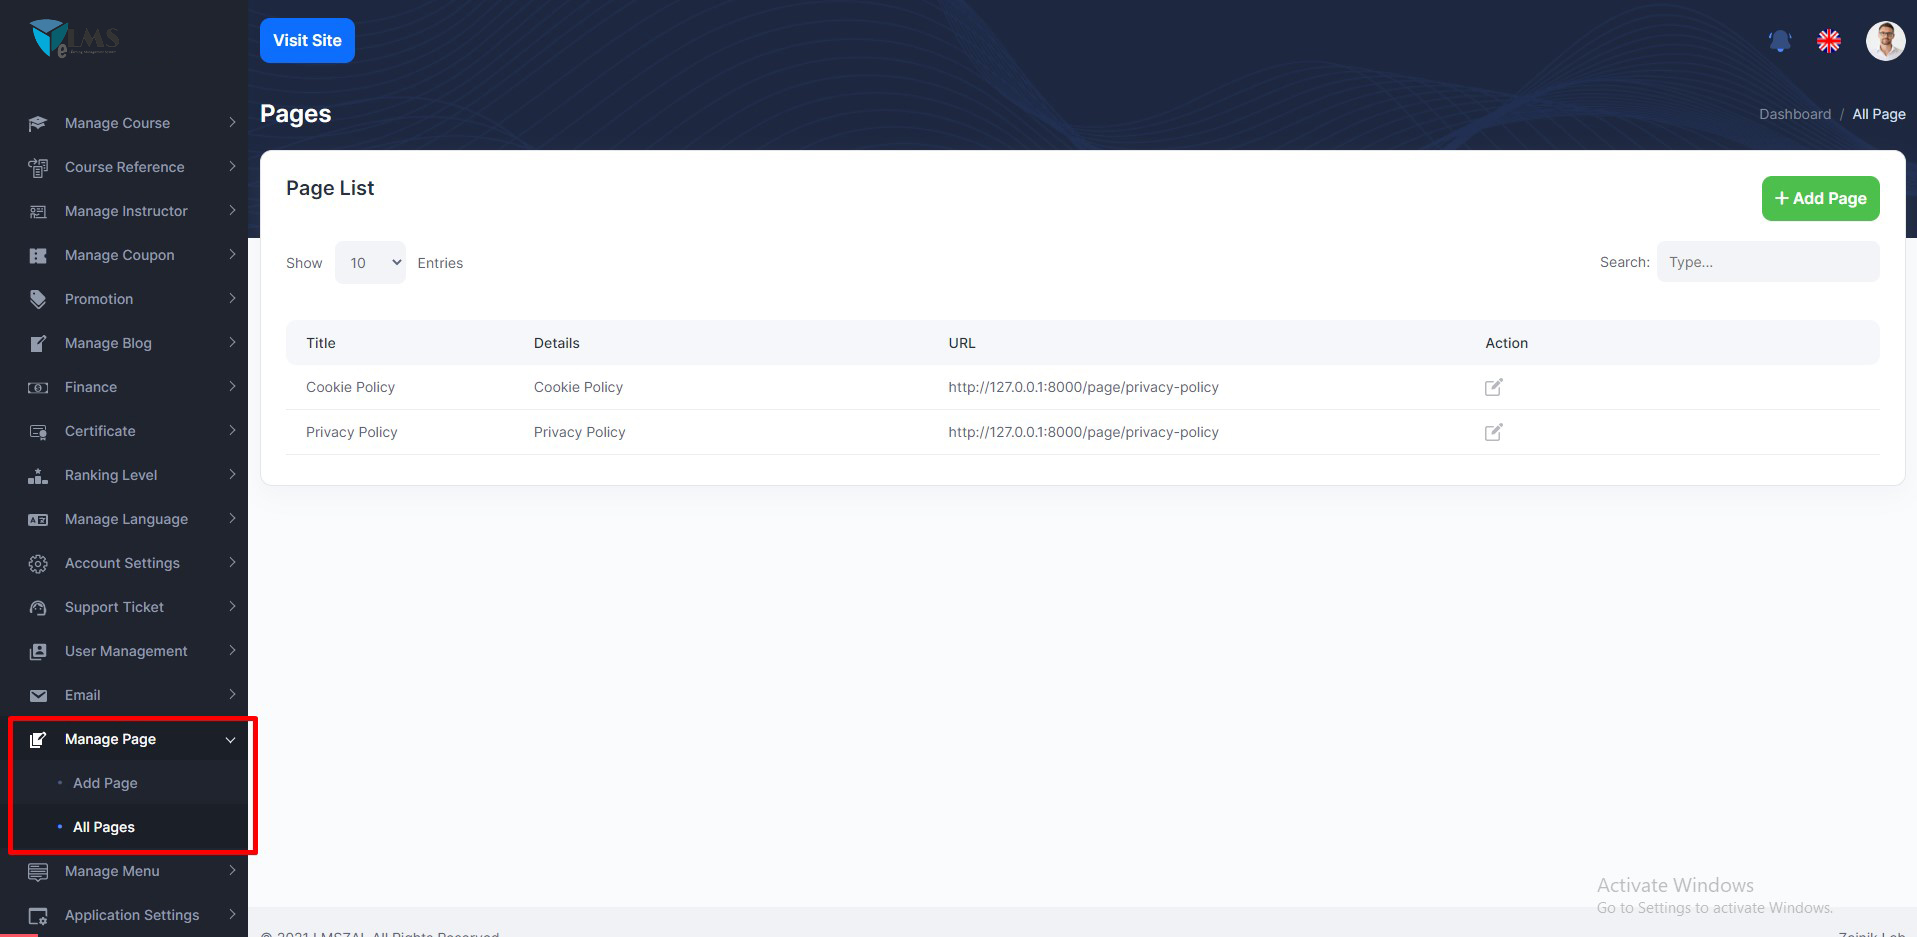
Manage page
Admin can create dynamic pages and show front pages
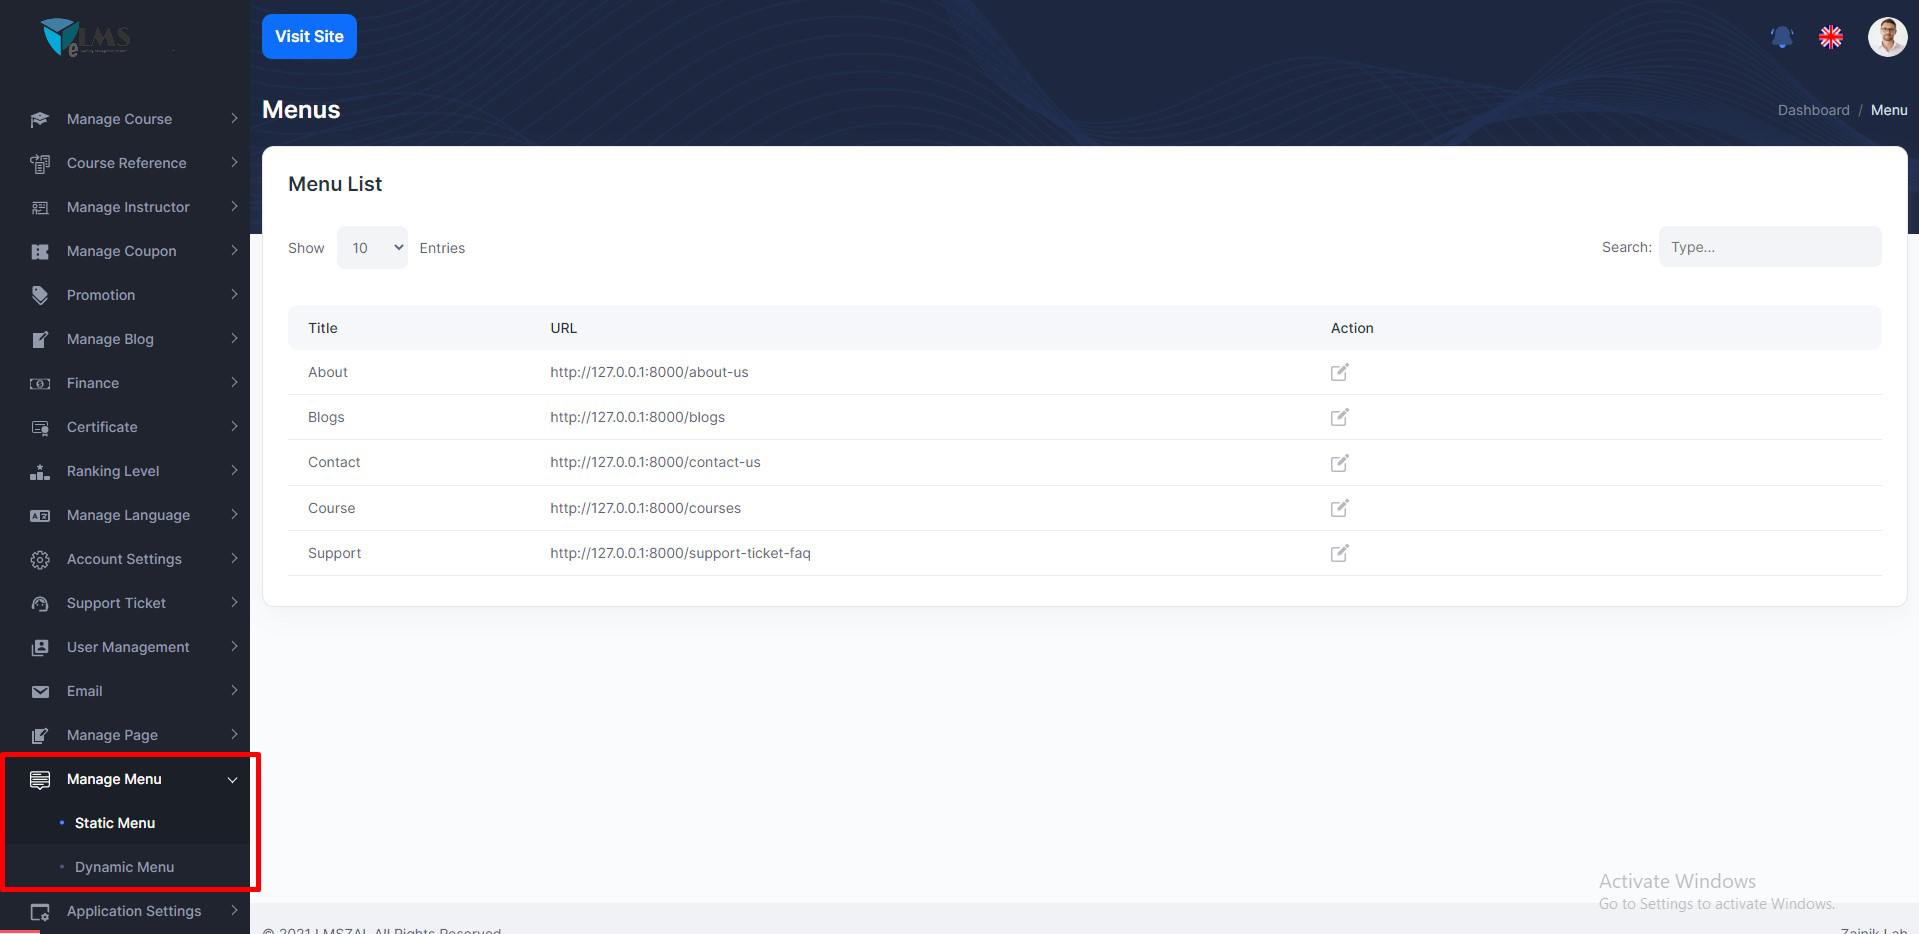
Manage menu
Admin can create, update, delete dynamic menu, static menu rename and show front pages
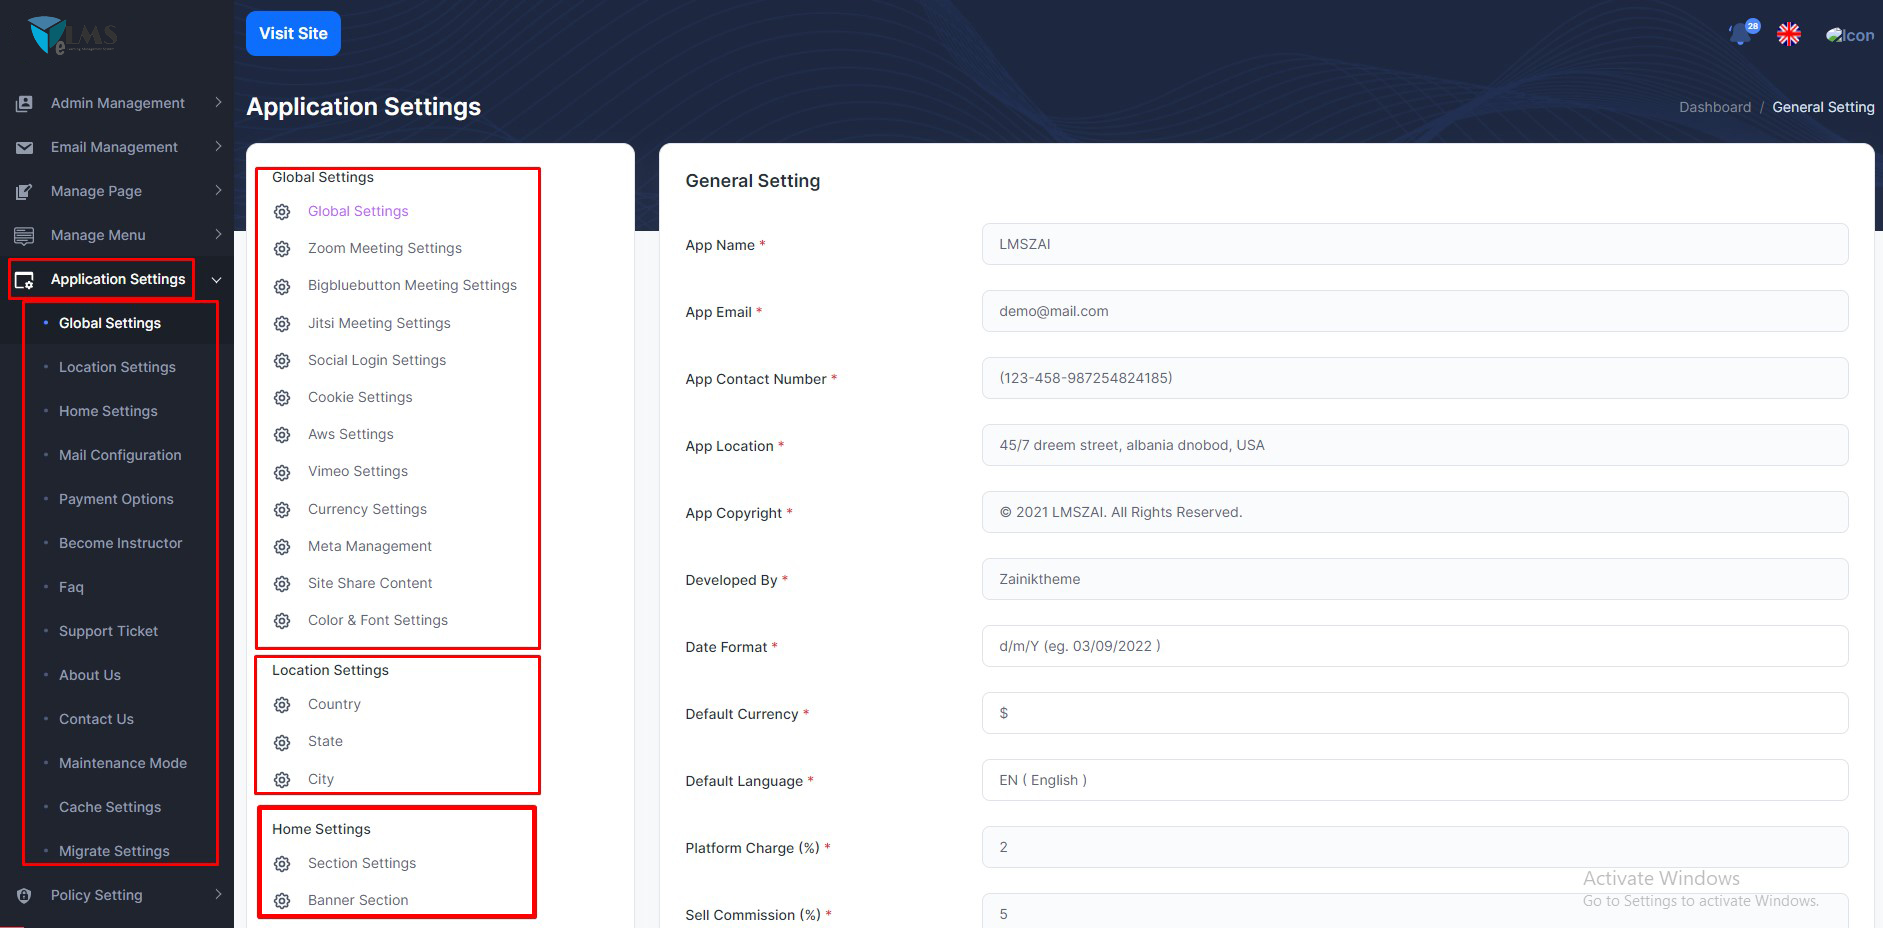
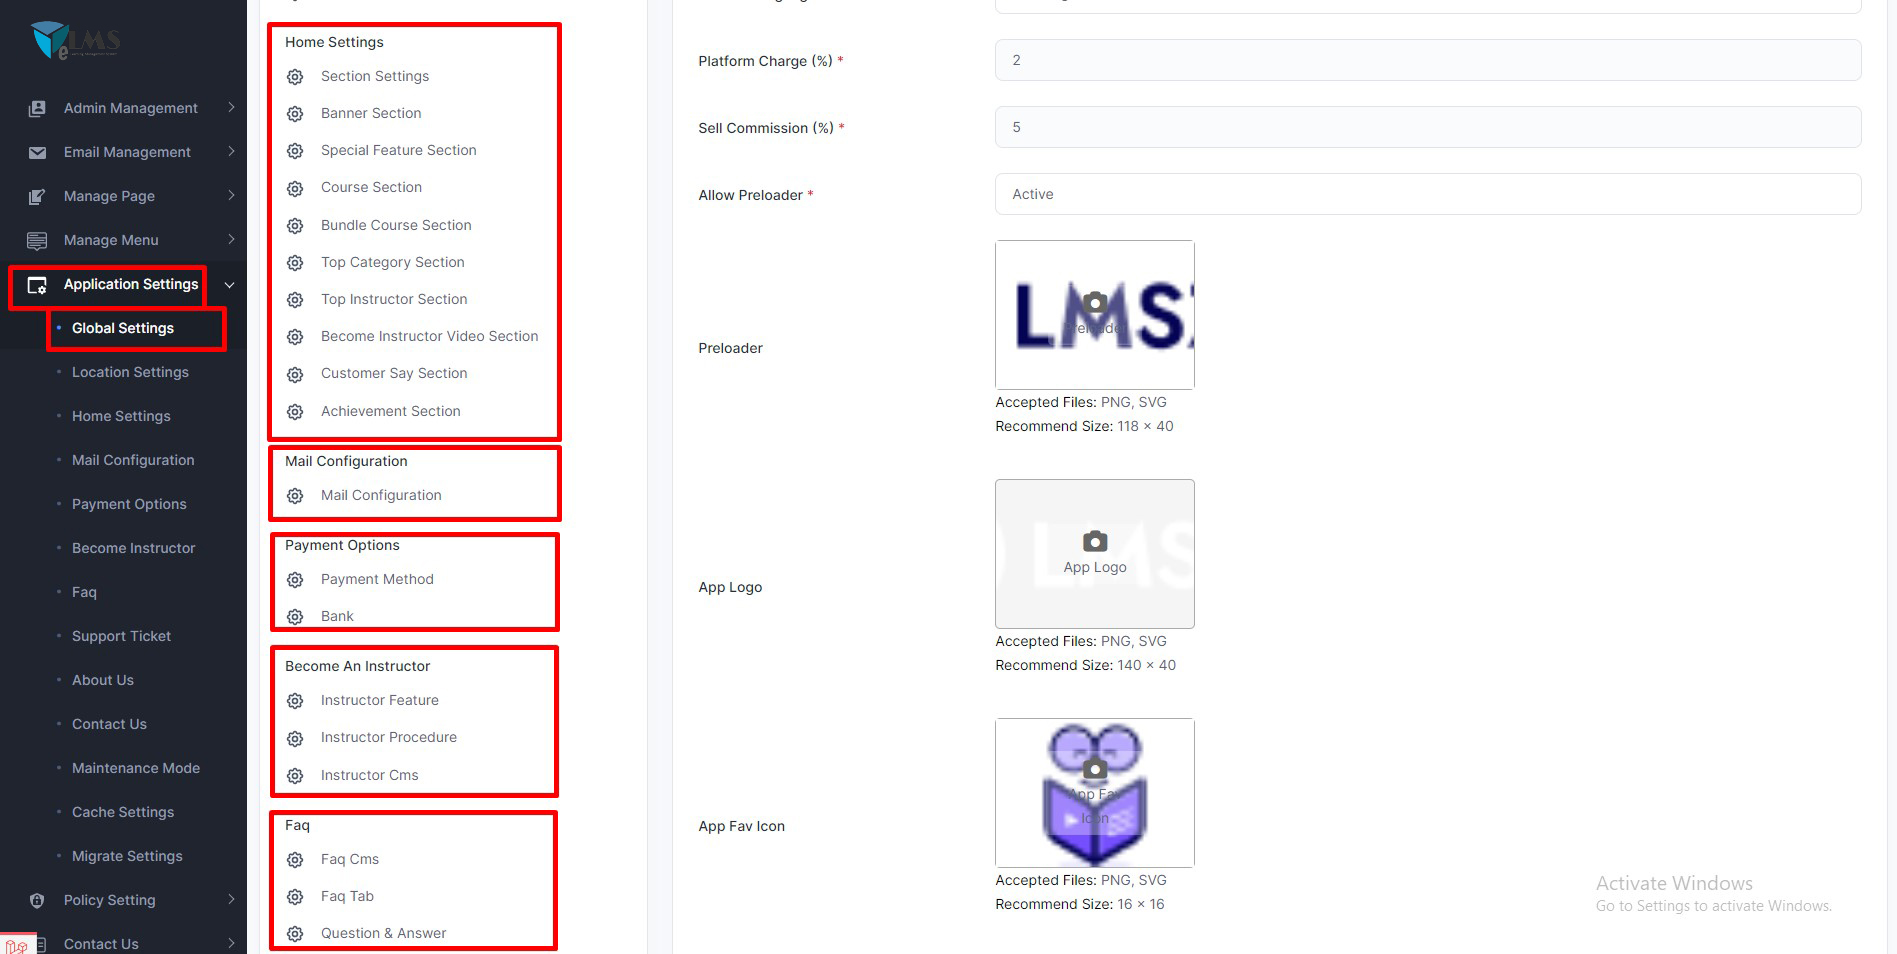
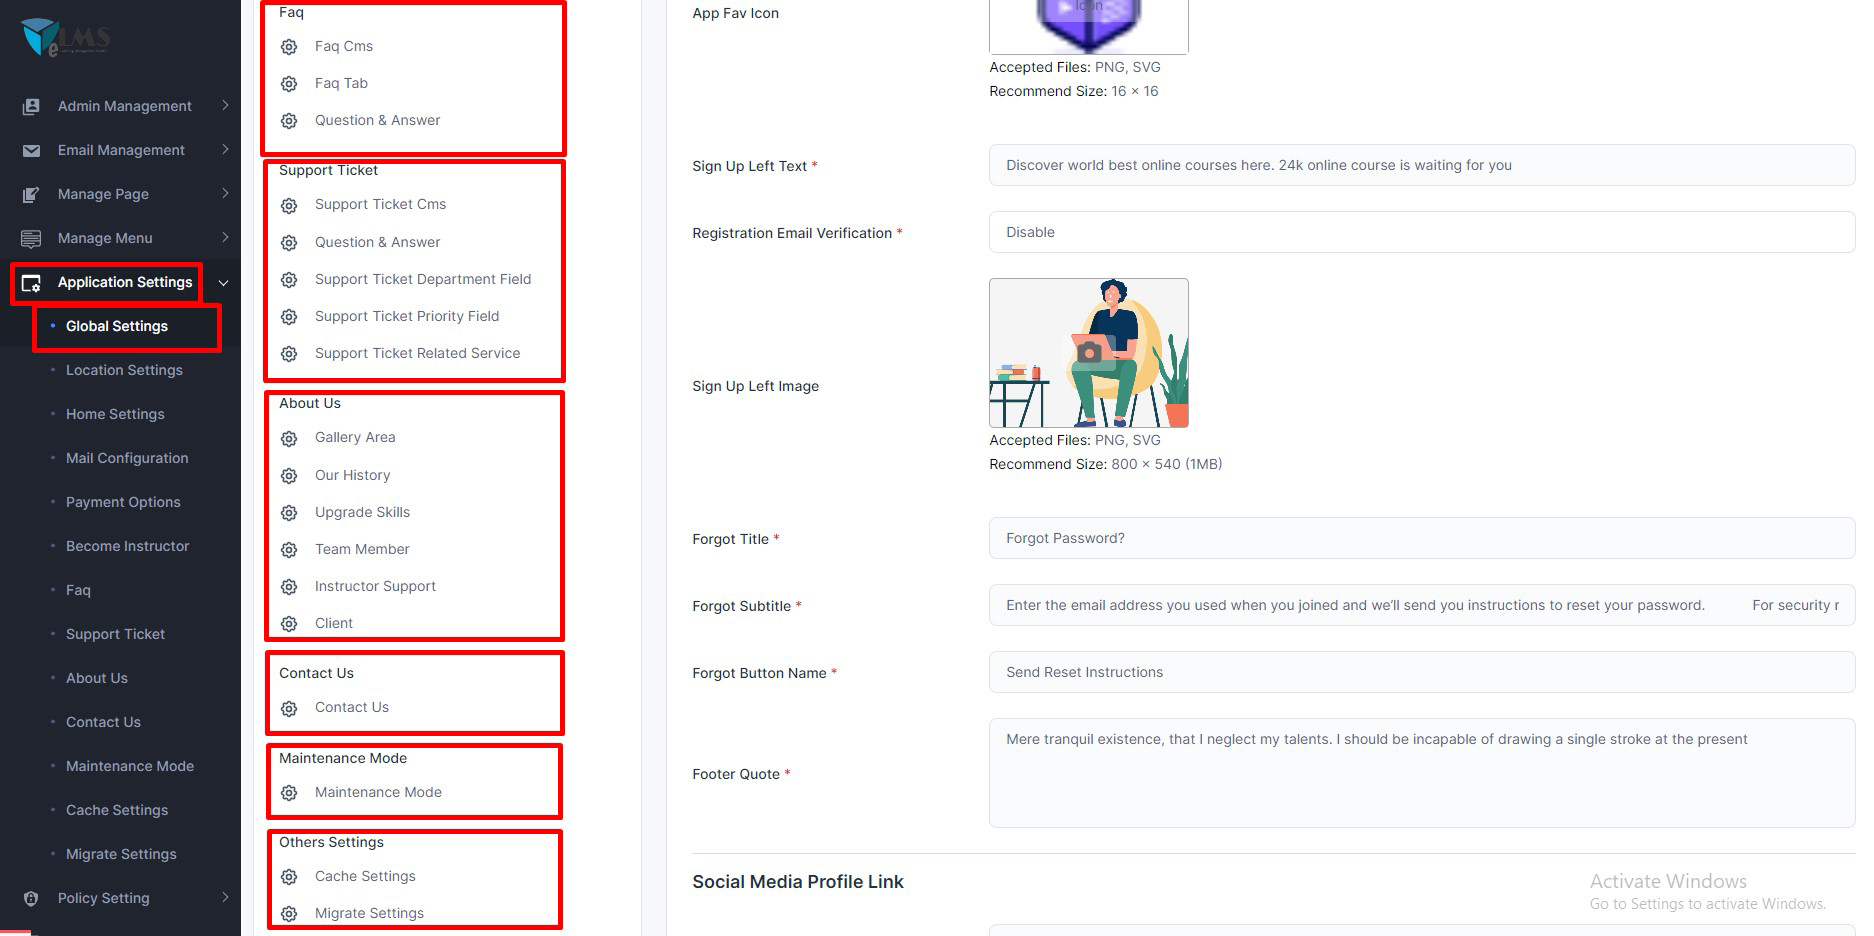
Application Settings
Admin can manage ELMS platform form here. You can see all the changes
Device Control
Admin can control student login device

Private Mode
Admin can manage website mode

Google Meet
Admin can manage google meet. You need to give the google oAuth Credentials here. To generate the key you can follow the link Link

Geo-Location
Admin can manage geo-location map. Admin need to setup the credentials here. You can collect the credentials from the link or official website of Link

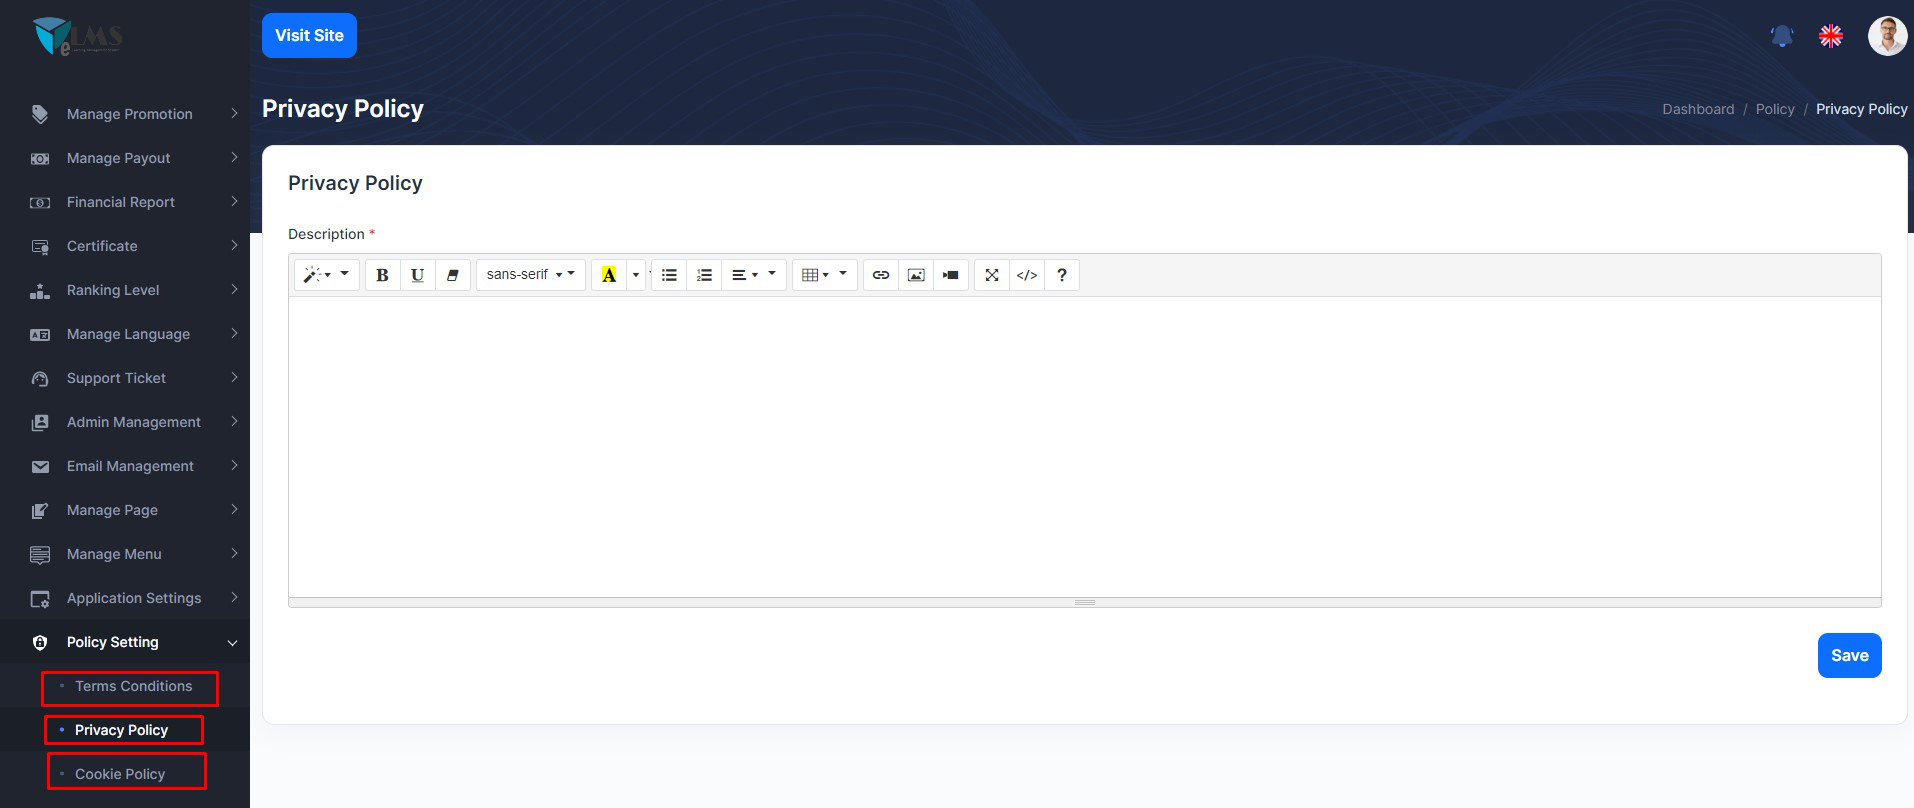
Policy Settings
Admin can manage privacy policy and cookie policy
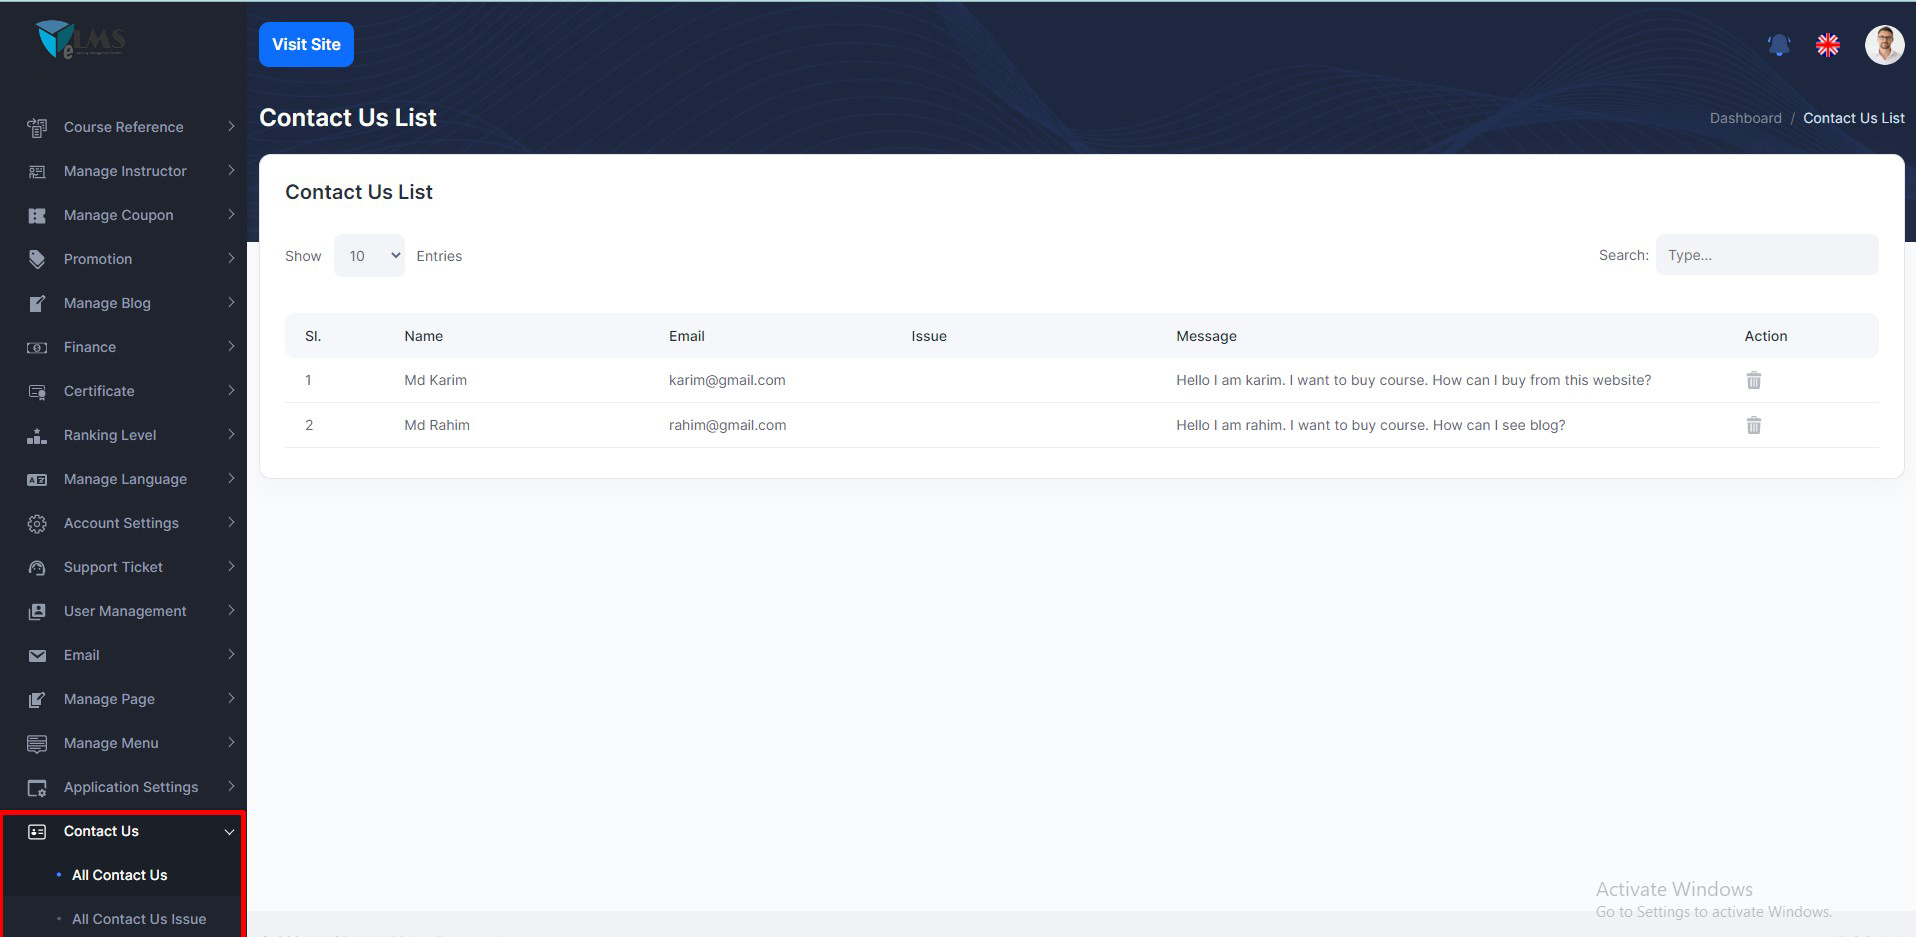
Contact Us
If any user wants to contact with admin. User send email from frontend contact us page. admin can see from here
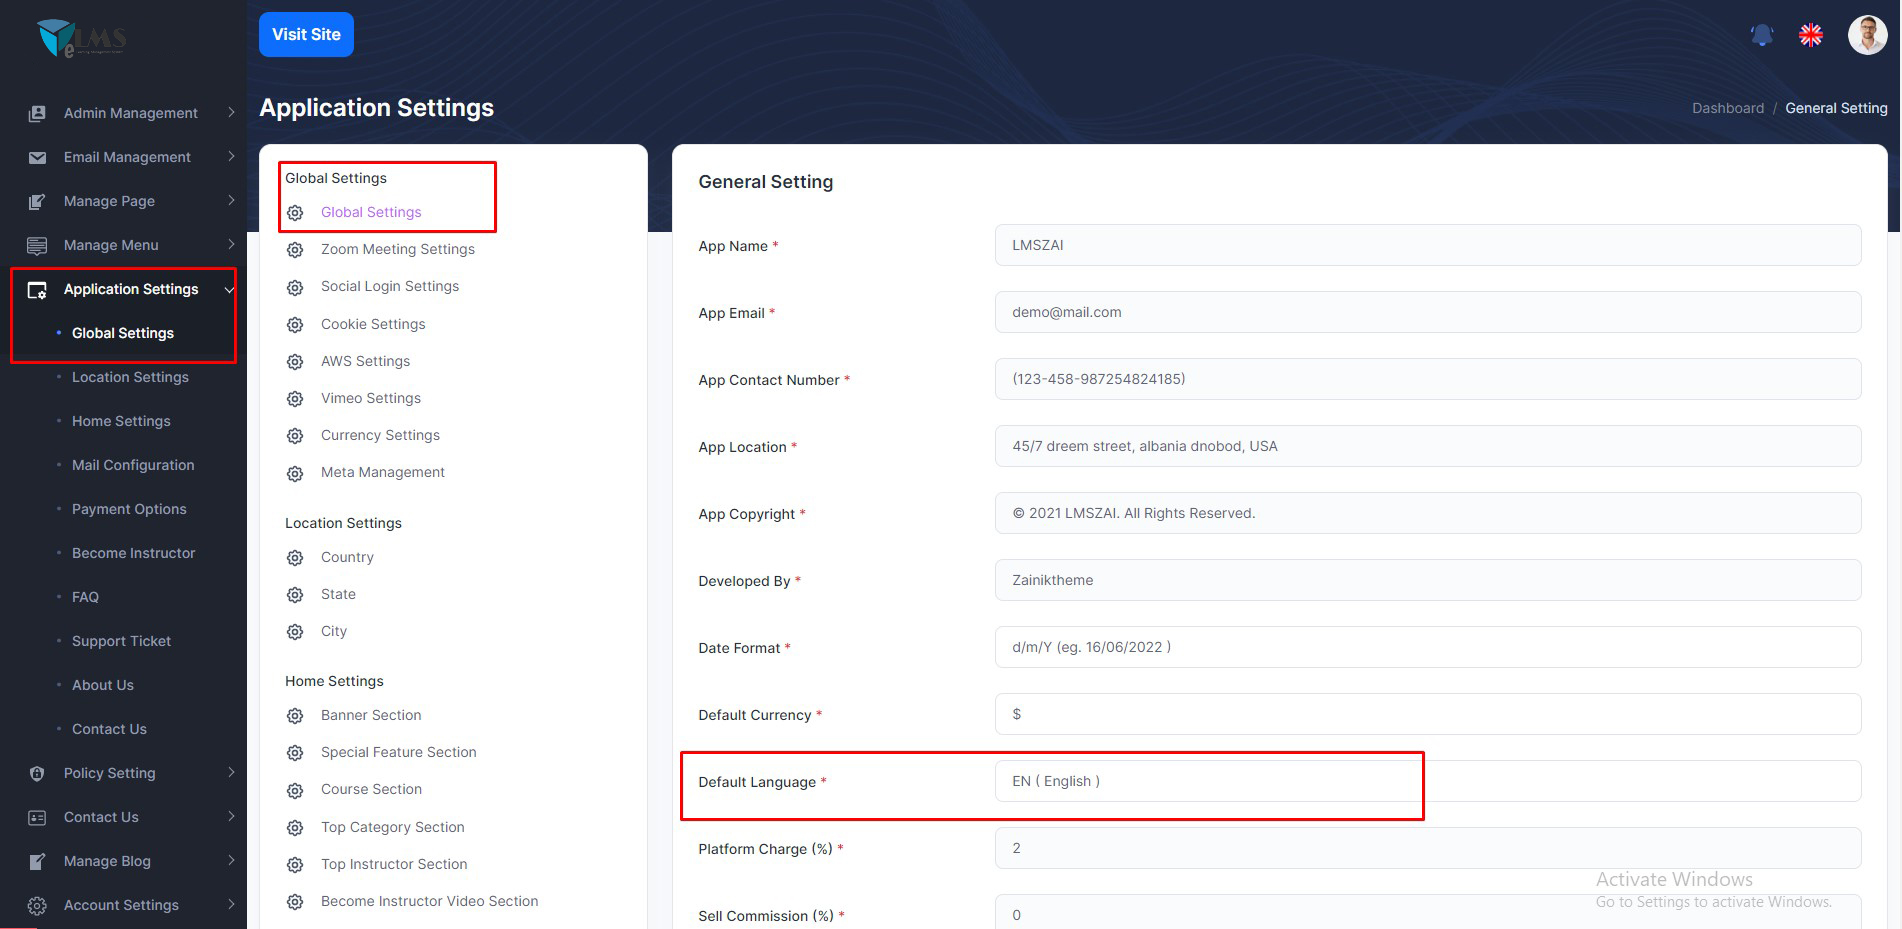
How to change language?
If admin wants to change application default language. Admin can change from here.
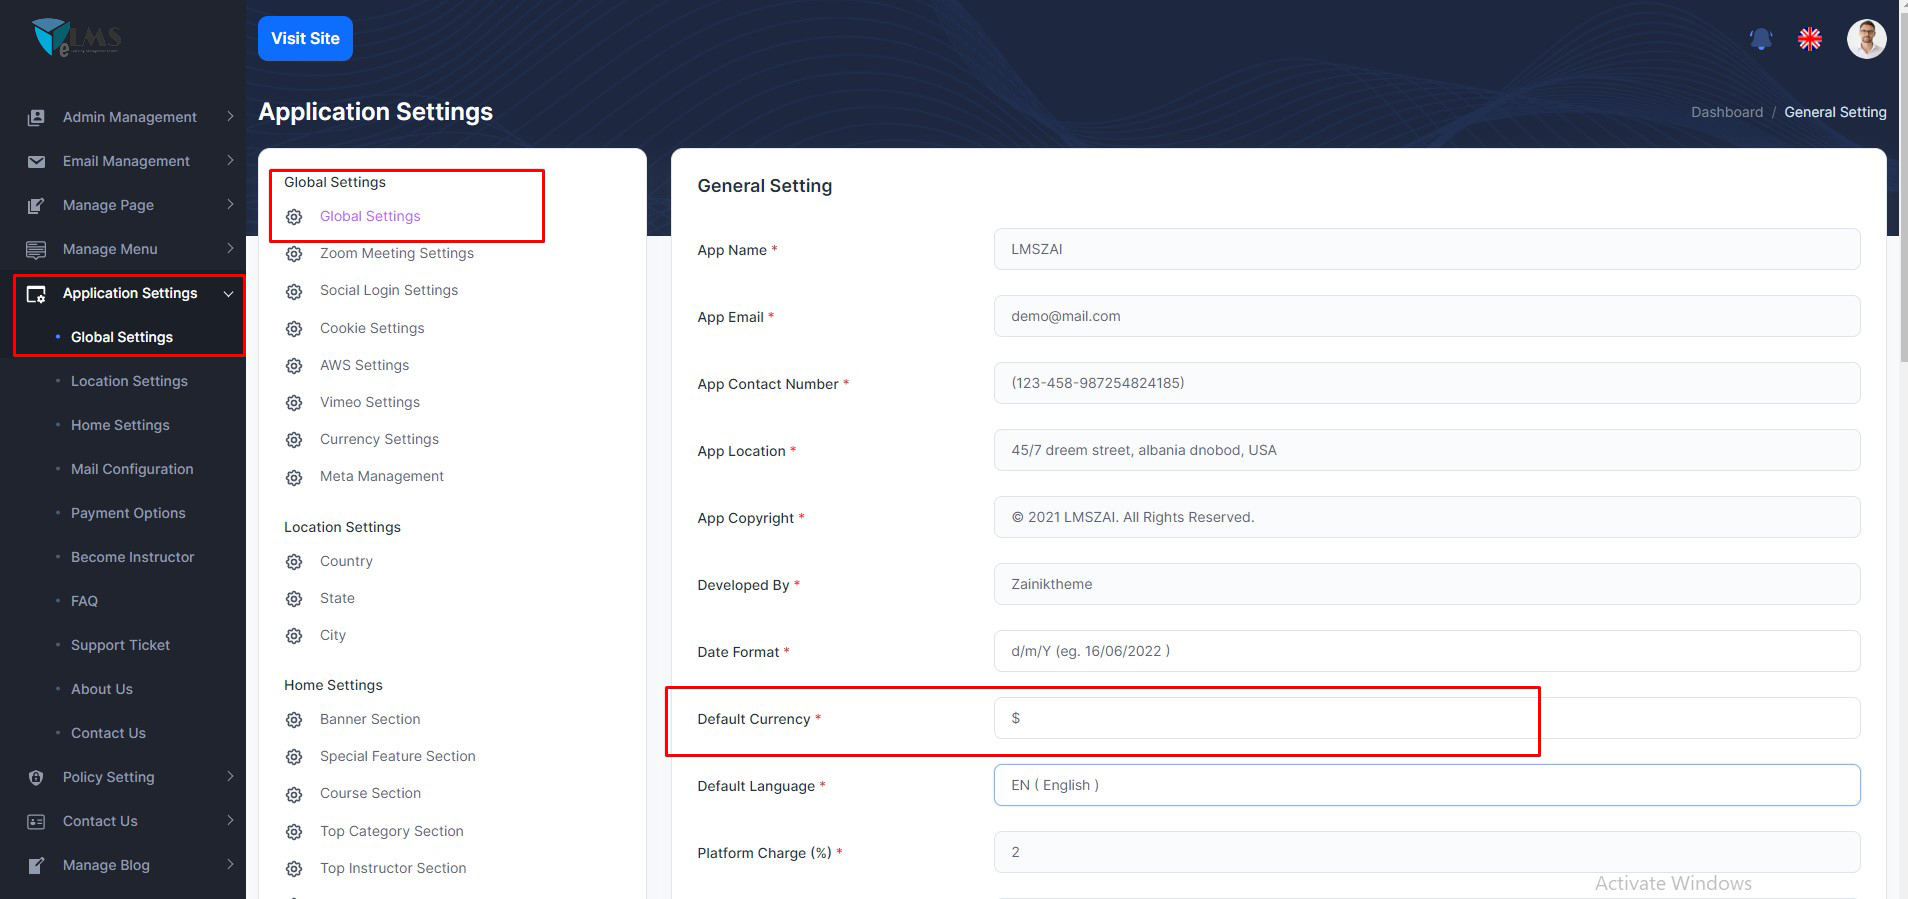
How to change currency?
If admin wants to change application default currency. Admin can change from here.
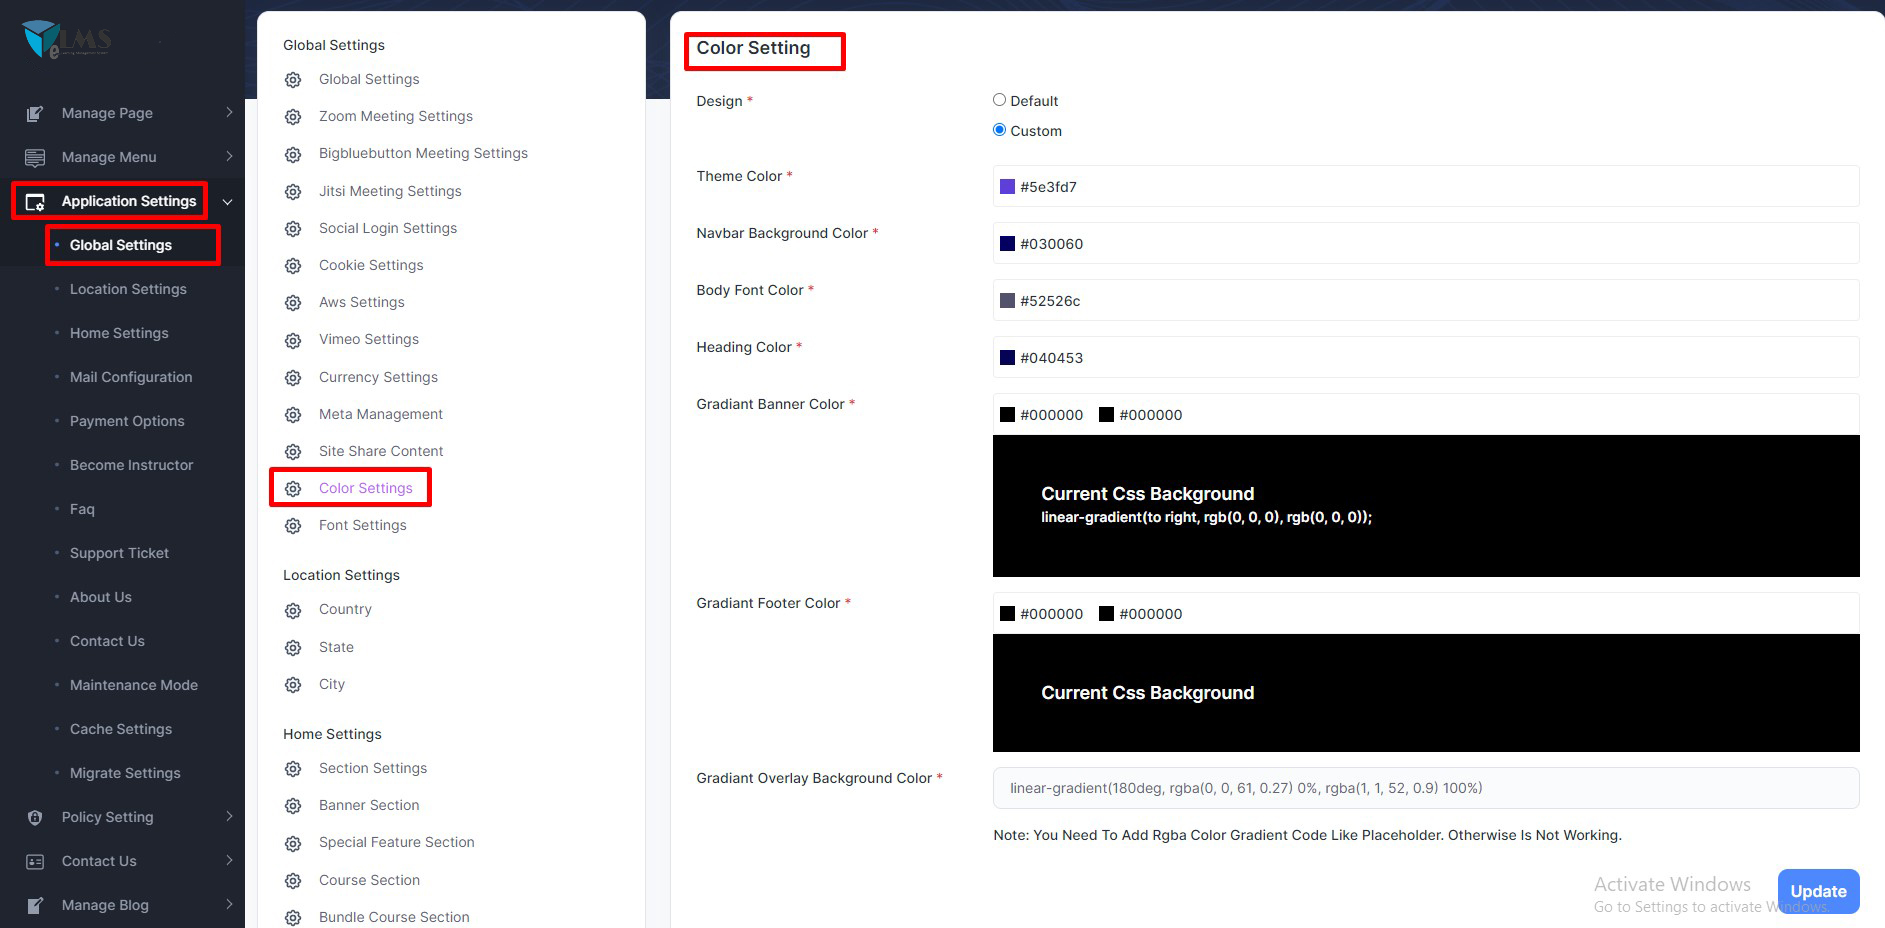
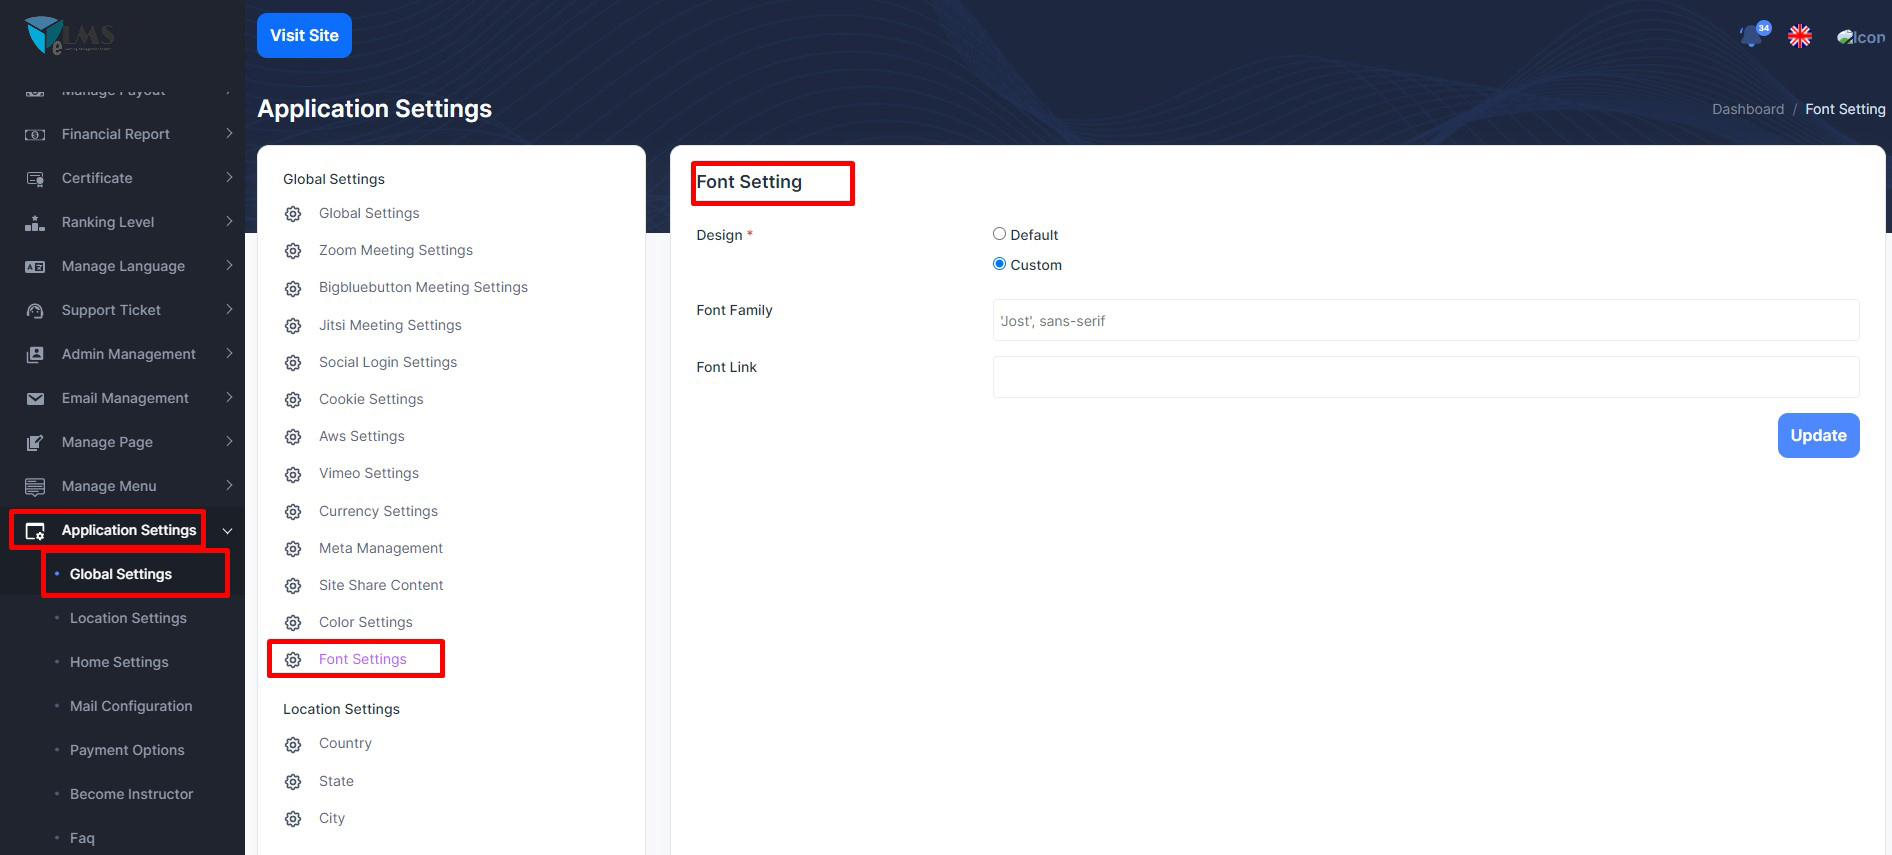
How to change color and font?
If admin wants to change application default color and font. Admin can change from here.
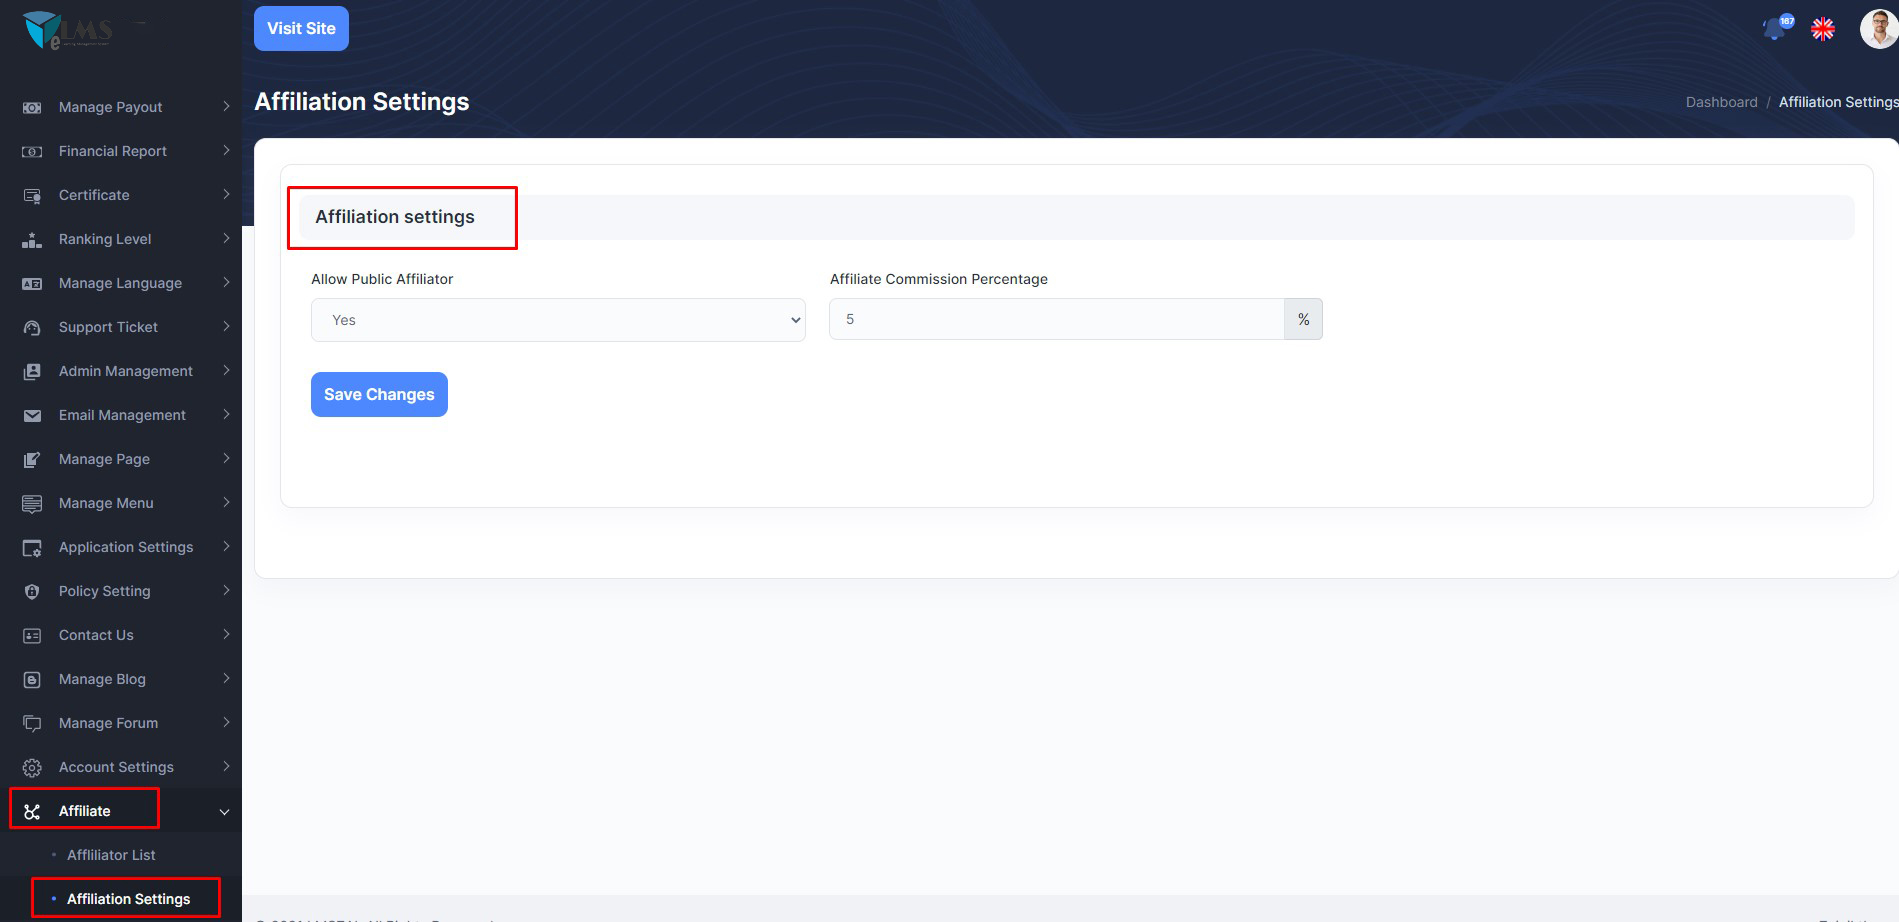
Manage Affiliate
Admin Panel Affiliate
Admin can start affiliate. If Admin allow affiliate, admin can set affiliator percentage any user can affiliate courses and user get percentage. Admin can set up from admin panel. Location given here.
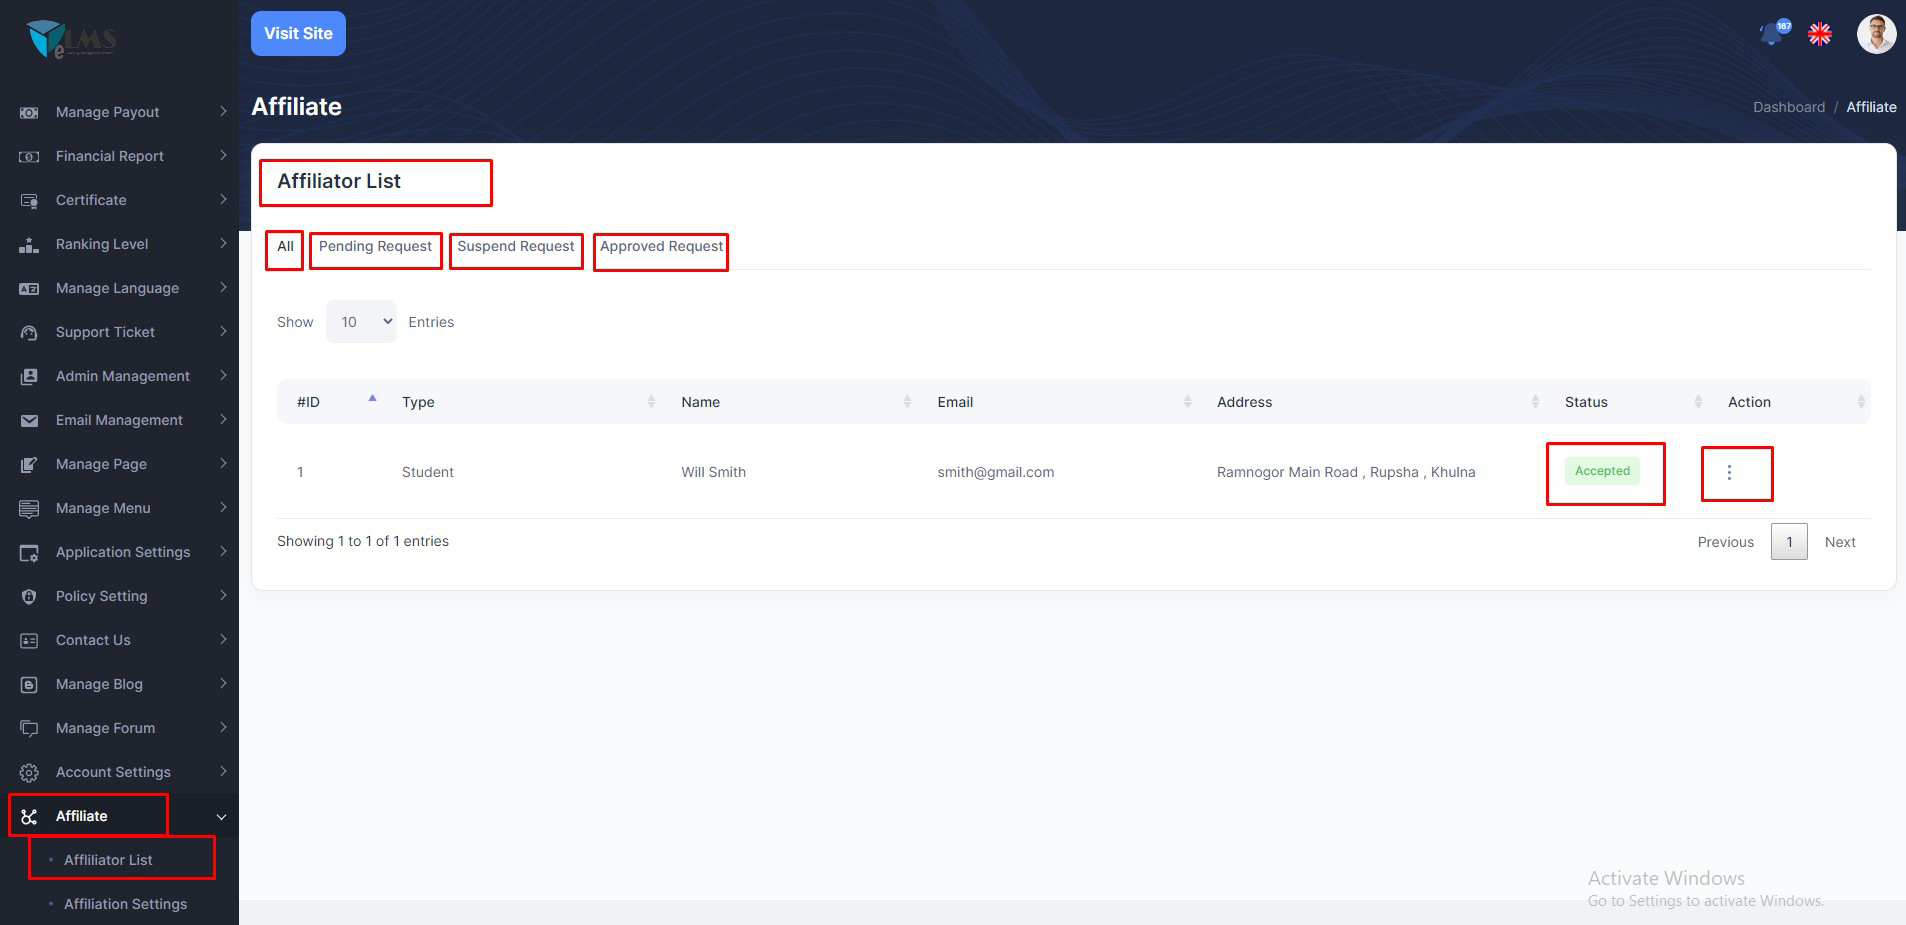
Admin can see the all affiliator list & when any user applies to become an affilator, admin can see all the list. And admin can change apply request status pending, suspend and approved . Location given here.
Manage Affiliate
User Panel Affiliate
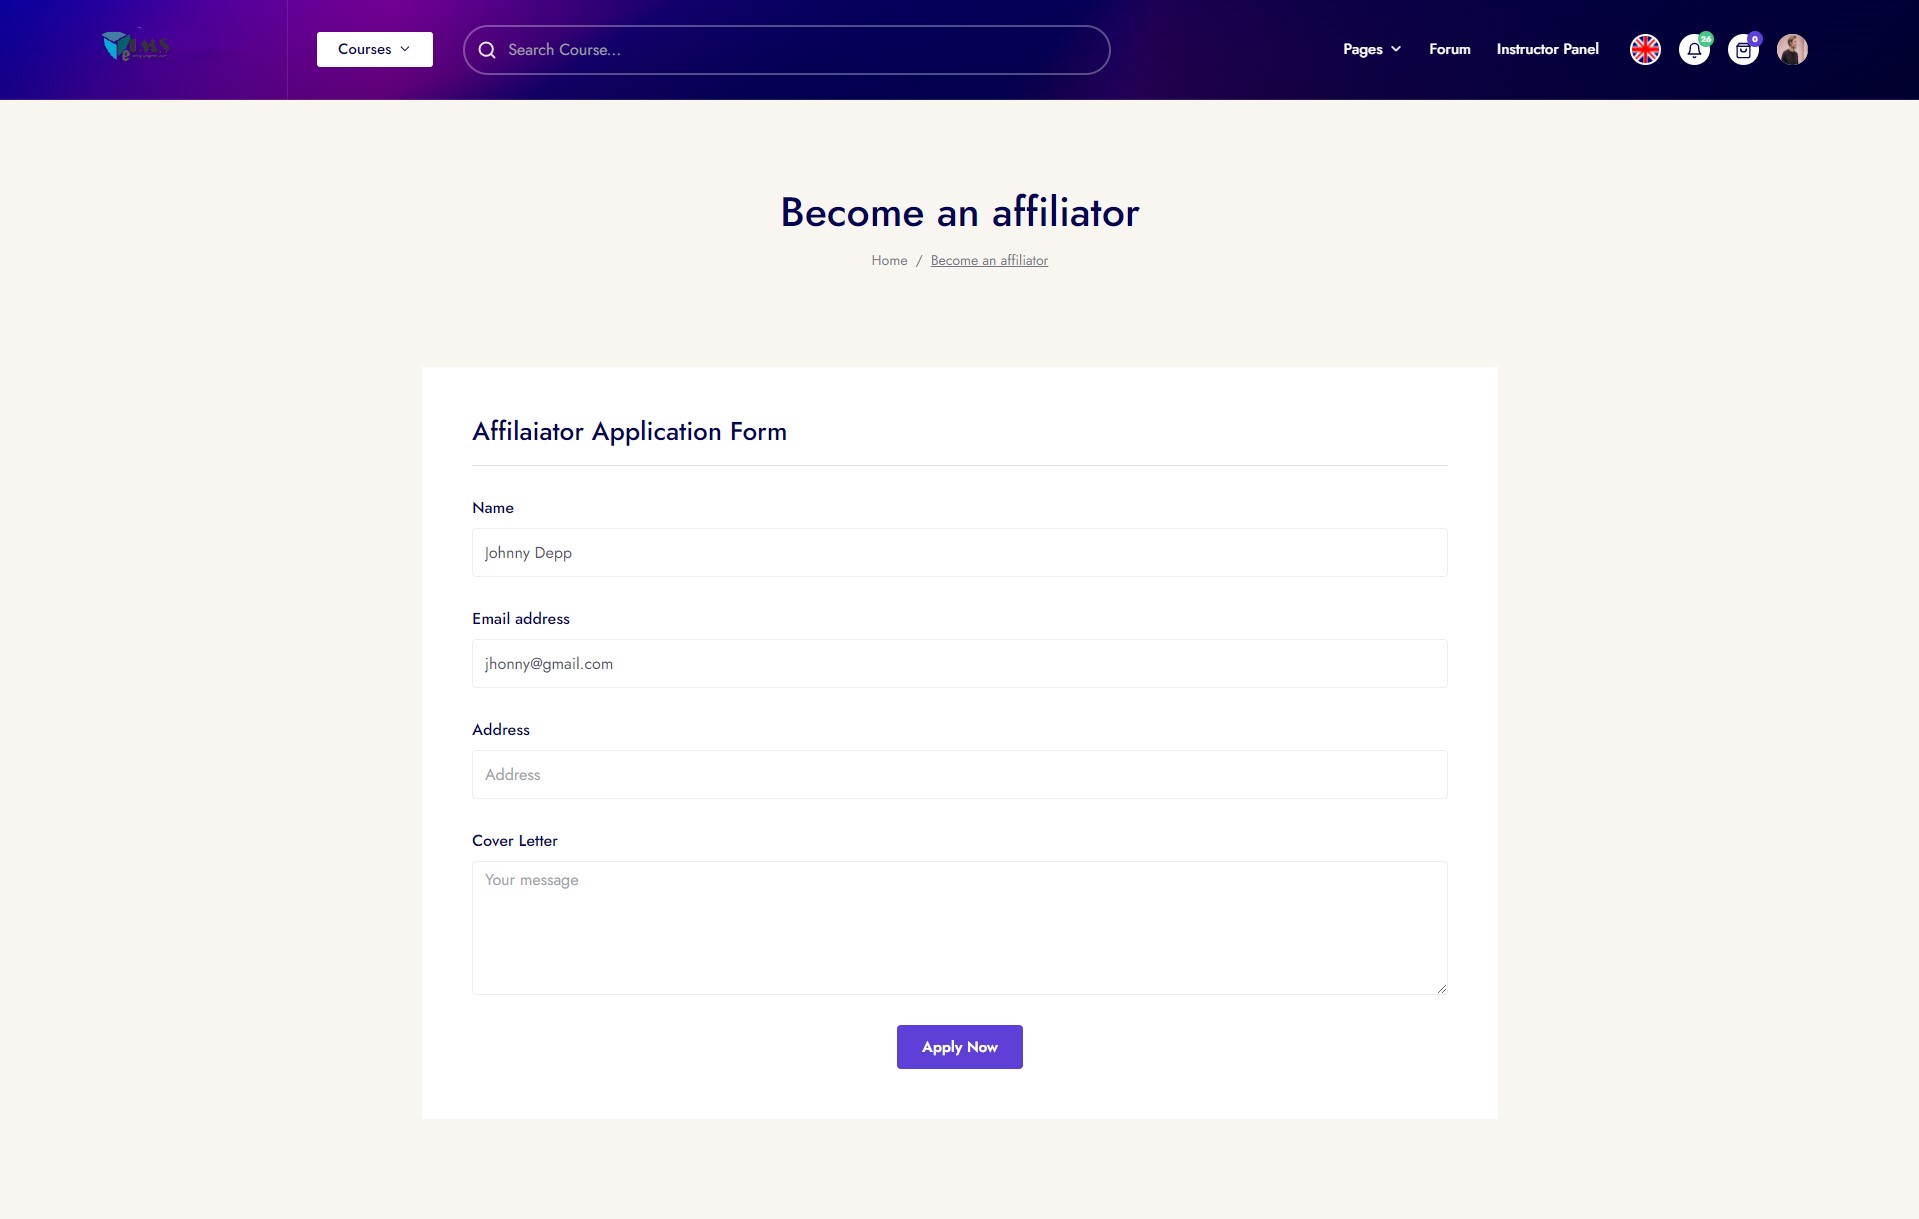
At first any user need apply to become an affiliator. After affilaitor request approve. then an affiliator earn from any course using referral URL. Location given here.
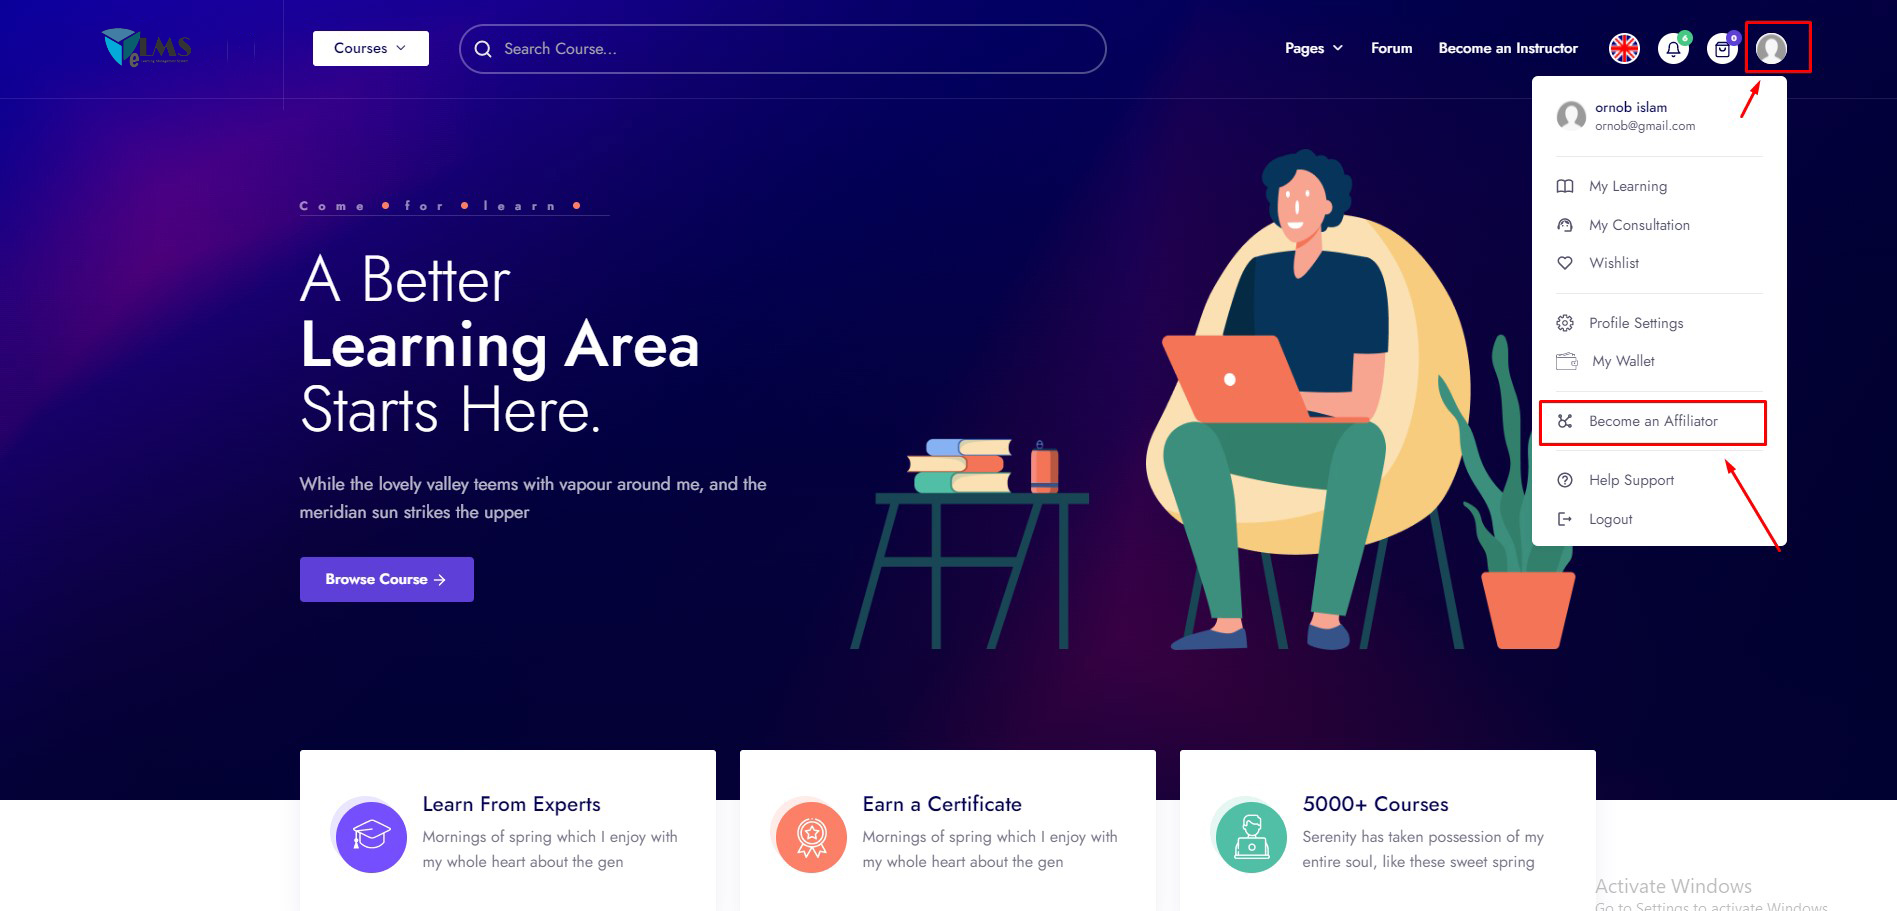
When user click Become an Affiliator . Then user can see this form. and fill up the form and apply button. Picture given here

After applying, then admin can see in admin panel pending affiliator list. After admin approve user affiliator request. User can see affilator panel for any affiliator
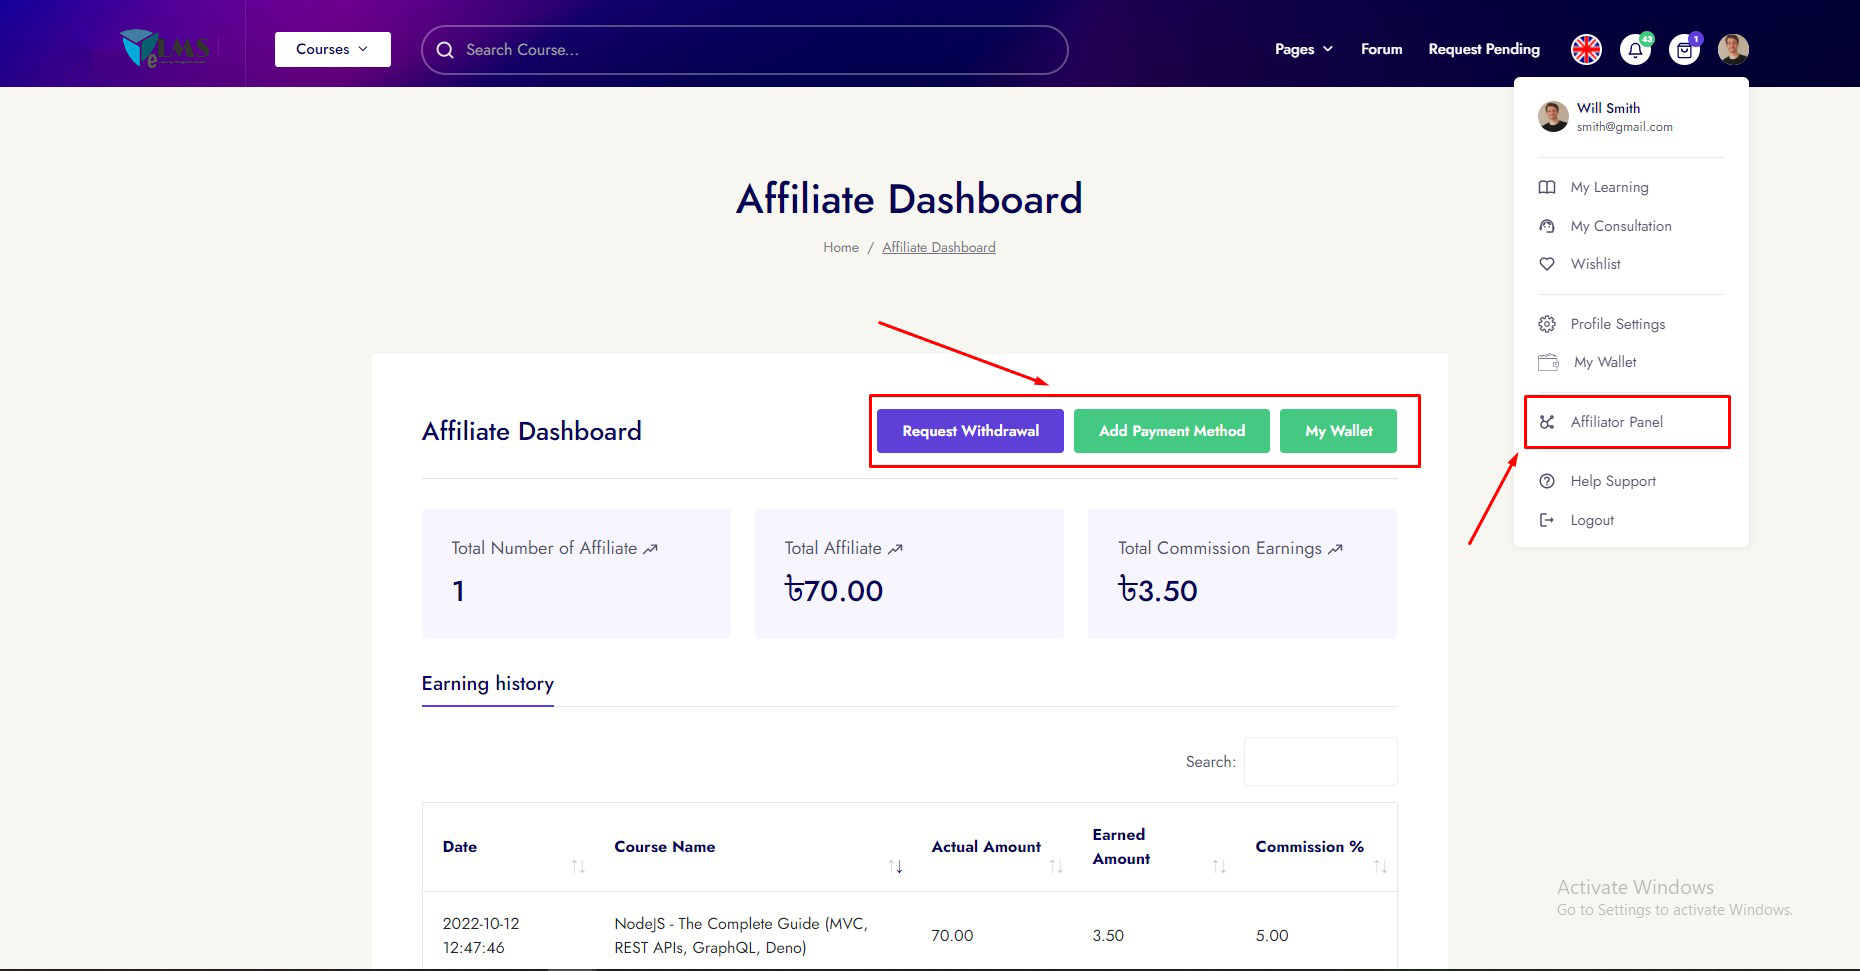
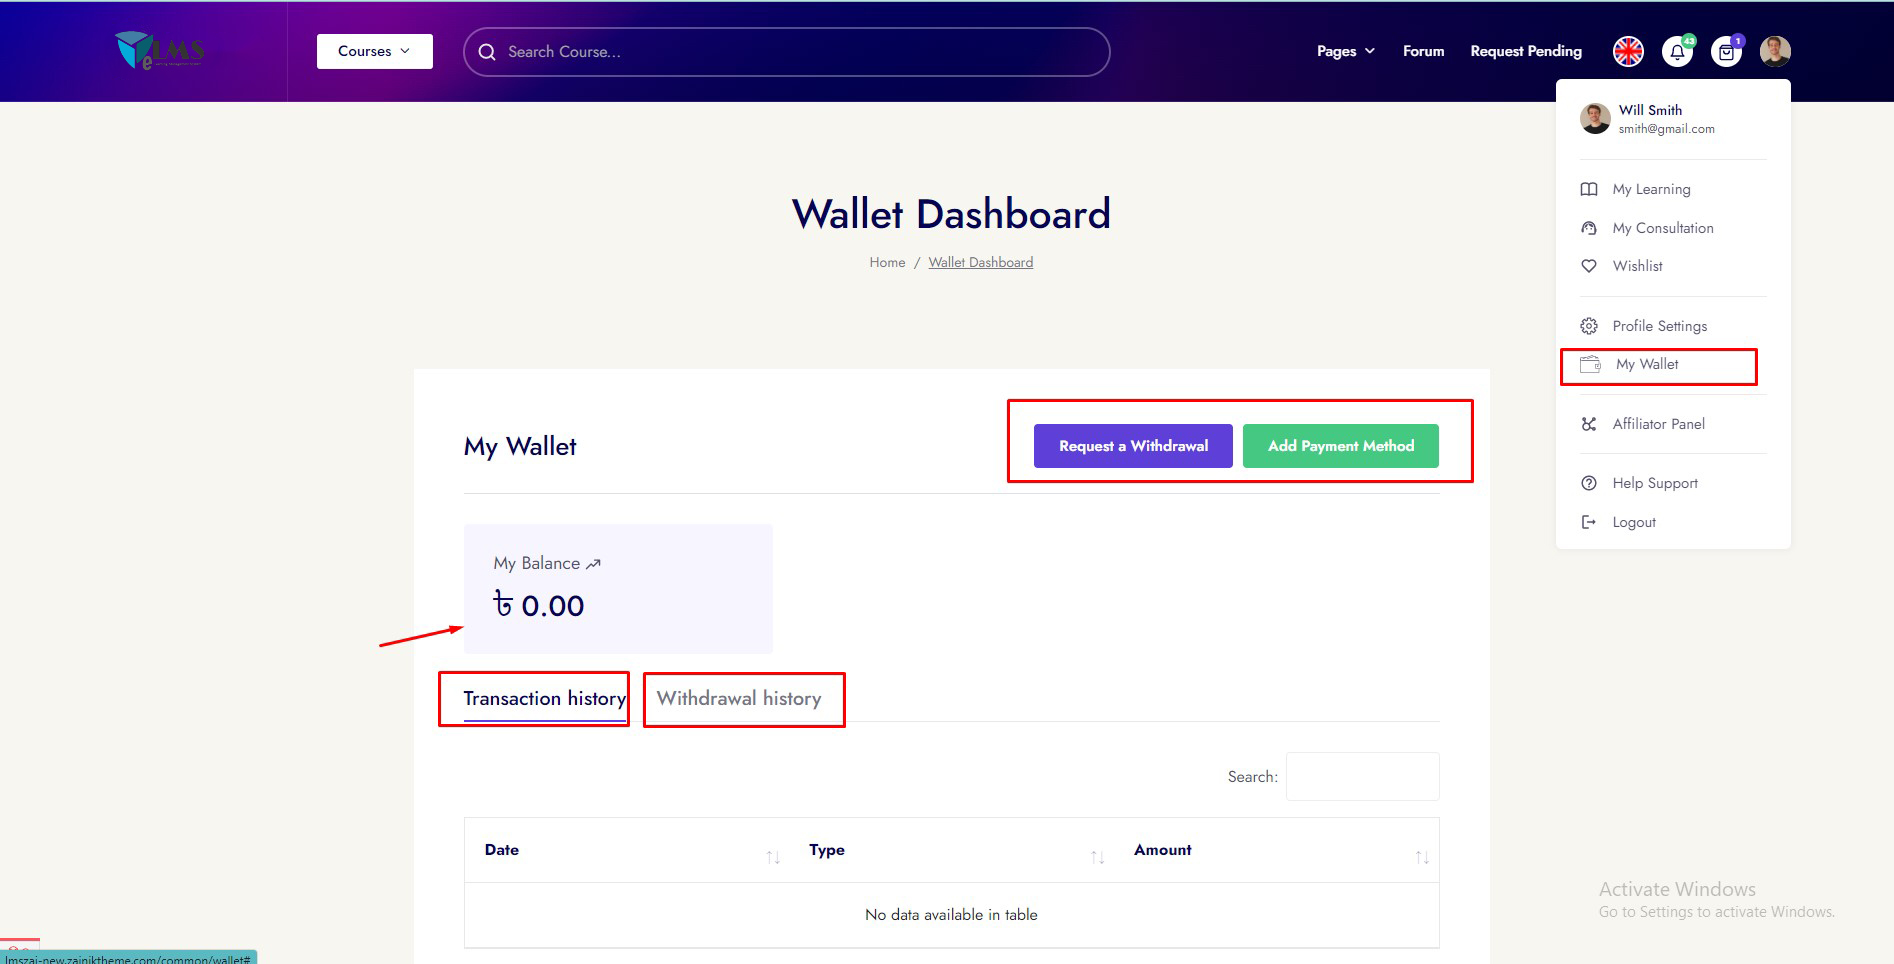
User can withdraw his/her balance using 2 payment method and see the withdrawal request and history my wallet dashboard
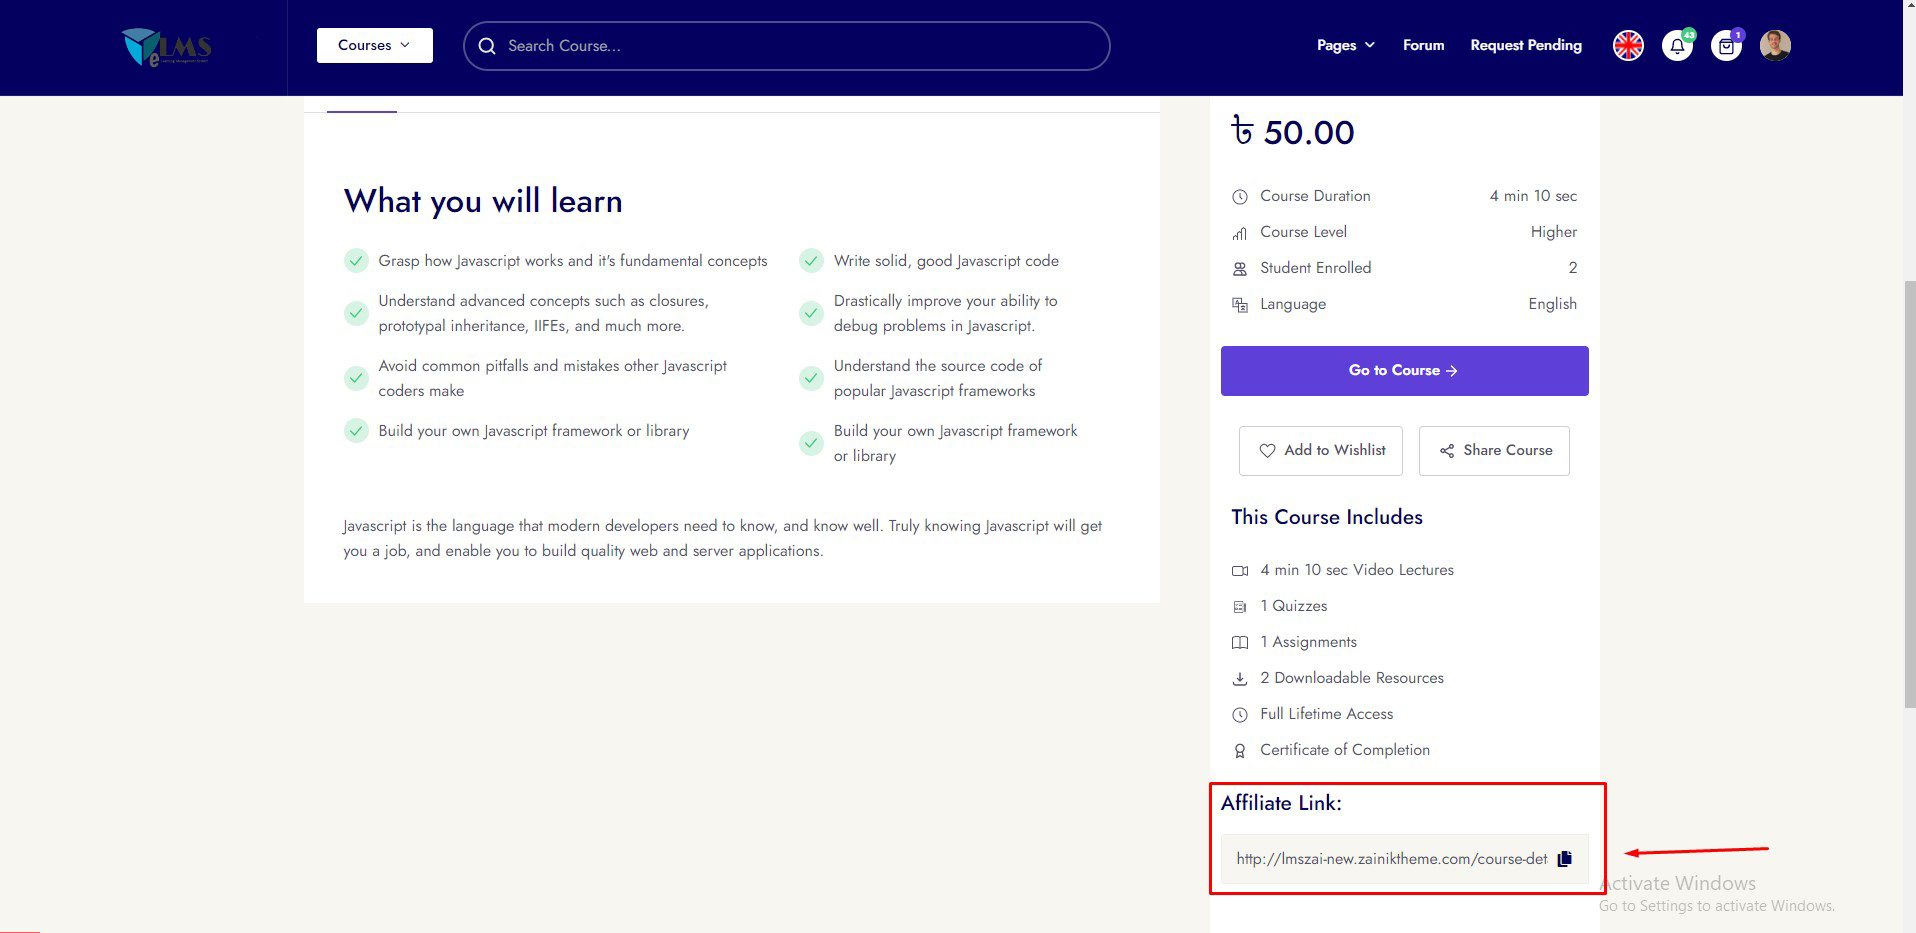
Affiliator can share his/her course affiliator url from course details. Every course has different affiliator url. Location image given here. After browse this url, who is purchase this course. Automatically add money in affiliator wallet.
Installable
Instructor Panel & Organization Panel
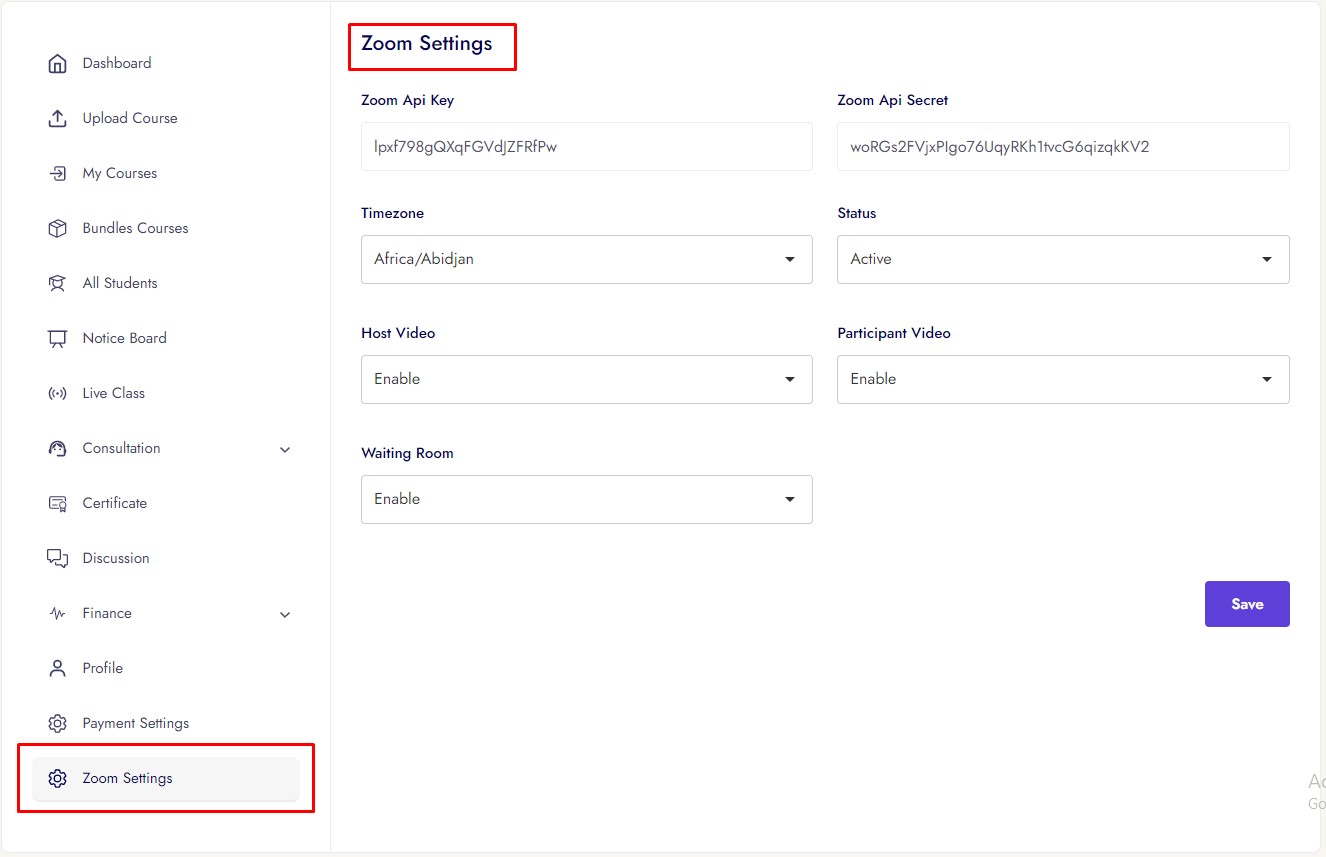
Zoom Live Class
In ELMS, you can add Zoom Live Class to enhance different features after configuring this, the Instructors/Organizations can take live video classes on the zoom live-streaming service.
Every Instructor/Organization need to add different zoom credentials.
To enhance this feature, you have to set many field on your application. Now, you have to follow the easy steps to set up zoom:
Installable
Admin Panel
Google Meet
In ELMS, you can add Google Meet to enhance different features after configuring this, the Instructors/Organizations can take live video classes on the google Meet live-streaming service.
Admin need to add the google calender oAuth credentials
To enhance this feature, you have to set many field on your application. Now, you have to follow the easy steps to set up google Meet:
Installable
Instructor Panel & Organization Panel
Google Meet
In ELMS, you can add Google Meet to enhance different features after configuring this, the Instructors/Organizations can take live video classes on the google Meet live-streaming service.
Every Instructor/Organization need to add different google Meet credentials.
To enhance this feature, you have to set many field on your application. Now, you have to follow the easy steps to set up google Meet:
Installable
Admin Panel
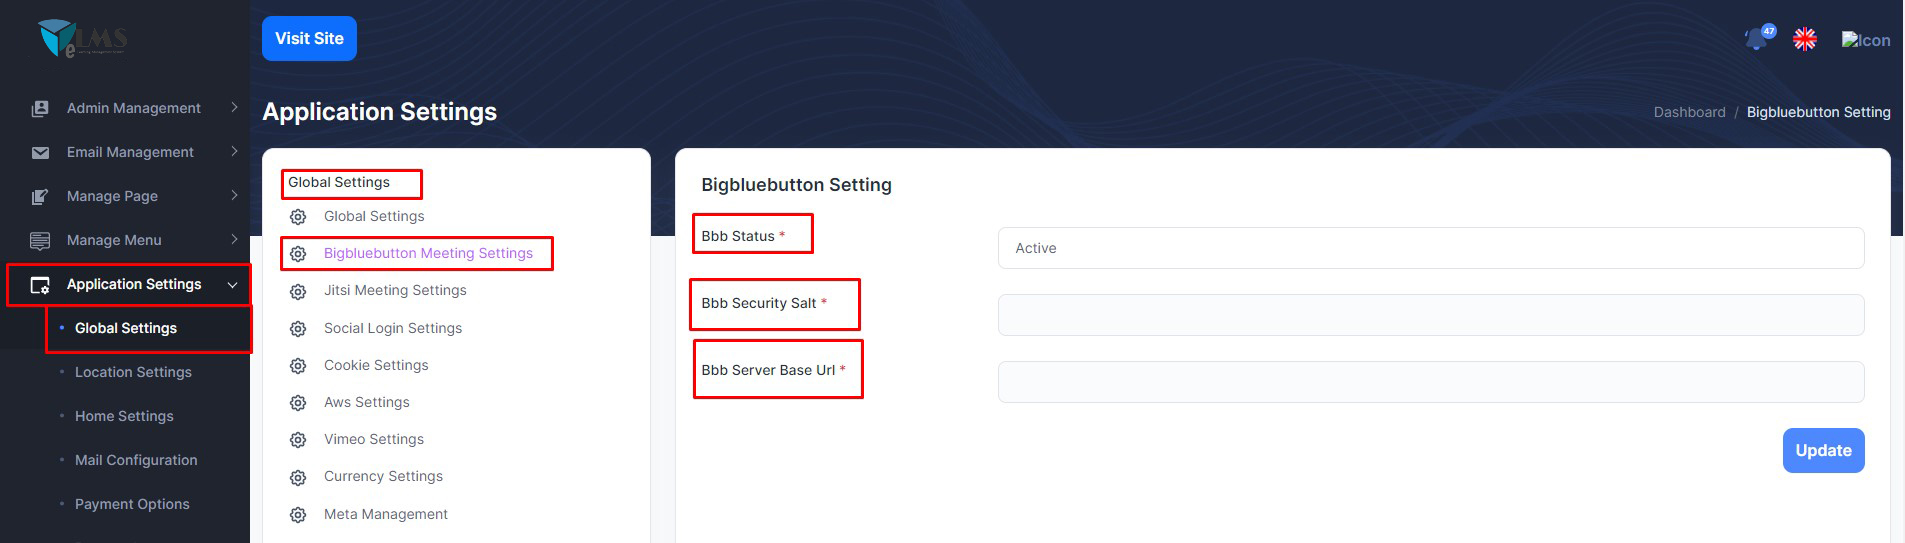
BigBlueButton Live Class
In ELMS, you can add BigBlueButton Live Class to enhance different features after configuring this, the Instructors can take live video classes on the BigBlueButton live-streaming service.
To enhance this feature, you have to set BBB Status, BBB SECURITY SALT, BBB SERVER BASE URL on your application. Now, you have to follow the easy steps to setup BigBlueButton:
Installable
Admin Panel
Geo-location
In ELMS, you can add Geo-location in every user to filter the data in instructors page.
To enhance this feature, you have to set the geolocalize mapbox api from admin
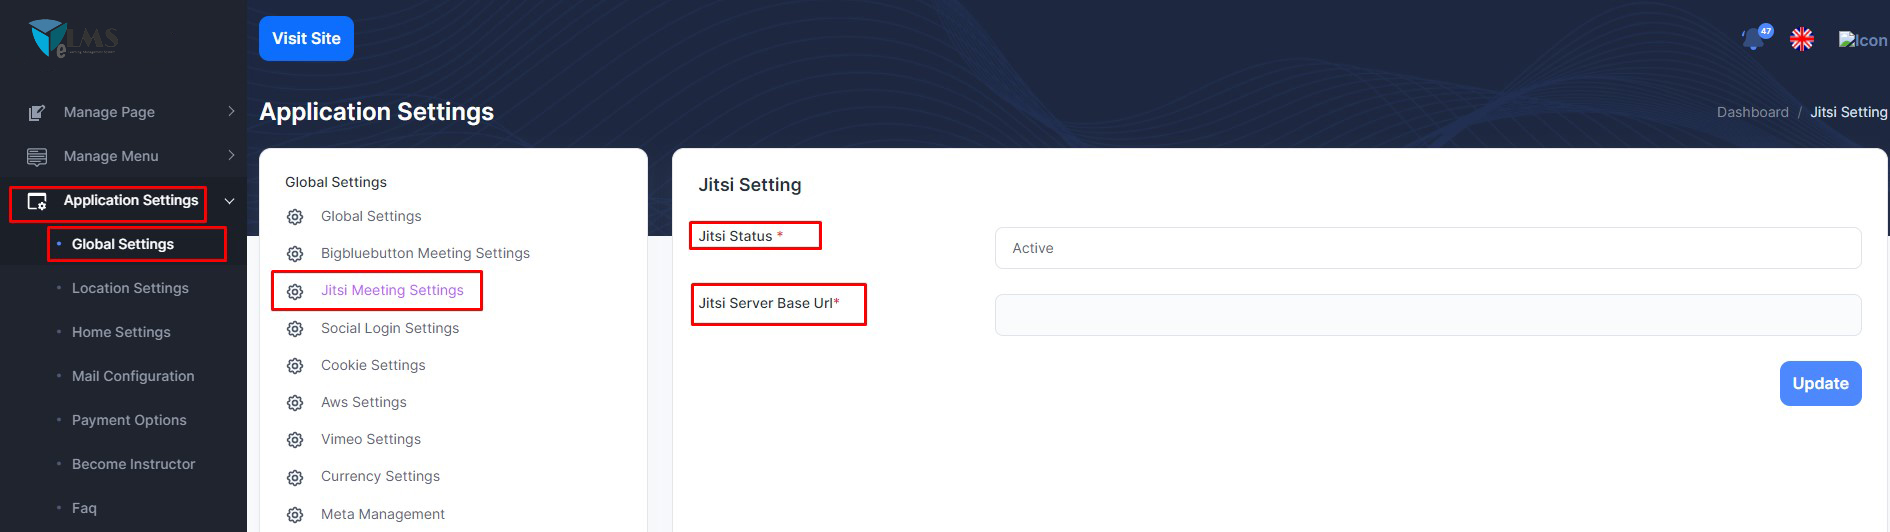
Jitsi Live Class
In ELMS, you can add Jitsi Live Class to enhance different features after configuring this, the Instructors can take live video classes on the Jitsi live-streaming service.
To enhance this feature, you have to set Jitsi Status, Jitsi Server Base URL on your application. Now, you have to follow the easy steps to setup Jitsi:
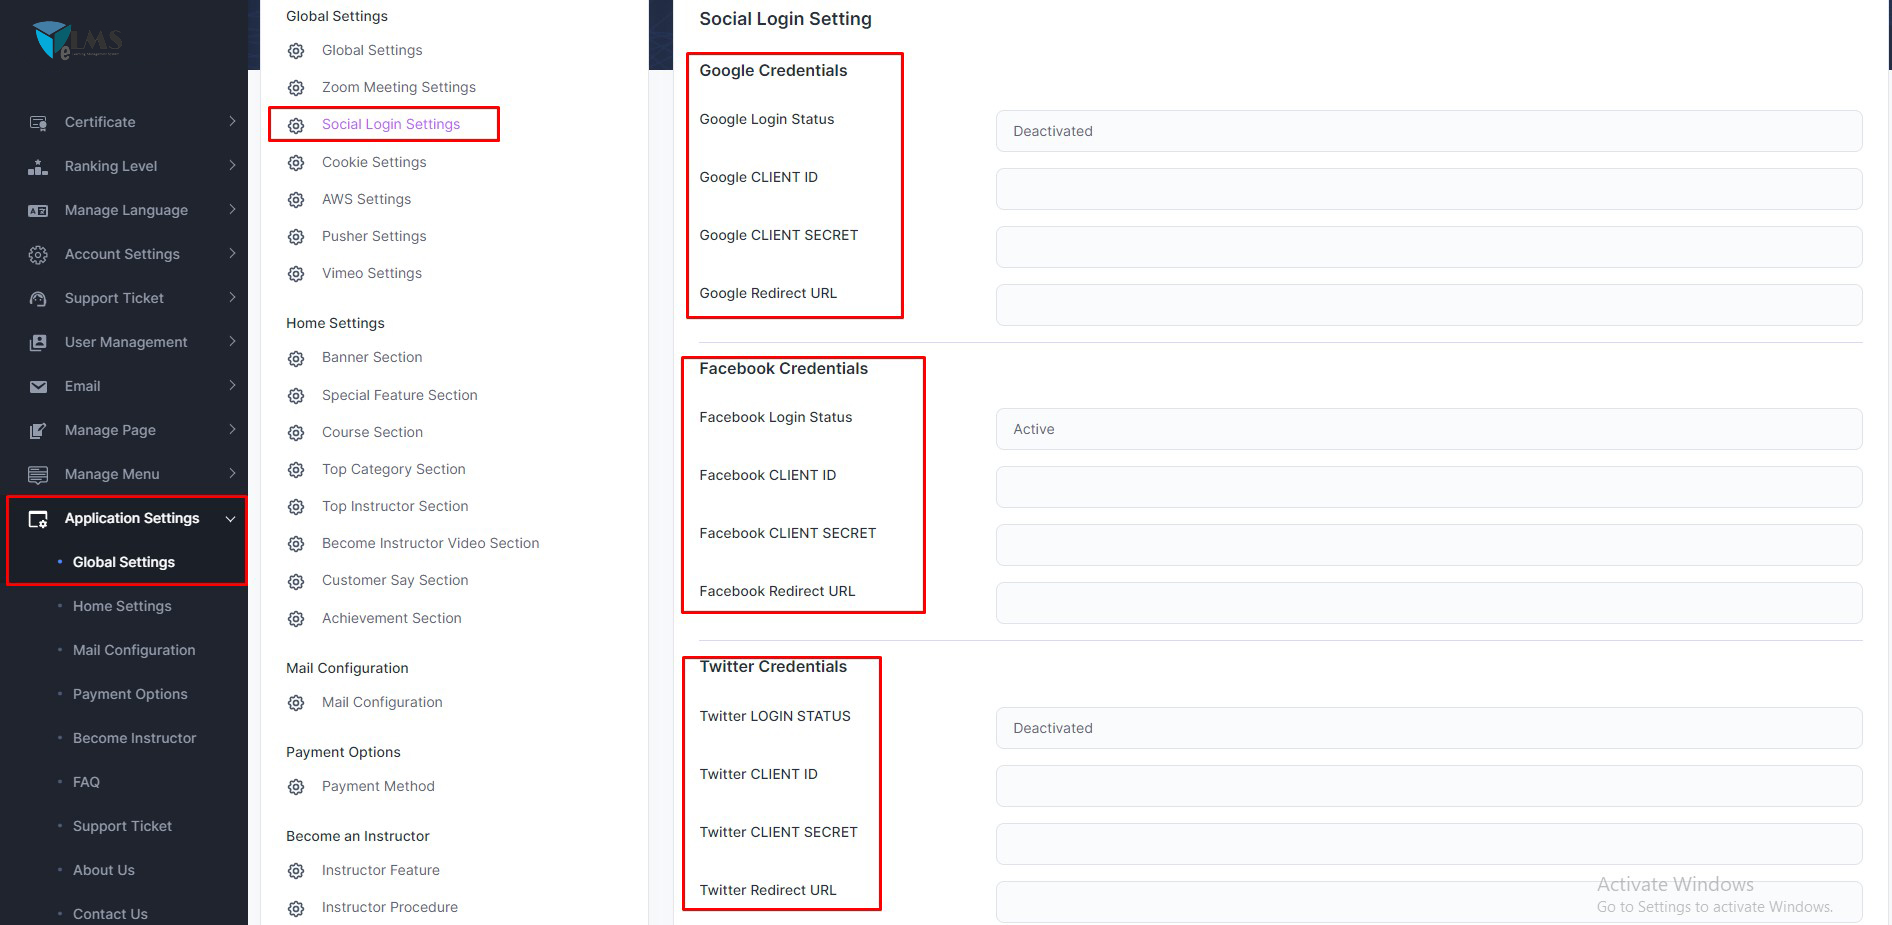
Social Login
In ELMS, you can add social login (google, facebook, twitter) to enhance different features after configuring this, Any user can login with social login.
To enhance this feature, you have to set some credentials on your application. Admin can active/deactivated option for social login. Now, you have to follow the easy steps to setup social login:
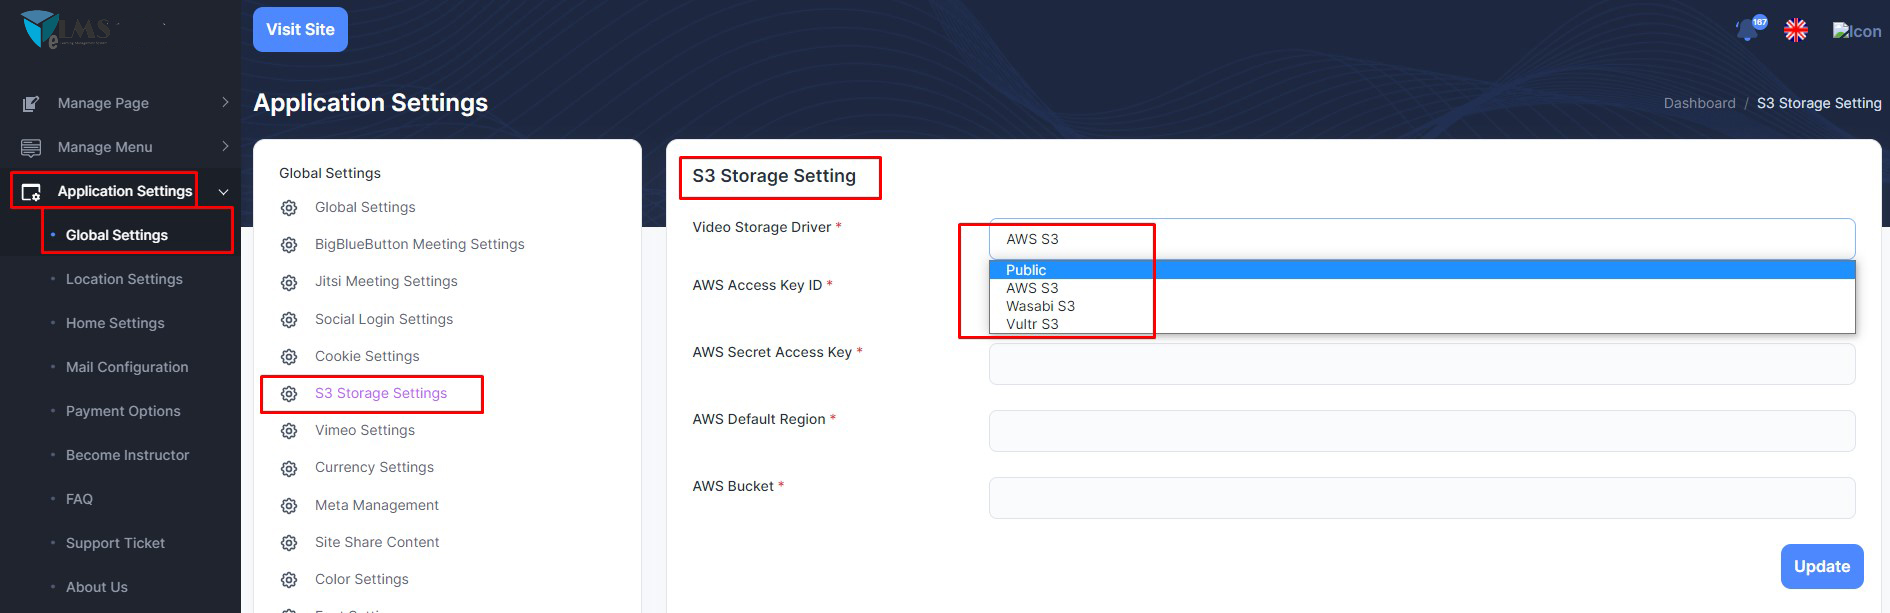
S3 Storage Setting (AWS, Wasabi, Vultr)
In ELMS, you can add s3 server to enhance different features after configuring this. This only work for video and file upload. If you want to video and file upload in s3 server. You need to add credentials
To enhance this feature, you have to set some credentials on your application. Admin can activate/deactivated option for AWS S3/Wasabi S3/Vultr S3. If you deactivate, please select Video Storage Driver = public. Now, you have to follow the easy steps to set up :
Vimeo Settings
In ELMS, you can add vimeo server to enhance different features after configuring this. This only work for video. If you want to video upload in vimeo server. You need to add credentials
To enhance this feature, you have to set some credentials on your application. Admin can activate/deactivated option for vimeo. if you deactivate, please select Vimeo Status = Deactivated Now, you have to follow the easy steps to set up :

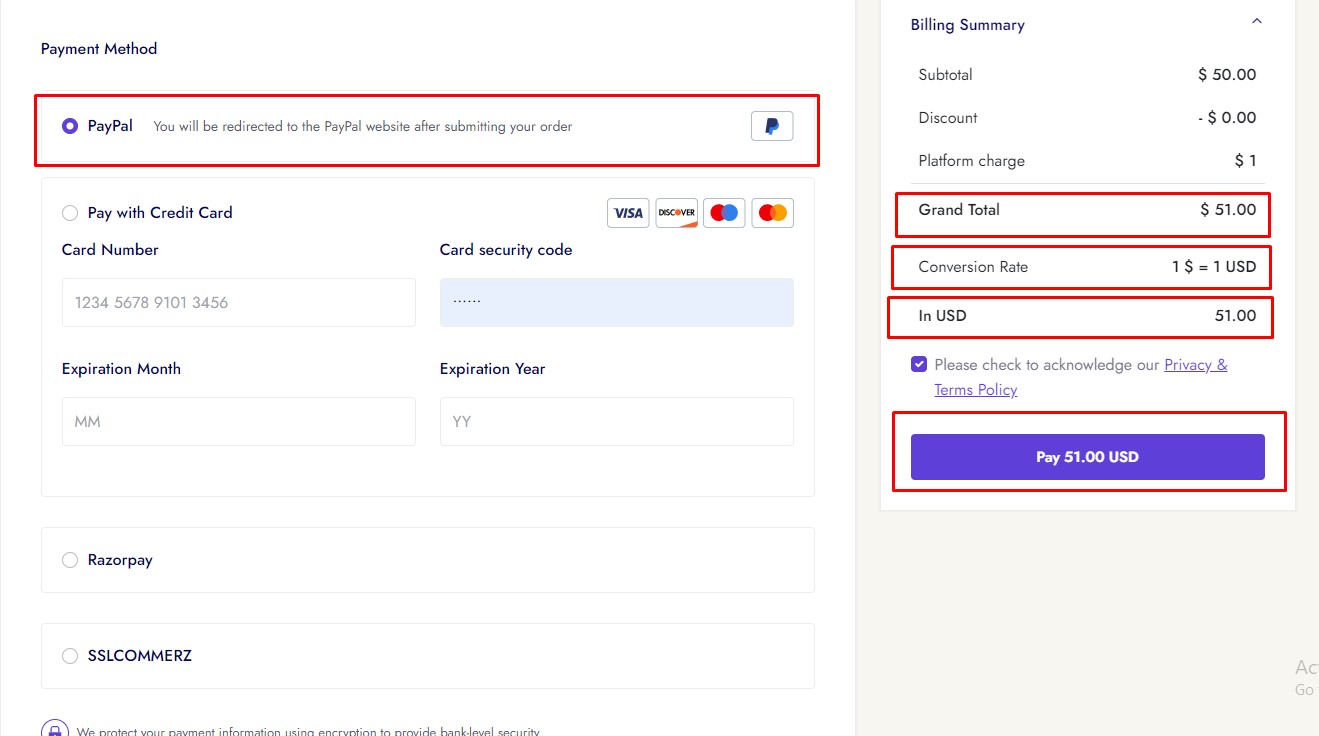
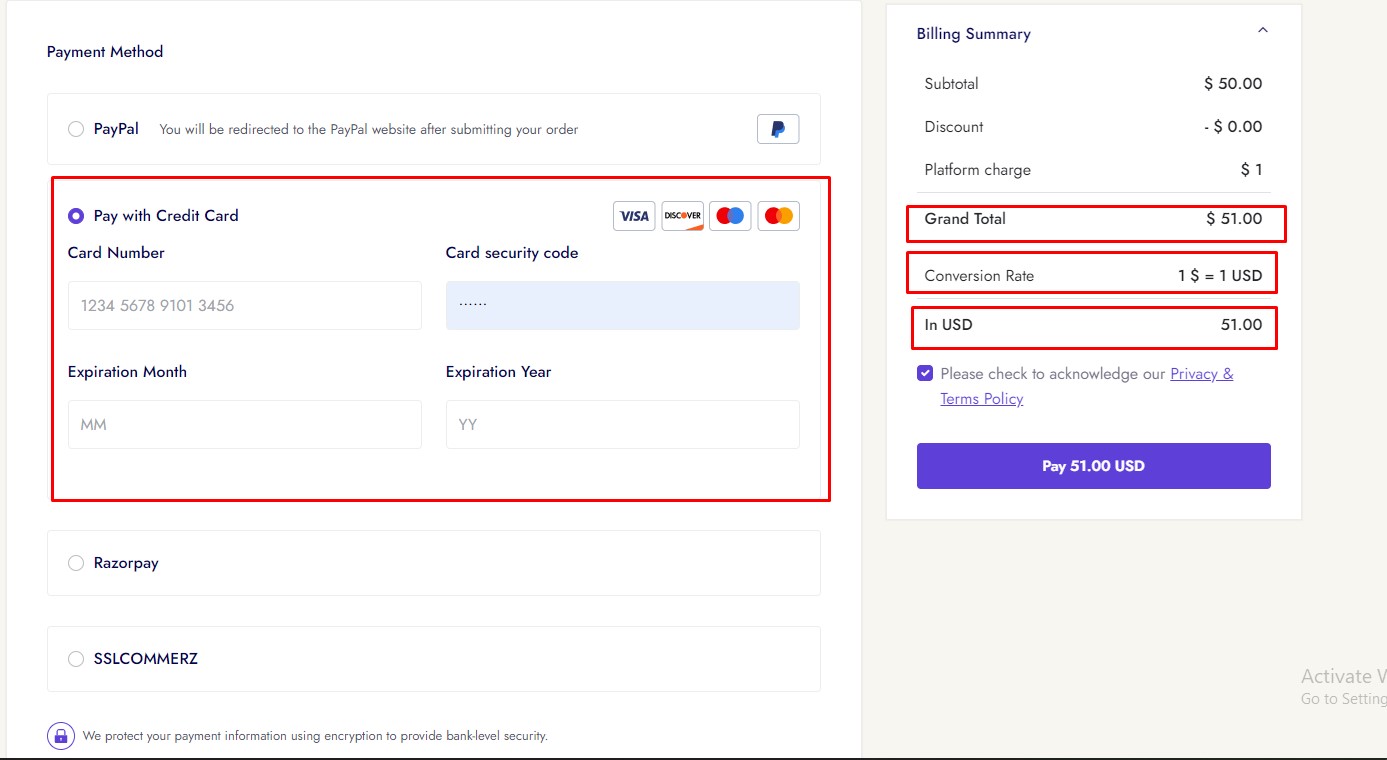
Payment Gateway
In ELMS, you can add payment gateway to enhance different features after configuring this. After purchase any course , student need to payment for paid courses. You need to add credentials for different payment gateway, like Paypal, Stripe, Razorpay, SSLCOMMERZ, Mollie, Instamojo, Paystack
To enhance this feature, you have to set some credentials on your application. Admin can activate/deactivated option for any type of payment gateway. Now, you have to follow the easy steps to set up :


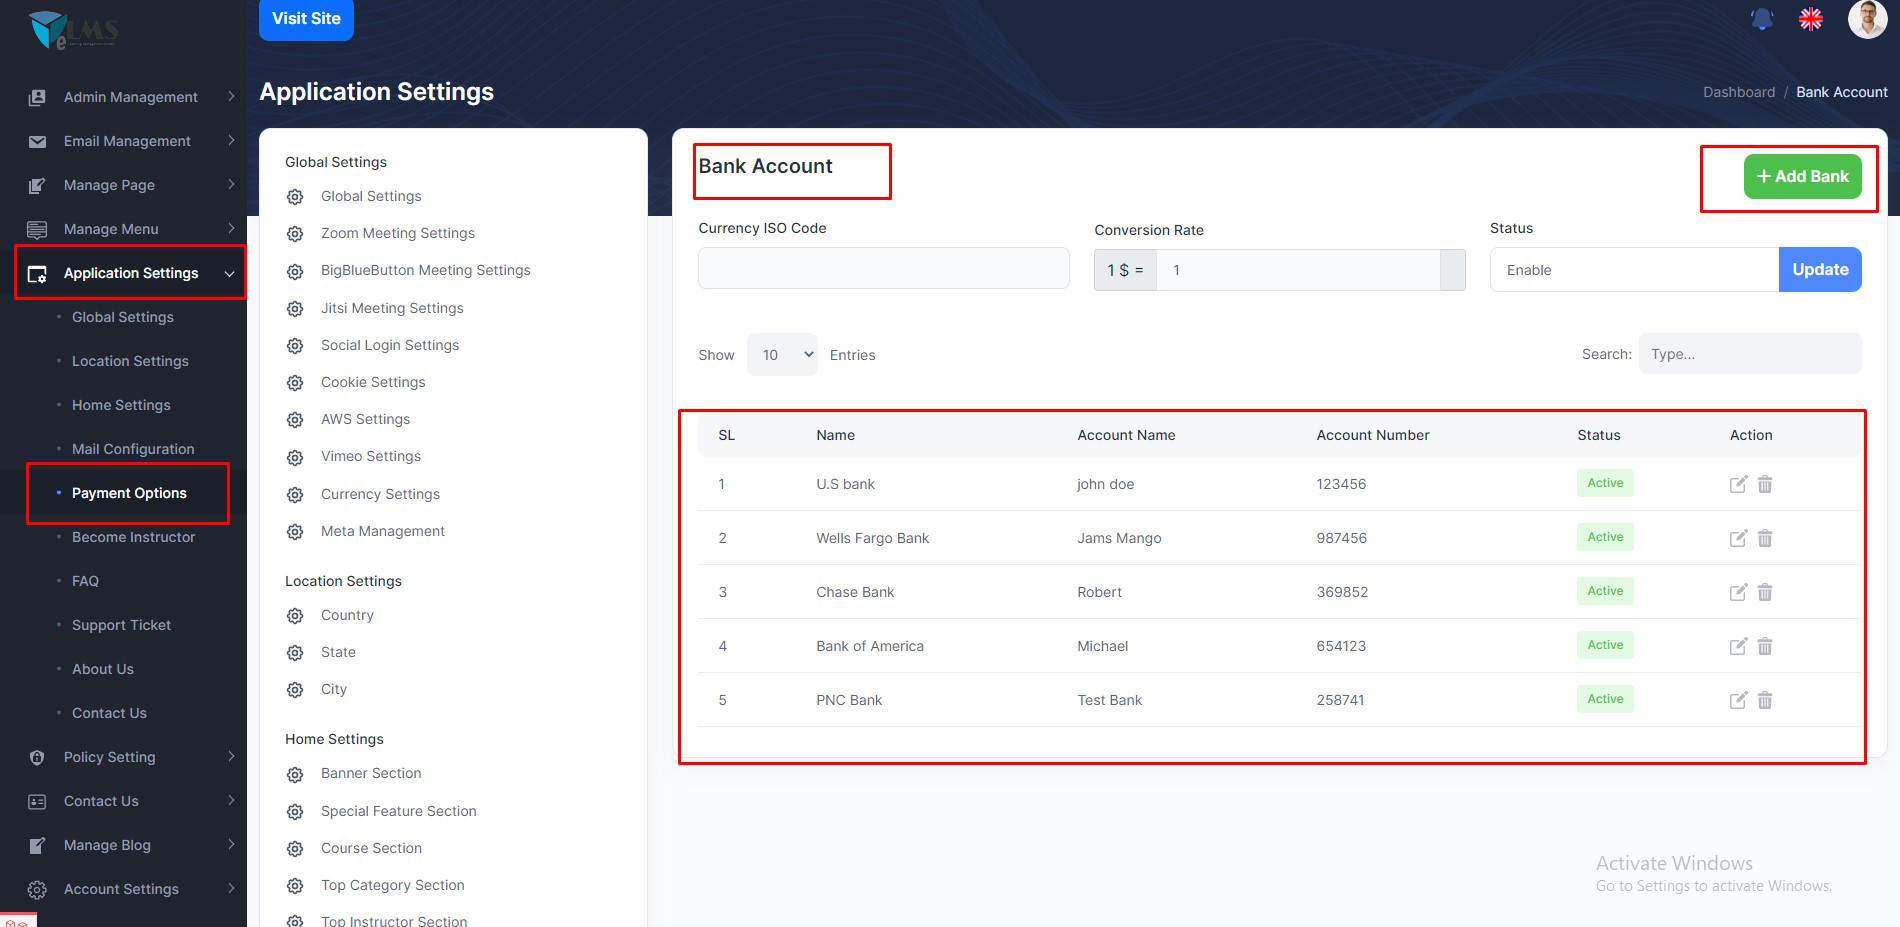
Bank Payment Gateway
In ELMS, you can add payment gateway to enhance different features after configuring this. After purchase any course , student need to payment for paid courses. You need to add credentials for different payment gateway, like Paypal, Stripe, Razorpay, SSLCOMMERZ, Instamojo, Mollie, Paystack
We also add bank payment method. Admin can add multiple bank information and user can purchase through those added banks.
To enhance this feature, you have to set some credentials on your application. Admin can activate/deactivated option for any type of payment gateway. Now, you have to follow the easy steps to set up :
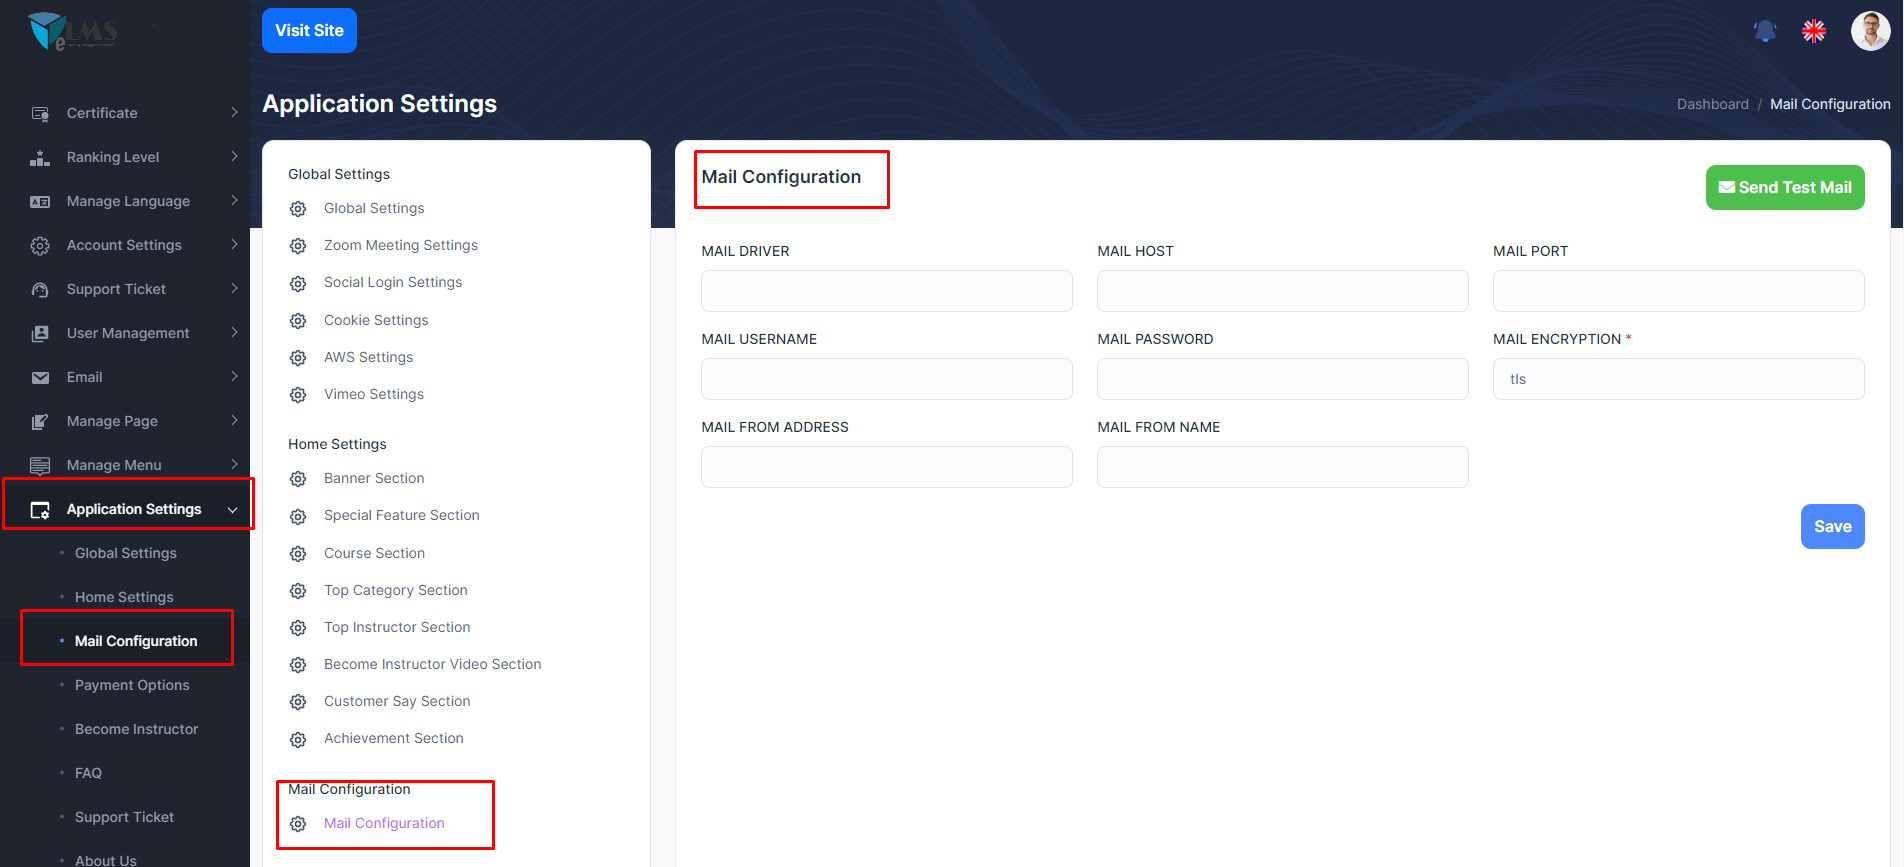
Mail Configuration
In ELMS, you can add mail configuration to enhance different features after configuring this. Many times need to mail student or instructor.
To enhance this feature, you have to set some credentials on your application. Now, you have to follow the easy steps to set up :